How Do I Create A Microsoft Word Database Step By Step
Creating a Microsoft Word database is easier than you think. You can use Word’s built-in mail merge feature, Excel as a data source, and ready-made templates to organize contacts, labels, and more. This step-by-step guide walks you through the entire process from setup to printing.
Have you ever wondered how do I create a Microsoft Word database? Maybe you need to print address labels for a wedding. Or perhaps you run a small business and want to send form letters to your customers. Whatever your reason, Word has tools that make it surprisingly easy.
A Word database might sound complicated. But it really just means using Word together with a list of data to create personalized documents. You do not need expensive software. You just need a few minutes and this guide. Let us walk through it together.
Key Takeaways
- Word databases use mail merge: This powerful tool lets you combine a Word document with a data source to create personalized letters, labels, and envelopes.
- Excel works as your data source: You can link an Excel spreadsheet to Word for easy data management.
- Templates save time: Word offers free database templates you can customize right away.
- It’s great for small businesses: A Word database helps manage mailing lists, contact lists, and form letters without extra software.
- Common mistakes are avoidable: Skipping data cleanup and forgetting to match fields cause most problems.
- You don’t need to be tech-savvy: The process is designed for everyday users with simple step-by-step instructions.
📑 Table of Contents
- What Is A Microsoft Word Database?
- How Do I Create A Microsoft Word Database Step By Step
- Using Word Database Templates For Quick Setup
- Setting Up Your Data Source In Excel
- Common Uses For A Word Database
- Expert Tips For A Better Word Database
- Common Mistakes To Avoid When Creating A Word Database
- Word Database Versus Other Database Tools
- How To Keep Your Word Database Organized
- Conclusion
What Is A Microsoft Word Database?
A Microsoft Word database is a way to store and use information inside Word. It combines a document template with a list of data. Think of it like a digital filing system that can also print things out.
Most people use Word databases for three main tasks:
- Mailing labels: Print labels for envelopes or packages.
- Form letters: Send personalized letters to many people at once.
- Address lists: Keep your contacts organized in one place.
The secret behind all of this is a feature called mail merge. Mail merge connects your Word document to a data source. Then it fills in the blanks for each person on your list. It is like a magic trick that saves you hours of copying and pasting.
How Mail Merge Works
Here is how mail merge works in simple terms. First, you create a document in Word. This could be a letter, a label, or an envelope. Second, you connect it to a list of names and addresses. Third, Word pulls each row of data and plugs it into your document. Fourth, you get a finished result for every person on your list.
That is it. No coding. No fancy skills. Just a few clicks and your Word database comes to life.
How Do I Create A Microsoft Word Database Step By Step
Now let us get into the real action. This section breaks down the entire process of creating a Word database from scratch. Follow each step carefully and you will have a working database in no time.
Step 1: Open Word And Choose Your Document Type
Start by opening Microsoft Word on your computer. Once Word is open, look at the left side of the screen. You will see a list of options. Click on “Mailings” at the top menu bar. This is where all the database magic happens.
Next, decide what kind of document you want. Do you want labels? A form letter? An envelope? Click on “Start Mail Merge” in the Mailings tab. Then choose your document type from the dropdown menu. Select “Labels,” “Letters,” or “Envelopes” depending on your needs.
This first step sets the foundation for your entire Word database project. Take your time and pick the right option.
Step 2: Set Up Your Data Source
Your data source is where all your information lives. You have a few choices here. You can use an Excel spreadsheet, a Word table, or an Access database. Most people find Excel the easiest option.
To use Excel as your data source, open a new Excel file. Create column headers in the first row. For example, type “First Name,” “Last Name,” “Address,” “City,” “State,” and “Zip Code.” Then fill in the data below each column.
Save this Excel file on your computer. You will need to link it to Word in the next step. Keep the file handy because you will be connecting it to your Word document soon.
Step 3: Connect Your Data Source To Word
Go back to your Word document. Click on “Select Recipients” in the Mailings tab. A dropdown menu will appear. Choose “Use an Existing List.” A file browser window will pop up.
Find the Excel file you saved earlier. Click on it and then click “Open.” A dialog box will ask you which sheet contains your data. Select the correct sheet and click “OK.”
Now your Word document is connected to your data. You should see a “Mail Merge Recipients” dialog box. This shows you all the rows in your Excel file. You can check or uncheck rows to include or exclude specific entries.
This is a key moment in your Word database creation journey. If your data looks right here, everything else will fall into place.
Step 4: Insert Merge Fields Into Your Document
Now comes the fun part. You need to add merge fields to your document. Merge fields are placeholders that Word fills in with data from your list.
Place your cursor where you want the first name to appear. Click on “Insert Merge Field” in the Mailings tab. Select “First Name” from the list. Word will add a field code that looks like «First Name».
Repeat this for each piece of information you want to include. Add «Last Name», «Address», «City», and so on. Arrange them on the page in a way that looks clean and organized.
Here is a quick tip. Use the “Address Block” button for a full address. Word will automatically format it correctly. This saves you a lot of time and keeps things looking neat.
Step 5: Preview Your Results
Before you print anything, preview your work. Click on “Preview Results” in the Mailings tab. Word will show you what the first document looks like. Use the arrows at the bottom to scroll through each entry.
Check for any errors. Are names spelled correctly? Is the address formatting right? If something looks off, go back and fix it in your Excel file. Then refresh the preview in Word.
Previewing is one of the most important steps. It saves you from printing dozens of wrong documents. Trust me, you do not want to waste paper on a mistake.
Step 6: Finish And Print
Once everything looks perfect, it is time to finish. Click on “Finish & Merge” in the Mailings tab. You have three options here:
- Print Documents: Sends everything straight to your printer.
- Edit Individual Documents: Lets you review each one before printing.
- Send Email Messages: If you want to email them instead.
Choose “Edit Individual Documents” if you want to double-check everything. Word will create a new document with all the merged results. Scroll through and make sure each one is correct.
When you are satisfied, go ahead and print. Your Microsoft Word database is now complete. Congratulations, you did it!
Using Word Database Templates For Quick Setup
If you do not want to start from scratch, Word has built-in templates. These pre-designed templates make the process even faster. They are perfect for people who want quick results.
How To Find Word Database Templates
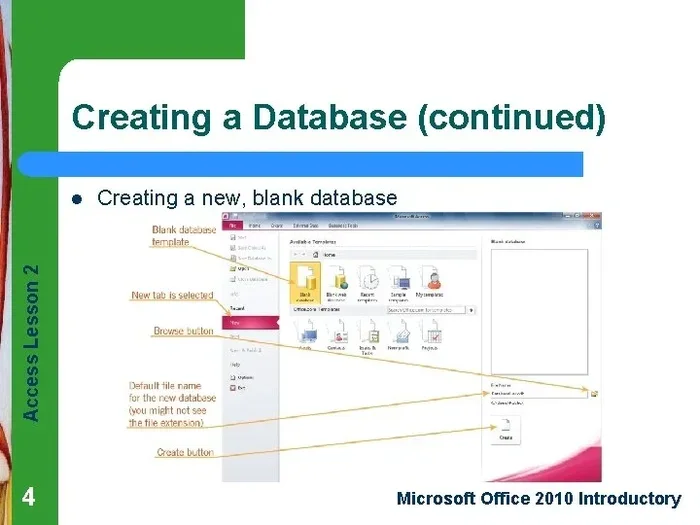
Open Word and click on “File.” Then click “New.” In the search bar, type “database” or “mail merge.” Word will show you a variety of templates. You can browse through them and pick one that fits your needs.
Popular template types include:
- Contact list templates: Great for organizing personal or business contacts.
- Label templates: Perfect for Avery labels or shipping labels.
- Invoice templates: Useful for small businesses that track clients.
- Envelope templates: Ready-to-print envelope formats.
Once you pick a template, click “Create.” Word will set up everything for you. All you need to do is add your data and customize the design. Templates are a fantastic shortcut for anyone learning how do I create a Microsoft Word database.
Customizing Your Template
After you open a template, you can change colors, fonts, and layouts. Click on any element to edit it. Add your company logo if you have one. Adjust the spacing so everything fits perfectly.
Remember to save your customized template. Give it a clear name like “Business Labels Template” so you can find it again later. This way, you never have to start from zero next time.
Setting Up Your Data Source In Excel
A good database depends on clean data. And Excel is the best tool for organizing that data before it goes into Word. Let us look at how to set up your Excel file properly.
Creating A Clean Excel Data Sheet
Open a new Excel workbook. In row 1, create your column headers. These headers must match the merge fields you will use in Word. Here is a standard setup:
- First Name
- Last Name
- Phone
- Street Address
- City
- State
- Zip Code
Keep each column focused on one type of information. Do not mix first and last names into one column. That causes problems during mail merge. Clean columns mean clean results.
Make sure there are no blank rows in the middle of your data. Blank rows can confuse Word and cause skipped entries. Go through your list and fill in any gaps or remove empty rows entirely.
Saving Your Excel File Correctly
Save your Excel file as an .xlsx file. This is the standard format that Word works with best. Avoid saving it as a .csv file unless you have a specific reason. While .csv files work, .xlsx files preserve formatting and reduce errors.
Also, make sure your file is not open in Excel when you try to connect it to Word. Close Excel first, then link the file from Word. This prevents connection issues and keeps your data safe.
Common Uses For A Word Database
Word databases are incredibly versatile. People use them for all kinds of tasks. Here are some of the most common ways to put your database to work.
Mailing Labels And Envelopes
This is the number one use for a Word database. Whether you are sending holiday cards, product samples, or business correspondence, mail merge handles it all. You just need a sheet of labels or envelopes and your connected data.
Word supports most major label brands, including Avery. When you pick a label template, it automatically sets the correct dimensions. You do not need to measure anything manually.
Form Letters And Invitations
Need to send the same letter to 100 people but with different names and addresses? A Word database makes this effortless. Write your letter once, insert merge fields, and let Word do the rest.
This is also great for wedding invitations, party invitations, and event announcements. Each guest gets a personalized version without you having to type each one separately.
Contact Lists For Small Businesses
Small business owners can use a Word database to maintain customer contact lists. Keep track of client names, phone numbers, and purchase history. Print the list whenever you need a physical copy for meetings or reference.
While Word is not a full contact management system, it works well for basic needs. If your business grows, you may want to upgrade to a dedicated CRM. But for starting out, a Word database is more than enough.
Expert Tips For A Better Word Database
Here are some insider tips that will make your experience smoother. These come from years of helping people work with Word databases.
- Always back up your data. Save your Excel file in at least two places. Use cloud storage or an external drive. Losing your data means starting over.
- Use consistent formatting. Keep all dates, phone numbers, and addresses in the same format. This prevents merge errors and keeps your output professional.
- Test with a small list first. Before merging your entire database, test with just five entries. This lets you catch mistakes early without wasting paper or labels.
- Update your data regularly. A database is only useful if the information is current. Set a reminder to review and update your list every few months.
- Use the “Match Fields” feature. If Word does not recognize a column, use the “Match Fields” button to manually link it. This solves most connection problems.
Common Mistakes To Avoid When Creating A Word Database
Even experienced users make mistakes. Here are the most common ones and how to avoid them.
Skipping Data Cleanup
The biggest mistake is importing messy data into Word. If your Excel file has typos, extra spaces, or missing information, your final documents will reflect those errors. Always clean up your data before connecting it to Word.
Go through each column and fix any inconsistencies. Remove duplicate entries. Make sure every row has complete information. A few minutes of cleanup now saves hours of rework later.
Forgetting To Update The Data Source
If you add new entries to your Excel file after connecting it to Word, those entries will not show up automatically. You need to go back to Word and update the data source. Click “Select Recipients” and choose “Use an Existing List” again to refresh the connection.
This is an easy step to forget. Make it a habit to update your data source every time you make changes to your Excel file.
Using The Wrong Document Type
Choosing the wrong document type at the start can cause headaches. If you pick “Letters” but actually need labels, you will have to redo the setup. Think carefully about what you need before you begin.
If you are unsure, start with a test document. Create a simple letter first, merge a few entries, and see how it looks. Then adjust your approach if needed.
Word Database Versus Other Database Tools
You might wonder why use Word instead of a real database tool like Excel alone or Access. Here is a quick comparison.
| Feature | Word Database | Excel Alone | Access |
|---|---|---|---|
| Ease of Use | Very Easy | Easy | Moderate to Hard |
| Printing Labels | Excellent | Limited | Poor |
| Mail Merge | Built-in | Not Available | Not Available |
| Data Storage | Basic | Good | Excellent |
| Cost | Included with Word | Included with Excel | Separate Purchase |
| Best For | Printing & Merging | Data Analysis | Large Scale Data |
As you can see, a Word database shines when your goal is to print documents. If you need to analyze data or manage thousands of records, Excel or Access may be better. But for everyday tasks like labels, letters, and envelopes, Word is the clear winner.
How To Keep Your Word Database Organized
Once your database is up and running, you want to keep it organized. A messy database leads to errors and frustration. Here are some simple habits that help.
- Name your files clearly. Use names like “Customer Database 2024” instead of “Document1.”
- Sort your data regularly. In Excel, sort your entries alphabetically or by date. This makes finding specific records much easier.
- Remove old entries. If a contact has not been active in over a year, consider archiving or deleting them.
- Use folders. Keep your Word and Excel files in a dedicated folder on your computer. This keeps everything in one place.
Organization is the secret ingredient to a database that actually works for you. Spend five minutes organizing your files each week and you will thank yourself later.
Conclusion
Creating a Microsoft Word database is a skill that saves you time and effort. Whether you are printing labels for a craft project or sending form letters for your business, Word has the tools you need. The mail merge feature is the heart of every Word database, and it is surprisingly simple to use.
Start with a clean data source in Excel. Connect it to your Word document. Add merge fields. Preview your results. And print. That is the entire process. You do not need to be a tech expert to pull it off.
Use templates when you want to save time. Follow the expert tips to avoid common mistakes. And always keep your data organized and backed up. With these practices, your Word database will serve you well for years to come.
Now that you know how do I create a Microsoft Word database step by step, it is your turn. Open Word, gather your data, and give it a try. You will be amazed at how quickly you can produce professional, personalized documents. Happy merging!
Frequently Asked Questions
Can I Create A Word Database Without Using Excel?
Yes, you can. Word has a built-in table feature that works as a simple data source. You can also use an existing Word document with a list of names and addresses. However, Excel offers more flexibility and is recommended for larger lists. For small projects, a Word table works just fine.
What Types Of Documents Can I Create With A Word Database?
You can create mailing labels, envelopes, form letters, name badges, and email messages. The mail merge feature supports all these document types. You simply choose your document type at the start of the merge process and Word handles the rest.
How Many Entries Can A Word Database Handle?
Word databases can handle thousands of entries without any issues. The real limit depends on your computer’s memory and the complexity of your document. For most personal and small business needs, a Word database easily manages lists of up to 10,000 entries or more.
Do I Need Any Special Software To Create A Word Database?
No special software is needed. You only need Microsoft Word and optionally Microsoft Excel. Both programs are part of the Microsoft Office suite. If you have Word installed, you already have everything required to build a functional database.
Can I Update My Data After Connecting It To Word?
Yes, you can. Go to the Mailings tab and click “Select Recipients.” Choose “Use an Existing List” and select your updated Excel file. This refreshes the connection. Any changes you made in Excel will now appear in your Word documents.
Is A Word Database The Same As A Word Document With A Table?
Not exactly. A table inside a Word document stores data, but a true Word database uses mail merge to connect that data with a template. The database approach lets you generate multiple personalized documents from one template and one data source. A simple table just holds information in rows and columns.
=== CONCLUSION ===
Learning how do I create a Microsoft Word database opens up a world of possibilities. From printing professional labels to sending personalized letters, the mail merge tool in Word makes it all possible. You now have a complete roadmap to follow, from setting up your data in Excel to finishing and printing your final documents.
Remember to keep your data clean, use templates when helpful, and test before printing large batches. These simple habits will save you time and prevent frustrating errors. A well-organized Word database is one of the most useful tools in your productivity toolkit.
Start small, practice the steps, and build your confidence. Before long, creating a Word database will feel like second nature. You will wonder how you ever managed without it. Happy creating!