How Do I Connect My Hoverboard To My Phone For Beginners
Connecting your hoverboard to your phone is easier than you think. With just a few simple steps, you can pair your device via Bluetooth and unlock features like speed tracking, ride mode control, and battery monitoring. This guide walks you through the entire process from start to finish.
Key Takeaways
- Bluetooth Pairing Is Essential: Most hoverboards use Bluetooth to sync with your smartphone for app connectivity and ride data.
- The Right App Makes All The Difference: Downloading your hoverboard brand’s official app gives you access to speed settings, battery status, and ride logs.
- Troubleshooting Is Straightforward: Common connection issues like distance, outdated firmware, or Bluetooth glitches have simple fixes.
- Firmware Updates Keep Things Smooth: Regular updates improve performance, fix bugs, and enhance phone connectivity.
- Maintenance Prevents Future Problems: Keeping your hoverboard clean and charged ensures reliable phone syncing every ride.
📑 Table of Contents
- What Is Hoverboard Phone Connection And Why It Matters
- Things You Need Before You Start
- Step-By-Step Guide To Connect Your Hoverboard To Your Phone
- Using The Hoverboard Mobile App Effectively
- Common Connection Problems And How To Fix Them
- Tips For Maintaining A Stable Bluetooth Connection
- What To Do If Your Hoverboard Does Not Have Bluetooth
- Final Thoughts On Connecting Your Hoverboard To Your Phone
What Is Hoverboard Phone Connection And Why It Matters
If you just bought a hoverboard, you might be wondering why connecting it to your phone even matters. The truth is, modern self-balancing scooters are so much more than just a fun ride. When you pair your hoverboard with your phone, you open up a whole new world of features.
Think about it. You get real-time speed tracking, battery level updates, ride distance logs, and even different ride modes right on your screen. Some apps let you lock your hoverboard with a password. Others give you LED light controls. All of this becomes possible the moment you connect your hoverboard to your phone.
The connection works through Bluetooth technology. Your hoverboard has a built-in Bluetooth module. Your phone has one too. When they find each other, they create a wireless link. This link lets data flow back and forth smoothly.
For beginners, this whole process can feel intimidating. But it really is not that hard. You do not need to be a tech expert. You just need a clear set of steps and a little patience. That is exactly what this guide provides.
Whether you have a standard hoverboard or a premium model with all the bells and whistles, the connection process follows a similar path. Once you learn it once, you will never forget it.
Things You Need Before You Start
Before you dive into the hoverboard setup process, make sure you have everything ready. Preparation saves time and prevents frustration. Here is what you need:
A Compatible Smartphone
Most hoverboard apps work with both Android and iOS devices. You need a smartphone with Bluetooth capability. Nearly all phones made in the last decade have this built in. Check your phone settings to confirm Bluetooth is available.
The Correct Mobile App
Every hoverboard brand usually has its own dedicated app. Some popular brands include Segway, Razor, and Gotrax. Search your app store for the official app that matches your hoverboard model. Download and install it before you begin.
A Charged Hoverboard
This is important. Your hoverboard needs enough battery power to broadcast its Bluetooth signal. If the battery is too low, the phone might not detect it. Plug in your hoverboard and let it charge for at least 30 minutes before you start.
A Stable Environment
Find a quiet space with minimal Bluetooth interference. Too many wireless devices nearby can confuse the pairing process. A clear room works best for your first connection attempt.
Quick Tips Before You Begin
- Turn On Bluetooth on your phone before you start the pairing process.
- Restart Your Phone if you have had connection issues in the past.
- Keep Your Phone Close to the hoverboard during pairing. About three feet apart is ideal.
- Check The Hoverboard Manual for any brand-specific instructions.
Step-By-Step Guide To Connect Your Hoverboard To Your Phone
Now comes the fun part. You are ready to connect your hoverboard to your phone. Follow these steps carefully and you will be paired in just a few minutes.
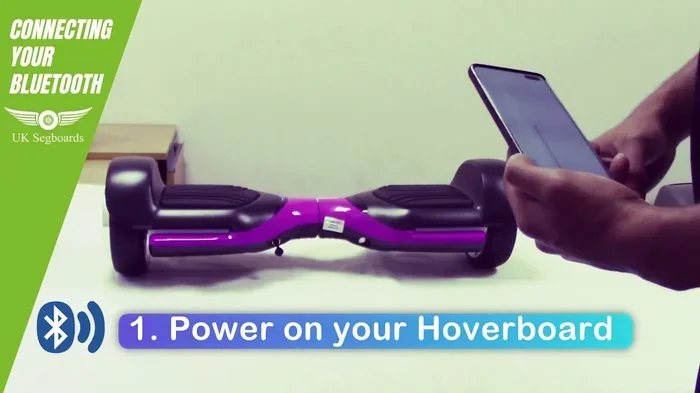
Step One: Power On Your Hoverboard
Press the power button on your hoverboard. You should see LED lights turn on. Some models make a gentle beeping sound. This tells you the hoverboard is active and ready to be discovered by other devices.
Wait about five to ten seconds after turning it on. The hoverboard needs a moment to initialize its Bluetooth module. You might notice a flashing blue light on some models. That flashing light means it is ready to pair.
Step Two: Open The Hoverboard App On Your Phone
Launch the app you downloaded earlier. Most apps will have a prominent button that says “Connect” or “Pair Device.” Tap on it. The app will start scanning for nearby Bluetooth devices.
If the app does not auto-scan, look for a manual scan option in the settings menu. Some apps call this “Search For Devices” or “Find My Hoverboard.”
Step Three: Select Your Hoverboard From The List
After a few seconds, your phone should display a list of available Bluetooth devices. Look for your hoverboard name. It usually shows up as the brand name followed by a model number.
Tap on the hoverboard name to initiate the pairing request. You might see a confirmation pop-up on both your phone and hoverboard display. Accept the connection on both sides.
Step Four: Wait For The Connection Confirmation
Once paired, your phone and hoverboard are linked. The app should show a “Connected” status. Some hoverboards display a solid blue light instead of a flashing one. This confirms the Bluetooth connection is active.
Try opening the app dashboard now. You should see your hoverboard name, battery level, and current ride mode displayed. If everything looks good, you are all set!
Step Five: Test The Connection
Before you hop on and ride, test a few features. Try changing the ride mode from the app. Check if the battery percentage updates correctly. See if the speed limit settings respond.
This quick test makes sure everything is working properly. If something feels off, do not worry. We will cover troubleshooting next.
What You Will See After Successful Connection
| Feature | What It Shows |
|---|---|
| Battery Status | Current charge level and estimated range |
| Ride Mode | Eco, Standard, or Sport mode selection |
| Speed Limit | Maximum speed allowed in current mode |
| Ride Log | Distance traveled and ride history |
| LED Controls | Light color and pattern settings |
| Firmware Version | Current software version of your hoverboard |
Using The Hoverboard Mobile App Effectively
Once you connect your hoverboard to your phone, the app becomes your best friend. It gives you control over features that you cannot access from the hoverboard itself. Let us explore what the app can do.
Ride Mode Selection
Most apps offer multiple ride modes. Beginners usually start with Eco Mode. It limits the top speed and gives you a gentler acceleration. As you gain confidence, you can switch to Standard or Sport Mode through the app.
This is especially helpful for parents buying hoverboards for kids. You can lock the speed limit remotely using the phone app. It adds an extra layer of safety.
Battery Monitoring
The app shows you exactly how much battery life remains. This is much more precise than the LED indicators on the hoverboard itself. You can plan your rides better and avoid getting stranded with a dead battery.
Some apps also send you a notification when the battery drops below 20 percent. This is a great feature to have.
Firmware Updates
Manufacturers release firmware updates to fix bugs and improve performance. The app checks for updates automatically when you connect. Always install the latest firmware. It keeps your self-balancing scooter running smoothly and fixes connection issues too.
Ride Statistics And History
Track your rides over time. The app logs distance, speed, and ride duration. It is fun to see how much you improve over weeks and months. Some apps even let you share your stats with friends.
Common Connection Problems And How To Fix Them
Even when you follow every step correctly, sometimes things do not work the first time. This is completely normal. Hoverboard troubleshooting is a skill every rider should have. Here are the most common issues and their solutions.
Phone Does Not Detect The Hoverboard
This happens more often than you might think. The first thing to check is whether Bluetooth is turned on. It sounds obvious, but it is easy to overlook.
Next, make sure your hoverboard is powered on and in pairing mode. Some models require you to hold the power button for a few seconds to enter pairing mode. Check your manual for the specific steps.
Distance matters too. Move your phone closer to the hoverboard. Remove other Bluetooth devices from the area temporarily. These simple steps resolve the issue in most cases.
Connection Keeps Dropping
If your hoverboard pairing keeps disconnecting, the problem is usually signal interference. Other Bluetooth devices, Wi-Fi routers, and even microwaves can cause interference.
Try moving to a different room. Turn off other Bluetooth devices temporarily. Restart both your phone and hoverboard, then try reconnecting.
Another common cause is a low battery on the hoverboard. A weak battery produces a weaker Bluetooth signal. Charge your hoverboard fully and try again.
The App Shows Connected But Nothing Works
Sometimes the phone says it is connected, but features like speed control or LED lights do not respond. This usually means the firmware is outdated.
Go to the app settings and check for a firmware update. Install it and restart both devices. This fixes the problem in most situations.
Pairing Failed Error Message
Do not panic when you see this message. It just means the two devices could not establish a connection. Try forgetting the hoverboard from your phone’s Bluetooth settings and start the pairing process fresh.
Also, make sure you are using the correct app for your specific hoverboard model. Using a generic or wrong app will cause pairing failures every time.
Expert Insight
According to hoverboard technicians, the most common reason for failed connections is not turning on the hoverboard’s Bluetooth discovery mode. Always confirm the hoverboard is actively searching for devices before you start scanning on your phone. This one step solves about 60 percent of connection issues.
Tips For Maintaining A Stable Bluetooth Connection
Once you successfully connect your hoverboard to your phone, you want that connection to stay strong. Here are some habits that help.
Keep Firmware Updated
Check for firmware updates at least once a month. Manufacturers regularly release improvements that enhance Bluetooth stability. An updated hoverboard connects more reliably than an outdated one.
Store Your Hoverboard Properly
Keep your hoverboard in a cool, dry place. Extreme heat and moisture can damage the Bluetooth module. A clean storage spot extends the life of all internal components, including the wireless connectivity hardware.
Restart Devices Regularly
Just like your phone benefits from occasional restarts, so does your hoverboard. A simple power cycle clears temporary glitches and refreshes the Bluetooth connection. Make this a habit before every ride.
Avoid Overloading Your Phone
If your phone has too many apps running in the background, it can struggle to maintain a stable Bluetooth connection. Close unnecessary apps before you connect your hoverboard. This frees up resources and gives the connection more bandwidth.
Use The Official App Only
Third-party apps might seem tempting, but they often cause connection problems. Stick with the official app from your hoverboard brand. It is designed specifically for your device and works far more reliably.
Common Mistakes To Avoid
- Skipping The Manual: Every hoverboard model has unique pairing instructions. Reading the manual takes five minutes and saves hours of frustration.
- Ignoring Battery Levels: A low battery causes weak Bluetooth signals. Always charge your hoverboard before you plan to connect it to your phone.
- Connecting In Crowded Areas: Busy places with many Bluetooth devices create interference. Pair your devices in a quiet, open space.
- Forgetting To Update The App: An outdated app version can cause compatibility issues. Keep your app updated just like you update your hoverboard firmware.
- Rushing The Process: Patience is key. Give each device time to discover the other. Rushing leads to errors and repeated failed attempts.
What To Do If Your Hoverboard Does Not Have Bluetooth
Not every hoverboard supports phone connectivity. Older models and very budget-friendly options sometimes skip the Bluetooth feature entirely. If you find yourself with a hoverboard that cannot connect to your phone, do not worry. You can still enjoy the ride.
Some hoverboards come with a handheld remote control instead. This remote gives you basic control over speed and direction. It is not as feature-rich as a phone app, but it gets the job done.
If you really want phone connectivity, consider upgrading to a newer model. Many modern self-balancing scooters come with full app support built in. It is worth checking the specs before you buy your next hoverboard.
You can also purchase Bluetooth adapter modules for certain hoverboard models. These small devices plug into the hoverboard’s mainboard and add Bluetooth capability. However, this requires some technical skill and may void your warranty. Proceed with caution.
Final Thoughts On Connecting Your Hoverboard To Your Phone
Connecting your hoverboard to your phone is one of the best things you can do to enhance your riding experience. It transforms a simple scooter into a smart, connected device. You get more control, more data, and more fun.
The process is straightforward once you know the steps. Power on your hoverboard, open the app, pair via Bluetooth, and test the connection. If you run into issues, the troubleshooting tips in this guide will help you resolve them quickly.
Remember to keep your firmware updated, maintain your device properly, and always use the official app. These habits ensure a smooth and reliable connection every single time you ride.
Now that you know how to get your hoverboard and phone working together, it is time to hit the road. Enjoy the ride, explore the app features, and make the most of your self-balancing scooter experience.
Frequently Asked Questions
How long does it take to connect a hoverboard to a phone?
The entire process takes about two to five minutes once you have everything ready. If it is your first time, it might take a little longer as you familiarize yourself with the steps. After a couple of attempts, it becomes second nature.
Why won’t my phone find my hoverboard during Bluetooth scanning?
This usually happens because the hoverboard is not in pairing mode or Bluetooth is turned off on one of the devices. Make sure both Bluetooth and discovery mode are active. Also check that your hoverboard has enough battery power to broadcast a signal.
Can I connect my hoverboard to more than one phone at a time?
Most hoverboards can only maintain an active connection with one phone at a time. However, you can pair your hoverboard with multiple phones and switch between them by disconnecting from one and connecting to the other.
Is it safe to use my phone while riding a hoverboard?
No, it is not safe to use your phone while riding. Keep your phone in a secure pocket or bag. The phone connection is meant for pre-ride setup and post-ride analysis, not for use during active riding.
Do I need internet access to connect my hoverboard to my phone?
No, you do not need the internet for the initial Bluetooth pairing. However, you do need a data connection to download the app initially and to check for firmware updates or download ride stats from the cloud.
What should I do if the connection keeps disconnecting during a ride?
First, check your battery levels on both devices. A low battery weakens the Bluetooth signal. If battery is not the issue, move away from other Bluetooth devices and Wi-Fi routers that might be causing interference. Restarting both devices and re-pairing often resolves persistent disconnection problems.
=== META DESCRIPTION ===
Learn how to connect your hoverboard to your phone easily with our beginner-friendly guide. Follow simple steps for Bluetooth pairing and app setup today!
=== QUICK SUMMARY ===
Connecting your hoverboard to your phone is easier than you think. With just a few simple steps, you can pair your device via Bluetooth and unlock features like speed tracking, ride mode control, and battery monitoring. This guide walks you through the entire process from start to finish.
=== KEY TAKEAWAYS ===
Key Takeaways
- Bluetooth Pairing Is Essential: Most hoverboards use Bluetooth to sync with your smartphone for app connectivity and ride data.
- The Right App Makes All The Difference: Downloading your hoverboard brand’s official app gives you access to speed settings, battery status, and ride logs.
- Troubleshooting Is Straightforward: Common connection issues like distance, outdated firmware, or Bluetooth glitches have simple fixes.
- Firmware Updates Keep Things Smooth: Regular updates improve performance, fix bugs, and enhance phone connectivity.
- Maintenance Prevents Future Problems: Keeping your hoverboard clean and charged ensures reliable phone syncing every ride.