How Can I Connect My Camera Without Internet Step by Step
Connecting your camera without internet is easier than you think. You can use USB cables, Bluetooth, Wi-Fi Direct, or an SD card reader to transfer photos and videos offline. This step-by-step guide walks you through every method so you can get your camera connected fast, no Wi-Fi needed.
Key Takeaways
- USB Connection: The most reliable way to connect a camera without internet using a simple cable.
- Wi-Fi Direct: Many modern cameras have a built-in Wi-Fi Direct mode that works offline.
- Bluetooth Transfer: Some cameras support Bluetooth for low-energy device pairing without a router.
- SD Card Reader: A simple offline method to access photos on any computer or device.
- HDMI Output: You can view camera feeds on a monitor or TV without any internet connection.
- Phone Hotspot: A portable workaround that creates a local network for camera-to-phone transfers.
📑 Table of Contents
- How Can I Connect My Camera Without Internet: A Complete Step-by-Step Guide
- Why You Might Need to Connect a Camera Without Internet
- Method 1: Connect Your Camera Using a USB Cable
- Method 2: Use Wi-Fi Direct for Offline Camera Connection
- Method 3: Bluetooth Connection for Camera Transfer
- Method 4: Use an SD Card Reader
- Method 5: HDMI Output to Monitor or TV
- Method 6: Create a Phone Hotspot as a Local Network
- Common Mistakes to Avoid When Connecting a Camera Offline
- Expert Tips for the Best Offline Camera Experience
- Quick Reference: Which Method Should You Choose?
- Final Thoughts on Connecting Your Camera Without Internet
How Can I Connect My Camera Without Internet: A Complete Step-by-Step Guide
Have you ever been in a situation where you need to connect my camera without internet but have no Wi-Fi available? Maybe you are on a remote shoot, traveling in a cabin, or simply prefer a more private setup. Whatever the reason, there are plenty of ways to get your camera talking to your phone, laptop, or TV without needing an active internet connection.
The good news is that most cameras come with multiple offline connection options built right in. From simple USB cables to Bluetooth and Wi-Fi Direct, you have more choices than you might think. In this guide, we will walk through every method step by step so you can pick the one that works best for you.
Whether you are using a DSLR, a mirrorless camera, a GoPro, or even a smartphone camera, this guide has you covered. We will also share practical tips and common mistakes to avoid along the way. Let us dive in and get your camera connected.
Why You Might Need to Connect a Camera Without Internet
There are many real-world situations where internet access is unavailable or simply not wanted. Understanding these scenarios helps you choose the right offline connection method.
Here are some common reasons people need to connect their camera without internet:
- Remote photo shoots: Outdoor weddings, hiking trips, or wildlife photography in areas with no signal.
- Privacy concerns: Some photographers prefer not to send data over the internet for security reasons.
- Traveling: International roaming can be expensive or unreliable, making offline transfers essential.
- Field work: Journalists, scientists, and researchers often work in locations without Wi-Fi.
- Speed and reliability: Wired connections like USB are faster and more stable than wireless options.
- Backup needs: Quickly transferring files to a laptop or hard drive without uploading to the cloud.
No matter the reason, knowing how to set up an offline camera connection gives you freedom and flexibility. You are not stuck waiting for Wi-Fi or dealing with slow uploads.
Method 1: Connect Your Camera Using a USB Cable
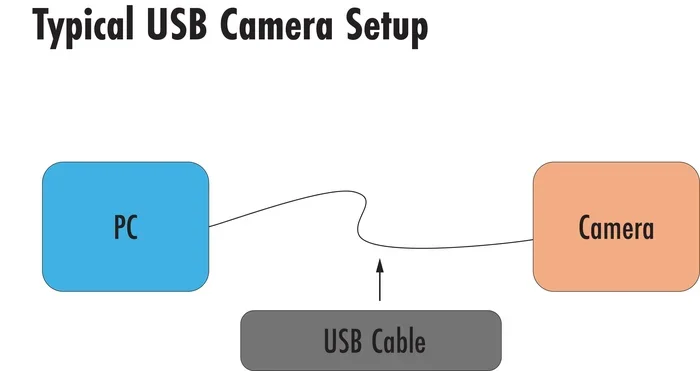
The USB cable method is the most straightforward way to connect my camera without internet. Almost every camera made in the last 15 years supports USB connectivity. All you need is the right cable and a device to plug into.
Step-by-Step USB Connection
- Check your camera’s USB port: Most cameras use a standard Micro-USB or USB-C port. Some older models still use Mini-USB.
- Grab the correct cable: Use the cable that came with your camera or a compatible replacement. Using the original cable ensures the best results.
- Connect the camera to your computer: Plug one end into the camera and the other into a USB port on your laptop or desktop.
- Turn on the camera: Power on your camera and set it to the correct mode. Many cameras will show a screen asking what mode you want to use.
- Select “PC” or “Transfer” mode: Use the camera’s menu to switch to the connection mode. This tells the camera to act as a storage device.
- Access your files: Your computer should recognize the camera as an external drive. Open it and browse your photos and videos.
That is it! You can now copy files directly from your camera to your computer. This method works even if you have no internet connection at all. It is fast, stable, and does not require any special software in most cases.
Tips for USB Connections
- Always use a high-quality cable to avoid connection drops.
- If your computer does not recognize the camera, try a different USB port.
- Some cameras charge while connected via USB, which can be handy on long shoots.
- You can also use a USB hub if you need to connect multiple devices at once.
For those wondering about connecting other devices offline, check out how to connect my iPhone to my TV with HDMI for a similar wired setup experience.
Method 2: Use Wi-Fi Direct for Offline Camera Connection
Many modern cameras now include a feature called Wi-Fi Direct. This is not the same as connecting to a Wi-Fi router. Wi-Fi Direct creates a direct, peer-to-peer wireless connection between your camera and another device. No internet, no router, no problem.
How Wi-Fi Direct Works
Wi-Fi Direct turns your camera into its own wireless access point. Your phone or tablet connects directly to the camera, forming a small local network. This is perfect for connecting your camera without internet in the field.
Step-by-Step Wi-Fi Direct Setup
- Enable Wi-Fi Direct on your camera: Go to the camera’s settings menu and look for Wi-Fi Direct or Direct Connect. The exact name varies by brand.
- Put your camera in pairing mode: The camera will broadcast its own Wi-Fi signal. You should see a network name appear on your phone.
- Go to your phone’s Wi-Fi settings: Look for the camera’s network name and tap to connect.
- Enter the password if required: Some cameras display a default password on their screen. Others may not require one.
- Open the camera’s companion app: Brands like Canon, Nikon, and Sony have free apps that let you browse and transfer files.
- Start transferring: Select the photos or videos you want and download them to your phone.
Wi-Fi Direct is slower than a USB cable, but it is very convenient for quick transfers. You do not need to carry any extra cables, and the range is typically around 30 to 50 feet.
Pros and Cons of Wi-Fi Direct
- Pros: Wireless, no cables needed, works without a router, easy to set up.
- Cons: Slower than USB, shorter range, may drain camera battery faster.
If you are interested in how other devices connect wirelessly, you might want to read about how to connect my phone to TV with HDMI cable for a similar direct connection approach.
Method 3: Bluetooth Connection for Camera Transfer
Bluetooth is another excellent option for connecting a camera without internet. While not as fast as USB or Wi-Fi Direct, Bluetooth uses very little battery and works well for small file transfers.
When to Use Bluetooth
Bluetooth is ideal for quick photo transfers, especially on the go. It is also great for connecting accessories like wireless remotes or headphones to your camera. The connection range is typically shorter than Wi-Fi Direct, around 10 to 30 feet, but it is very stable.
Step-by-Step Bluetooth Setup
- Turn on Bluetooth on your camera: Find the Bluetooth setting in your camera’s menu and enable it.
- Turn on Bluetooth on your phone or tablet: Make sure Bluetooth is visible and discoverable.
- Pair the devices: Your camera should appear in your phone’s Bluetooth device list. Tap to pair.
- Confirm the connection: Some cameras require you to confirm the pairing on the camera screen.
- Use the companion app: Open your camera’s app to browse files and start transfers.
Bluetooth works best for transferring a few photos at a time. If you need to move large video files, you will want to use USB or Wi-Fi Direct instead. But for everyday quick transfers, Bluetooth is a solid choice.
Bluetooth vs Wi-Fi Direct Comparison
| Feature | Bluetooth | Wi-Fi Direct |
|---|---|---|
| Speed | Slower | Faster |
| Range | 10-30 feet | 30-50 feet |
| Battery Use | Low | Moderate |
| Best For | Small files, quick transfers | Larger files, bulk transfers |
| Setup Difficulty | Very easy | Easy |
For a related wireless connection guide, you can also learn how to use a wireless controller on my phone for similar Bluetooth pairing steps.
Method 4: Use an SD Card Reader
Sometimes the simplest solution is the best one. An SD card reader lets you connect my camera without internet by removing the memory card and plugging it directly into your computer, tablet, or phone.
Why Use an SD Card Reader?
This method is incredibly fast and reliable. You do not need any cables, apps, or wireless connections. Just pop the card out of your camera, slide it into a reader, and plug it into your device. It works on virtually every computer and many modern tablets.
Step-by-Step SD Card Transfer
- Turn off your camera: This prevents any data corruption while removing the card.
- Remove the SD card: Open the card slot and carefully take the card out.
- Insert the card into a reader: Use a USB SD card reader for computers or a compatible adapter for phones.
- Plug the reader into your device: Connect via USB or insert directly into your tablet’s card slot.
- Access your files: Your device will recognize the SD card as a storage drive. Browse and copy your files.
- Eject safely: Always eject the card properly before removing it to protect your data.
SD card readers are cheap, small, and easy to carry. They are a must-have for any photographer who works offline frequently. You can pick one up for just a few dollars at any electronics store.
For more about connecting storage devices, check out how to connect a USB stick to my iPhone using a similar card reader approach.
Method 5: HDMI Output to Monitor or TV
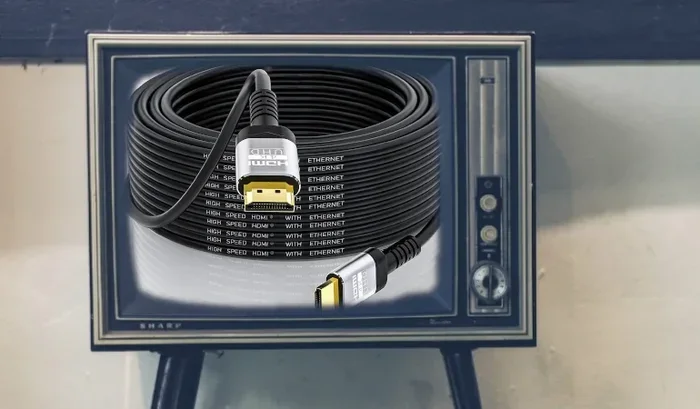
If your goal is to view your camera’s feed on a larger screen, HDMI is the way to go. Many cameras have a full-size HDMI output that lets you display photos, videos, or live views on any HDMI-compatible monitor or TV.
Step-by-Step HDMI Connection
- Check your camera’s HDMI port: Look for a mini-HDMI or micro-HDMI port on your camera.
- Get the right cable: You will need a cable that matches your camera’s port on one end and a standard HDMI on the other.
- Connect to your monitor or TV: Plug the HDMI cable into your display device.
- Switch the display input: Use your TV or monitor’s input selector to choose the correct HDMI port.
- Turn on your camera: Set the camera to playback or live view mode.
You do not need any internet connection for this method at all. The HDMI cable carries both video and audio signals directly from the camera to the display. This is perfect for reviewing photos on a big screen or using your camera as a webcam for video calls.
If you want to learn more about HDMI connections across devices, you can explore how to connect HDMI to USB-C monitor for similar display setup tips.
Method 6: Create a Phone Hotspot as a Local Network
Here is a clever workaround. Even without a real internet connection, you can use your phone’s hotspot feature to create a local Wi-Fi network. Your camera can then connect to this network for file transfers.
How This Works
Your phone creates its own Wi-Fi network using cellular data or just the hotspot feature itself. Your camera connects to this network just like it would connect to a home router. The key difference is that the data stays local between your devices, and you do not need an active internet plan for the transfers to work.
Step-by-Step Hotspot Setup
- Turn on your phone’s hotspot: Go to Settings, then Hotspot or Personal Hotspot, and enable it.
- Note the network name and password: Your phone will display these on the hotspot screen.
- On your camera, go to Wi-Fi settings: Look for your phone’s hotspot name and connect to it.
- Enter the password: Type in the hotspot password when prompted.
- Use the camera’s app to transfer files: Open the companion app on your phone to browse and download photos.
This method works best when you have some cellular signal but no Wi-Fi available. It gives you the wireless convenience of Wi-Fi Direct with the added benefit of using your phone as the bridge device.
Common Mistakes to Avoid When Connecting a Camera Offline
Even with the right method, things can go wrong. Here are some common mistakes people make when trying to connect my camera without internet and how to avoid them.
Using the Wrong Cable
Not all USB cables are created equal. Some cables are charging-only and cannot transfer data. Always use the cable that came with your camera or one that is specifically rated for data transfer.
Forgetting to Change the Connection Mode
Many cameras default to charging mode when plugged in via USB. You need to manually switch to PC or transfer mode in the camera’s menu. Otherwise, your computer will not see the files.
Ignoring Battery Levels
Offline connections can drain your camera battery faster, especially Wi-Fi Direct and Bluetooth. Start with a full battery or keep your charger handy during long transfer sessions.
Skipping Software Updates
Camera companion apps sometimes need updates to work with newer camera models. Check for app updates before you head out on a shoot.
Not Backing Up Files
Offline transfers mean you are responsible for your own backups. Always copy your files to at least two different locations to prevent data loss.
Expert Tips for the Best Offline Camera Experience
Here are some pro tips that make offline camera connections smoother and faster.
- Label your cables: In a bag full of gear, it helps to know which cable is for your camera.
- Carry a backup SD card reader: They are small and cheap, and they save the day when cables fail.
- Use a portable hard drive: Transfer files to an external drive for extra backup without needing internet.
- Turn off Wi-Fi when not in use: This saves battery and prevents accidental connections.
- Organize files before transferring: Create folders on your device before you start copying files for easier organization.
These small habits add up to a much smoother workflow, especially when you are working in remote locations without internet access.
Quick Reference: Which Method Should You Choose?
Not sure which offline connection method is right for you? Here is a quick guide based on your needs.
- Fastest transfers: USB cable connection
- Most convenient: Wi-Fi Direct
- Lowest battery drain: Bluetooth
- Simplest setup: SD card reader
- Best for large screens: HDMI output
- Most flexible: Phone hotspot
Each method has its strengths. The best approach is to know two or three methods so you are prepared for any situation. A USB cable and an SD card reader together cover most offline needs reliably.
Final Thoughts on Connecting Your Camera Without Internet
Connecting your camera without internet is a skill every photographer and videographer should have. Whether you are in a remote location, traveling internationally, or just prefer a more private workflow, the methods in this guide will get the job done.
From simple USB cables to clever phone hotspot setups, you now have six solid options at your fingertips. The key is to practice before you are in the field. Try each method at home so you feel confident when you need it most.
Remember, the best connection method is the one that fits your workflow. Some photographers carry a USB cable and an SD card reader everywhere. Others rely on Wi-Fi Direct for quick sharing with clients on set. Find what works for you and stick with it.
Now you have everything you need to get your camera connected, no internet required. Go out there and capture your moments with confidence.
Frequently Asked Questions
Can I connect my camera to my phone without internet?
Yes, you can. Use Wi-Fi Direct, Bluetooth, or USB to connect your camera directly to your phone. Wi-Fi Direct and Bluetooth create a local connection between devices without needing a router or internet service. Most camera brands offer free companion apps that make this process simple.
What is the fastest way to transfer photos from a camera without internet?
The fastest method is using a USB cable to connect your camera directly to a computer or laptop. USB transfers are significantly faster than wireless options. An SD card reader is also very fast and does not require any cables at all.
Do I need special software to connect my camera offline?
Most of the time, no. USB connections work with your computer’s built-in file manager. For Wi-Fi Direct and Bluetooth, you will need your camera’s companion app, which is usually free to download. SD card readers work immediately without any software.
Can I use my camera without Wi-Fi at all?
Absolutely. Cameras work perfectly fine without Wi-Fi. You can shoot, store files on the SD card, and transfer them later using USB, an SD card reader, or Bluetooth. Wi-Fi is just an optional feature for convenience.
How do I connect my camera to a TV without internet?
Use an HDMI cable to connect your camera directly to your TV. Most cameras have an HDMI output port. Simply plug the cable in, switch your TV to the correct input, and you can view your photos and videos on the big screen.
Is it safe to transfer files offline?
Yes, offline transfers are very safe. Since the data stays between your devices and does not travel over the internet, there is less risk of interception or data loss. Just make sure to back up your files to at least two locations after transferring.