Can You Network A Zebra Printer And How To Do It Right
Yes, you can network a zebra printer, and it is easier than most people think. Whether you want to connect your zebra printer over WiFi, Ethernet, or a USB network share, this guide walks you through every step. You will learn how to find your zebra printer IP address, install the right drivers, and configure network settings like a pro. We also cover common zebra printer troubleshooting tips and the advantages and disadvantages of network cables for printer setups. By the end, you will have a fully networked zebra printer ready for label printing.
Key Takeaways
- Networked zebra printers let multiple users print from one device: This saves time and reduces setup costs in offices and warehouses.
- You can connect via WiFi, Ethernet, or USB sharing: Each method has its own benefits depending on your workspace needs.
- Finding your zebra printer IP address is the first key step: Without it, you cannot configure network settings or share the printer.
- The zebra printer setup wizard makes configuration simple: You do not need to be a tech expert to get it running.
- Knowing the advantages and disadvantages of network cables helps you choose the best connection: Wired connections offer stability while wireless gives flexibility.
- Common zebra printer problems have easy fixes: Most connectivity issues stem from driver mismatches or incorrect IP settings.
- Regular firmware updates keep your zebra printer running smoothly: Updated firmware improves security and performance over time.
📑 Table of Contents
- Can You Network A Zebra Printer And Why It Matters
- How To Network A Zebra Printer Over WiFi
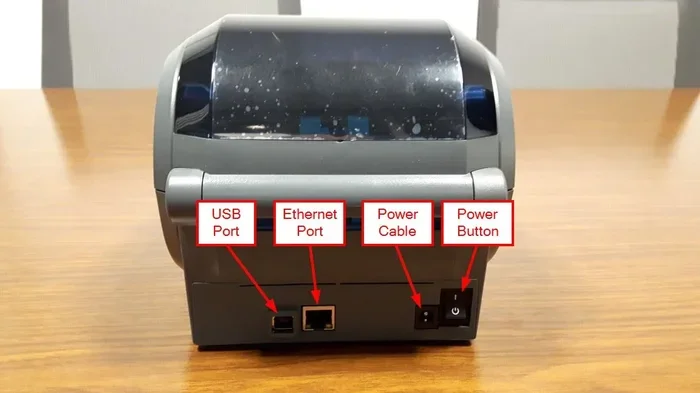
- How To Network A Zebra Printer Using Ethernet
- How To Share a Zebra Printer Through USB
- Installing Zebra Printer Drivers and Software
- Zebra Printer Troubleshooting for Network Issues
- Best Practices for Managing a Networked Zebra Printer
- Zebra Printer Network Setup Comparison
- Conclusion
Can You Network A Zebra Printer And Why It Matters
If you have a zebra printer sitting on your desk and only one computer is using it, you are missing out. Networking a zebra printer opens up a whole new world of convenience. Multiple users can send print jobs from different devices at the same time. This is especially helpful in busy offices, warehouses, and retail stores where label printing happens all day long.
So can you network a zebra printer? The short answer is yes. Zebra printers are designed to work on local networks. You can connect them using WiFi, Ethernet cables, or even share them through a USB connection on a host computer. Each method has its own strengths. Let us walk through everything you need to know.
Before we dive in, it helps to understand why zebra printer connectivity matters so much. When a printer is networked, anyone on the same network can send print jobs. You do not need to plug a USB cable into every single computer. This saves time, reduces cable clutter, and makes it easy to manage printing from anywhere in the building.
Now, if you are comparing wired and wireless options, it is worth knowing the advantages and disadvantages of network cables. Wired connections tend to be faster and more stable. Wireless connections give you freedom of movement and less cable mess. Both work great with zebra printers. Your choice depends on your workspace and how you plan to use the printer.
What Kind of Zebra Printers Support Networking
Most modern zebra printers come with built-in networking features. The Zebra GX430t, ZT230, ZT410, and ZD420 are popular models that support both WiFi and Ethernet. If you have an older model, you might need an external print server to add network capability. Check your printer model number and look up its specs before you start.
Here are some common zebra printer models that support networking out of the box:
- Zebra GX430t – A desktop thermal printer with WiFi and Ethernet options.
- Zebra ZT230 – A reliable industrial printer with strong network support.
- Zebra ZT410 – A high-volume printer perfect for large warehouses.
- Zebra ZD420 – A compact design with easy network setup.
- Zebra GC420t – A budget-friendly option with basic network features.
When you pick a zebra printer for your network, make sure it supports the connection type you want. If you need fast and reliable printing, go with Ethernet. If you want flexibility and less cable work, WiFi is the way to go.
How To Network A Zebra Printer Over WiFi
Setting up a zebra printer WiFi connection is one of the most popular ways to go wireless. Most zebra printers have a built-in WiFi setup wizard. This makes the process straightforward even if you are not very technical. Here is how you do it step by step.
First, make sure your WiFi network is working and you know the password. Then turn on your zebra printer and press the WiFi button on the control panel. Most zebra printers will show a WiFi setup screen on their display. Use the arrow keys to navigate and select your network name.
Enter your WiFi password using the printer keypad. This can be a bit tedious since you are typing on a small screen, but it works. Once you enter the password, the printer will connect to your network. You should see a confirmation message on the display.
Now go to a computer on the same network. Open your printer settings and click “Add a printer.” Your zebra printer should show up in the list. Select it and follow the on-screen prompts to install the zebra printer drivers. Once the drivers are installed, you can print a test page to confirm everything works.
Quick Tips for WiFi Setup
- Make sure your zebra printer is close enough to the WiFi router for a strong signal.
- If the signal is weak, consider moving the printer closer to the router or adding a WiFi extender.
- Write down your zebra printer IP address once it connects. You will need it later.
- Keep your WiFi password handy during the setup process.
How To Network A Zebra Printer Using Ethernet
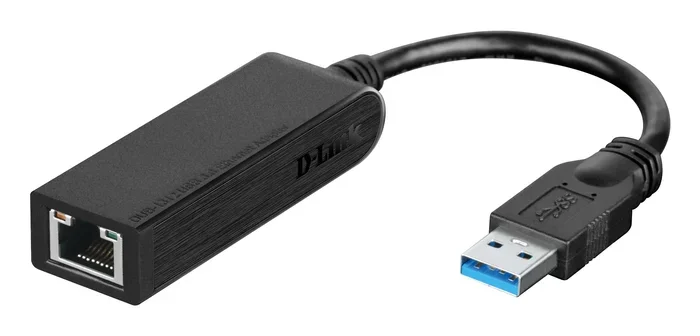
If you prefer a wired connection, setting up your zebra printer with an Ethernet cable is very reliable. Zebra printer Ethernet setup gives you a stable connection with minimal interference. This is ideal for environments where print jobs need to be fast and consistent.
Start by plugging one end of an Ethernet cable into your zebra printer and the other end into your router or network switch. The printer should automatically detect the network. Most zebra printers use DHCP by default, which means they will get an IP address automatically from your router.
To find the IP address assigned to your zebra printer, print a network configuration page. On most zebra printers, you can do this by holding the feed button while turning the printer on. The configuration page will show the IP address, subnet mask, and default gateway.
Now go to a computer on the same network. Open the printer settings and add a new printer using TCP/IP. Enter the zebra printer IP address you found on the configuration page. The computer will search for the printer and install the necessary drivers. Once that is done, you are ready to print.
One thing to keep in mind is that the advantages and disadvantages of network cables apply here too. Ethernet cables provide a steady and fast connection, but they do require physical cabling. If your office layout changes often, you might find a wired setup less flexible than WiFi.
Setting a Static IP Address for Your Zebra Printer
By default, most zebra printers use DHCP to get an IP address. This means the IP address can change if your router restarts. To avoid this problem, you should set a static IP address for your zebra printer.
Here is how to do it:
- Print the network configuration page from your zebra printer.
- Note down the current IP address, subnet mask, and default gateway.
- Log into your zebra printer web interface by typing the IP address into a browser.
- Navigate to the network settings section.
- Change the IP assignment from DHCP to static.
- Enter the IP address, subnet mask, and gateway manually.
- Save the settings and restart the printer.
A static IP address ensures your zebra printer always stays at the same address on the network. This makes it much easier to share the printer across multiple computers and devices.
How To Share a Zebra Printer Through USB
Not everyone has a WiFi or Ethernet setup available. In some cases, you might only have one computer near the zebra printer. You can still share the printer over a network using USB sharing. This method uses a host computer to relay print jobs to the zebra printer.
Connect your zebra printer to a computer using a USB cable. On Windows, go to Settings > Devices > Printers & Scanners. Select your zebra printer and click “Printer properties.” Go to the Sharing tab and check “Share this printer.” Give it a share name that is easy to remember.
Now, on any other computer on the same network, you can add the shared printer. Go to Add a printer and select “The printer that I want isn’t listed.” Choose “Select a shared printer by name” and type the path to the shared printer. It will look something like \\ComputerName\ZebraPrinter.
One downside of USB sharing is that the host computer must be turned on and awake for other users to print. If you compare this to the advantages and disadvantages of a computer mouse being wired versus wireless, you can see a similar trade-off. Wired connections are more reliable but less flexible. USB printer sharing is reliable but depends on one computer always being on.
Installing Zebra Printer Drivers and Software
Getting the right zebra printer drivers installed is essential for smooth network printing. Without the correct drivers, your computer will not know how to communicate with the printer. Zebra provides free drivers and utilities on their official website.
Here is what you need to do:
- Go to the Zebra website and navigate to the Support or Drivers section.
- Enter your printer model number to find the correct driver.
- Download the driver for your operating system (Windows, Mac, or Linux).
- Run the installer and follow the on-screen instructions.
- Restart your computer if prompted.
- Add the printer through your operating system’s printer settings.
Zebra also offers the Zebra Setup Utilities tool. This free software helps you find zebra printers on your network and configure them quickly. It is especially handy when you are setting up multiple printers at once.
ZebraDesigner Software for Label Printing
If you are printing labels, barcodes, or RFID tags, you will want to use ZebraDesigner software. This tool lets you create custom label templates and send them directly to your networked zebra printer. It supports a wide range of zebra printer models and gives you full control over label design.
You can download ZebraDesigner in free and paid versions. The free version handles basic label design well. The paid version adds advanced features like database connectivity and variable data printing. Either way, it works seamlessly with a networked zebra printer.
Zebra Printer Troubleshooting for Network Issues
Even with a great setup, you might run into zebra printer troubleshooting situations. Network printing problems are common but usually easy to fix. Here are the most frequent issues and how to solve them.
Printer Not Showing Up on the Network
If your zebra printer does not appear when you try to add it, the first thing to check is the connection. Make sure the printer is powered on and connected to the same network as your computer. Try printing a network configuration page to confirm the printer has an IP address.
Next, check your firewall settings. Sometimes Windows Firewall or third-party security software blocks printer discovery. Temporarily disable the firewall to see if that fixes the issue. If it does, add an exception for your zebra printer in the firewall settings.
Print Jobs Stuck in the Queue
If print jobs are piling up and not printing, the issue might be with the print spooler. Open the Services app on Windows and restart the Print Spooler service. This clears the queue and often resolves the problem. You can also try removing and re-adding the printer from your device settings.
Incorrect Print Output or Garbled Text
Garbled text or misaligned labels usually mean the wrong driver is installed. Uninstall the current driver and download the correct one from the Zebra website. Make sure you select the exact model number of your printer. After reinstalling the driver, restart your computer and try printing again.
In some workflows, you might also encounter issues with formatting or data export. For example, if you are pulling data from spreadsheets, you could run into problems similar to when a line wont delete in Microsoft Excel. These kinds of data formatting issues can affect how labels print, so always double-check your data sources before blaming the printer.
WiFi Connection Drops Frequently
If your zebra printer keeps losing its WiFi connection, the signal strength might be the problem. Move the printer closer to the router or access point. You can also try changing the WiFi channel on your router to reduce interference from other devices.
Another cause could be an outdated printer firmware. Check the Zebra website for firmware updates for your specific model. Updating firmware often fixes connectivity bugs and improves overall performance.
Best Practices for Managing a Networked Zebra Printer
Once your zebra printer is networked and working, you want to keep it running smoothly. Following best practices helps you avoid problems and get the most out of your printer.
Keep Firmware Updated
Zebra regularly releases firmware updates that fix bugs and improve performance. Check for updates every few months. Most zebra printers let you update firmware directly from the web interface or using Zebra Setup Utilities.
Monitor Print Volume and Ribbon Usage
Keep track of how much your printer is being used. High print volumes can wear out the print head faster. Replace ribbons and print heads on a regular schedule to maintain print quality. Most zebra printers have built-in counters that help you track usage.
Secure Your Networked Printer
Since your zebra printer is on the network, it is important to keep it secure. Change the default printer password if your model supports it. Use a separate VLAN or network segment for printers if your network setup allows it. This prevents unauthorized access and keeps your printing environment safe.
Use Quality Network Cables for Wired Setups
If you are using an Ethernet connection, invest in good quality cables. Cat5e or Cat6 cables provide reliable speeds and reduce signal loss. Keep cable runs as short as possible for the best performance. And remember, understanding the advantages and disadvantages of network cables helps you make smarter choices about your setup.
Zebra Printer Network Setup Comparison
To help you choose the best networking method, here is a quick comparison of the three main options:
| Feature | WiFi | Ethernet | USB Sharing |
|---|---|---|---|
| Connection Type | Wireless | Wired | Wired via Host PC |
| Speed | Good | Excellent | Moderate |
| Stability | Good | Excellent | High (depends on host) |
| Flexibility | High | Low | Low |
| Setup Difficulty | Easy | Easy | Moderate |
| Multiple Users | Yes | Yes | Yes (host must be on) |
| Cable Required | No | Yes | Yes (USB to host) |
As you can see, each method has its place. WiFi is great for flexibility and easy setup. Ethernet is best for speed and reliability. USB sharing works when you have limited networking options but need to share the printer across a small team.
No matter which method you choose, the key is to get the right zebra printer drivers installed and configure the network settings correctly. Once that is done, your zebra printer will be ready to serve your entire team.
Conclusion
So can you network a zebra printer? Absolutely. Whether you choose WiFi, Ethernet, or USB sharing, the process is straightforward and well worth the effort. A networked zebra printer makes label printing faster, more efficient, and accessible to everyone on your team.
Start by choosing the right connection method for your workspace. Set up your zebra printer using the steps outlined in this guide. Install the correct drivers and software. And if you run into issues, use the troubleshooting tips to get things back on track.
Remember to keep your firmware updated, monitor usage, and secure your network. A little maintenance goes a long way in keeping your zebra printer running at its best. With the right setup, your zebra printer will be a reliable workhorse for years to come.