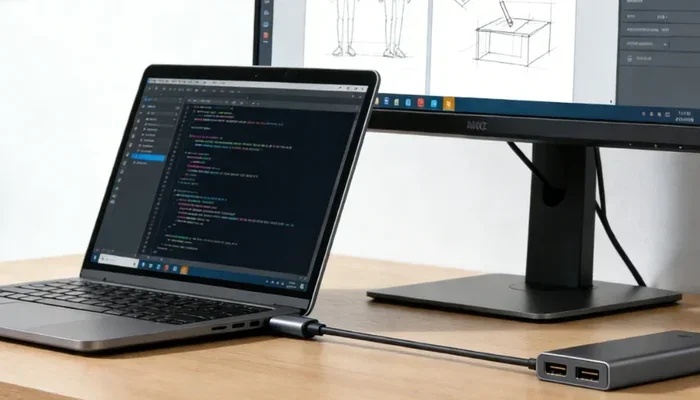
Can I Remove Laptop Screen And Just Use External Monitor
Yes, you can remove your laptop screen and just use an external monitor. Whether you want a cleaner desk setup or are dealing with a broken display, using an external monitor alone is totally doable. This guide walks you through every step, from connecting cables to setting up your laptop in clamshell mode, so you can ditch the built-in display and work with confidence.
Have you ever looked at your laptop and thought, “Can I remove laptop screen and just use external monitor?” Maybe your built-in display is cracked, or you simply want a bigger screen for work. Whatever the reason, this is a question many laptop users ask. The good news is that the answer is a clear yes. You can use an external monitor as your only display and still have a fully functional laptop.
Using a laptop without its built-in screen might sound unusual, but it is actually quite common. People do this for ergonomic reasons, desk space savings, or because their screen is broken. In this guide, we will walk you through everything you need to know. From connection options to setup steps, you will have a complete picture of how this works and what you need to do it right.
Let us dive in and explore how you can turn your laptop into a headless machine that relies entirely on an external display. By the end, you will know exactly what to do, what tools you need, and how to avoid common pitfalls.
Key Takeaways
- You can absolutely use an external monitor without a laptop screen: It is fully supported by most modern laptops.
- Clamshell mode makes this easy: Close the lid and your laptop runs on the external display alone.
- You need the right cable or dock: HDMI, USB-C, or a docking station are your main options.
- Physical removal is possible but risky: You can take out the screen, but it voids warranty and requires care.
- Headless laptop setups save space: A monitor-only setup creates a cleaner, more ergonomic workstation.
- Performance stays the same: Your laptop’s processor and graphics still power the external display.
- Keyboard and mouse are essential: You will need external input devices when the built-in screen is gone.
📑 Table of Contents
- What Happens When You Remove or Bypass Your Laptop Screen
- How to Connect an External Monitor to Your Laptop
- Setting Up Your Laptop to Work Without the Built-in Screen
- Benefits of Using Only an External Monitor with Your Laptop
- Can You Physically Remove the Laptop Screen?
- Common Mistakes to Avoid When Using an External Monitor Only
- Expert Tips for the Best Headless Laptop Experience
- Conclusion
What Happens When You Remove or Bypass Your Laptop Screen
Before we get into the how-to, let us understand what actually happens when you stop using your laptop’s built-in display. Your laptop screen is just an output device. It shows what your computer is processing. When you connect an external monitor, you are simply redirecting that output to a different display.
Your laptop’s brain, including the CPU, RAM, and storage, keeps working exactly the same. Nothing changes inside the machine. The only difference is where the visual output appears. This is why using an external monitor as your primary display is perfectly safe and will not harm your laptop in any way.
How Your Laptop Handles Display Output
Every modern laptop has a graphics chip or a dedicated GPU that sends video signals to displays. The built-in screen is one output. An external monitor is another. Your laptop can handle multiple outputs at the same time. When you remove the laptop screen from the equation, the graphics card simply sends all the visual data to the external display you have connected.
Here is how the process works in simple terms:
- Your laptop processes data and creates a visual output.
- The graphics chip sends that output through a video port.
- The external monitor receives the signal and displays it.
- Your laptop continues running as normal, just without its own screen showing anything.
This is the same process whether you are using an HDMI cable, a USB-C connection, or a DisplayPort cable. The method changes, but the result is the same.
Do You Need to Keep the Laptop Screen Connected?
No. You do not need to keep the laptop screen attached for the computer to work. However, if you are physically removing the screen, there are a few things to consider. The screen is connected to the motherboard through a thin cable called the eDP cable. Disconnecting it is safe, but you should be gentle. If you plan to remove the screen permanently, make sure you have the right tools and a little patience.
For most people, you do not even need to remove the screen physically. You can just close the lid and use the external monitor. This is called clamshell mode, and it is the easiest way to run a laptop without using the built-in display.
How to Connect an External Monitor to Your Laptop
Setting up an external monitor is straightforward. The steps vary slightly depending on your laptop model, but the basics are the same. Let us walk through the connection process step by step.
Step 1: Check Your Laptop’s Video Ports
First, look at the sides of your laptop. What kind of video ports does it have? Most modern laptops come with one or more of these options:
- HDMI port: The most common connection type. Almost every external monitor supports HDMI.
- USB-C with DisplayPort Alt Mode: Found on newer laptops. You can use a USB-C to HDMI or USB-C to DisplayPort cable.
- DisplayPort: Less common on laptops but offers great video quality.
- VGA or D-Sub: Older connection type. Still works but delivers lower quality.
Once you know which port your laptop has, pick the right cable or adapter for your external monitor.
Step 2: Choose the Right Cable or Adapter
Your choice of cable matters. A good cable ensures clear video and smooth performance. Here are the most common options:
- HDMI cable: Best for most setups. Supports full HD and 4K resolution on most monitors.
- USB-C to HDMI adapter: Great for slim laptops that only have USB-C ports.
- USB-C docking station: Connects your laptop to a monitor, keyboard, mouse, and charger all at once.
- DisplayPort cable: Ideal if your monitor has a DisplayPort input and you want the best quality.
Quick Tip: If you want a simple setup, a single USB-C cable that carries video and power is the easiest option. Many modern monitors support USB-C video input.
Step 3: Connect and Detect the Monitor
After plugging in the cable, your laptop should detect the external monitor automatically. If it does not, try these steps:
- Go to your laptop’s Settings menu.
- Click on Display or Screen settings.
- Look for the Detect button to find the new monitor.
- Choose how you want the display to work.
Your operating system will let you choose between extending the display, duplicating it, or using the external monitor as the only screen.
Setting Up Your Laptop to Work Without the Built-in Screen
Now that you have your external monitor connected, let us talk about how to set things up so your laptop works perfectly without the built-in display. This is where the real magic happens.
Using Clamshell Mode
Clamshell mode is the easiest way to use your laptop with an external monitor only. In clamshell mode, you close the laptop lid and the external monitor becomes the main display. Your laptop stays on, your apps keep running, and you work on the bigger screen.
Here is how to set it up:
- Connect your external monitor to the laptop.
- Connect a keyboard and mouse. You can use wireless or wired options.
- Close the laptop lid gently.
- The external monitor should turn on and display your desktop.
Clamshell mode works on both Windows and macOS. On a Mac, you may need to go to System Settings and make sure the external display is set as the primary display.
Adjusting Display Settings for the Best Experience
Once your external monitor is running, take a few minutes to tweak the settings. This makes a big difference in how comfortable your setup feels.
- Resolution: Set the resolution to match your monitor’s native setting for the sharpest image.
- Scale and layout: Adjust text size so everything is easy to read.
- Orientation: Choose landscape or portrait mode depending on your work.
- Refresh rate: If your monitor supports a higher refresh rate, enable it for smoother visuals.
These small adjustments make a huge difference. A well-configured external monitor setup feels just as natural as using the built-in screen.
What If the Laptop Screen Is Broken?
If your laptop screen is cracked or not working, you can still use the machine with an external monitor. Simply connect the monitor, open the lid (if possible), and use the external display. Even if you cannot see the laptop screen, you can still control everything through the external monitor.
Some laptops let you control brightness and display settings even when the built-in screen is off. If your laptop has a function key for display switching, press it to send all output to the external monitor.
Benefits of Using Only an External Monitor with Your Laptop
There are many good reasons to run a laptop with just an external monitor. Let us look at the biggest benefits.
More Screen Space
Most laptop screens range from 13 to 17 inches. An external monitor can be 24 inches, 27 inches, or even larger. More screen space means you can have more windows open at the same time. This boosts productivity significantly.
Better Ergonomics
Laptop screens are small and sit low on your desk. This forces you to hunch forward, which can hurt your neck and back over time. An external monitor placed at eye level fixes this problem. You sit up straight, your eyes are at the right height, and your neck stays comfortable.
Cleaner Desk Setup
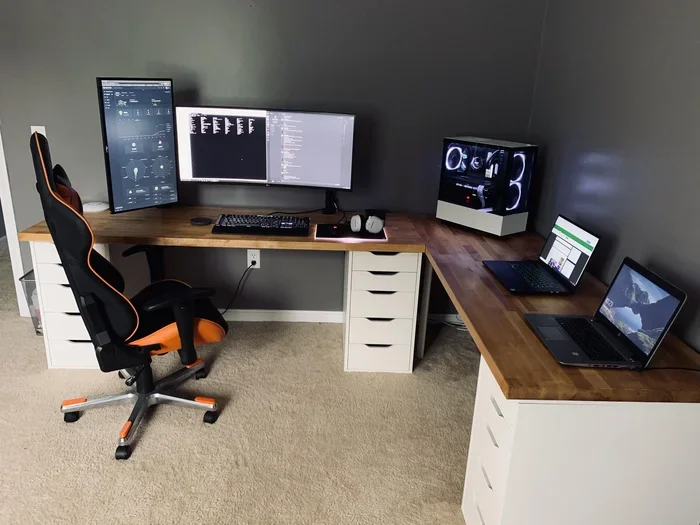
When you remove the laptop screen from the equation, your desk looks much cleaner. You can mount the monitor on a monitor arm or stand, free up desk space, and create a sleek, minimal workstation. Many people find that a headless laptop setup looks and feels much better than a cluttered laptop-and-monitor combo.
Cost Savings
If your laptop screen is damaged, replacing it can be expensive. Using an external monitor as your only display saves you money. A good 24-inch monitor costs much less than a laptop screen replacement. Plus, you get a bigger and better display in the process.
Can You Physically Remove the Laptop Screen?
So far, we have talked about using an external monitor while keeping the laptop intact. But what if you actually want to remove the laptop screen? Can you do that? The short answer is yes, but there are important things to know first.
The Process of Removing a Laptop Screen
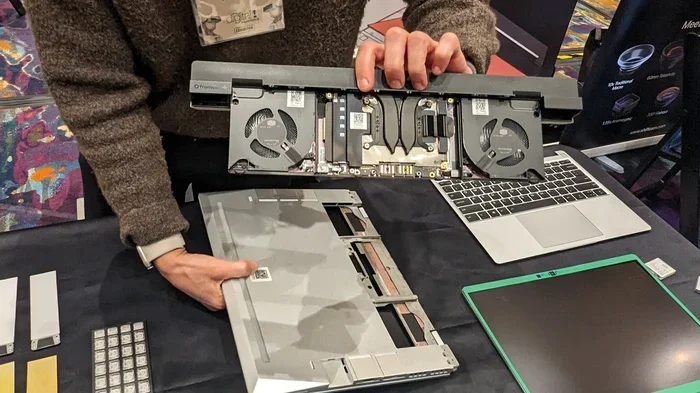
Physically removing a laptop screen involves detaching the display panel from the hinges and disconnecting the video cable. Here is a simplified overview of what the process looks like:
- Remove the bezel around the screen. This is the plastic frame that holds the display in place.
- Unscrew the mounting brackets that secure the screen to the lid.
- Carefully disconnect the eDP cable from the motherboard.
- Lift the screen out gently.
This process requires patience and the right tools. Each laptop model is different, so look up a teardown guide for your specific laptop before you start.
Risks of Removing the Laptop Screen
Before you grab a screwdriver, consider these risks:
- Voided warranty: Opening the laptop and removing parts usually voids the manufacturer’s warranty.
- Damage to the hinge: The hinges are fragile. Removing the screen can break them if you are not careful.
- Cable damage: The eDP cable is thin and can tear easily during removal.
- No built-in webcam or mic: Many laptop screens have the camera and microphone built in. Removing the screen means losing these features.
Because of these risks, most people prefer to simply close the lid and use an external monitor. Physical removal should only be done if you are experienced with laptop disassembly or if the screen is beyond repair and you want to repurpose the laptop as a desktop.
Repurposing a Laptop Without a Screen
Some people remove the laptop screen permanently and turn the machine into a small desktop computer. This works well for media centers, server setups, or compact workstations. If you go this route, make sure you have a good laptop docking station to handle all your connections.
You can plug in a monitor, keyboard, mouse, and external storage all through the dock. The laptop becomes a small, powerful desktop unit that fits in tight spaces. This is a popular setup for people who want the power of a laptop in a compact form factor.
Common Mistakes to Avoid When Using an External Monitor Only
Setting up a laptop without its built-in screen is simple, but there are a few mistakes that trip people up. Here are the most common ones and how to avoid them.
Forgetting to Plug in the Charger
In clamshell mode, your laptop still uses power. If you do not keep it plugged in, the battery will drain. Always connect your charger when using an external monitor as your primary display. Some docking stations even charge your laptop through a single USB-C cable, which makes this even easier.
Using the Wrong Cable
Not all cables support the same resolution or refresh rate. Using a cheap or old cable can result in a blurry picture or no signal at all. Always use a high-quality cable that matches your laptop and monitor capabilities.
Ignoring Display Settings
After connecting an external monitor, do not just leave the default settings. Spend five minutes adjusting the resolution, scale, and display arrangement. This small step makes a huge difference in how pleasant your setup feels.
Not Having Backup Input Devices
When you close the laptop in clamshell mode, you lose access to the built-in keyboard and trackpad. If your external keyboard or mouse stops working, you have no way to control the laptop. Keep a backup input device handy, or use a wireless option that stays connected.
Overheating in Clamshell Mode
Closing the laptop lid traps heat inside. Some laptops are designed to vent heat through the keyboard area. When the lid is closed, those vents are blocked. This can cause your laptop to overheat during long work sessions. Use a laptop cooling pad or keep the laptop on a hard, flat surface to prevent this.
Expert Tips for the Best Headless Laptop Experience
Want to get the most out of your external monitor setup? Here are some expert tips that make a real difference.
Invest in a Good Docking Station
A laptop docking station is the best accessory for a headless setup. It gives you one cable connection that handles video, power, USB devices, and internet. When you sit down at your desk, you plug in one cable and everything just works. When you leave, you unplug and go.
Use a Monitor Arm for Better Ergonomics
A monitor arm lets you adjust the height, angle, and position of your external display. This is much better than a stand that sits on your desk. A monitor arm frees up desk space and lets you position the screen at the perfect eye level.
Set Up Hotkeys for Display Switching
Learn the keyboard shortcut for switching displays on your laptop. On Windows, it is usually the Windows key plus P. On a Mac, it is in the Display settings. Being able to switch between displays quickly saves time and makes your workflow smoother.
Keep Your Laptop Clean
Since you are not using the built-in screen, it is easy to forget about cleaning the laptop. Dust still builds up inside, and the keyboard still collects crumbs. Keep your laptop clean for better performance and longevity.
Conclusion
Can I remove laptop screen and just use external monitor? Absolutely. Whether you close the lid and use clamshell mode or physically remove the screen, an external monitor setup works great. Your laptop keeps running the same way, your apps stay open, and you get a bigger, better display to work with.
The key is to use the right cable, adjust your display settings, and avoid the common mistakes we covered. With a simple setup and a few smart choices, you can turn any laptop into a powerful desktop workstation. Give it a try, and you might never go back to the small laptop screen again.
Start with a basic connection, test it out, and then fine-tune your setup over time. You will be surprised at how natural and productive a headless laptop setup can be. It is one of the simplest upgrades you can make to your workspace, and the results speak for themselves.
Frequently Asked Questions
Is it safe to use an external monitor as my laptop’s only display?
Yes, it is completely safe. Your laptop works the same way whether you use the built-in screen or an external monitor. The graphics card simply sends the output to the connected display. There is no risk of damage to your laptop.
Can I close my laptop and still use it with an external monitor?
Yes, this is called clamshell mode. You close the lid, connect a keyboard and mouse, and the external monitor becomes your main display. Just make sure your laptop is plugged in so the battery does not drain.
Do I need any special equipment to remove my laptop screen?
If you are just using an external monitor, you only need a cable or adapter. If you want to physically remove the screen, you need a screwdriver, a plastic spudger, and a teardown guide for your specific laptop model.
Will my laptop perform the same with an external monitor?
Yes, performance stays exactly the same. The external monitor does not affect your laptop’s processor, RAM, or graphics capabilities. The only difference is where the visual output appears.
Can I use a USB-C cable to connect my laptop to an external monitor?
Yes, many modern laptops support video output through USB-C. You can use a USB-C to HDMI or USB-C to DisplayPort cable. Some monitors even accept a single USB-C cable that also charges your laptop.
What happens to my laptop’s webcam and mic if I remove the screen?
If you physically remove the laptop screen, you may lose the built-in webcam and microphone if they are housed in the screen bezel. You can replace these with an external webcam and USB microphone for video calls and meetings.