Can I Install Windows 11 Directly From the USB Drive
Yes, you can install Windows 11 directly from a USB drive. This method works for both clean installs and upgrades. You need a bootable USB flash drive, the Windows 11 ISO file, and a PC that meets the system requirements. The process is simple and takes about 30 to 60 minutes. This guide walks you through every step with clear instructions.
Have you been wondering if you can install Windows 11 directly from a USB drive? The answer is a clear yes. Whether you are building a new PC, replacing a hard drive, or just want a fresh start, a USB installation is one of the simplest ways to get Windows 11 running. This method gives you full control over the installation process. You decide what to keep, what to delete, and how to set up your system.
Installing from a USB drive is also great when your computer won’t boot properly from the internal drive. Maybe the operating system is corrupted, or you are upgrading from an older version of Windows. A USB drive solves all of these problems. In this guide, I will walk you through everything you need to know. From preparing your USB drive to finishing the setup, I have you covered.
Key Takeaways
- USB installation is fast and reliable: Installing Windows 11 from a USB drive is one of the easiest and most popular methods.
- You only need a few things: A USB flash drive of at least 8 GB, the Windows 11 ISO file, and a working PC to create the bootable drive.
- The Media Creation Tool makes it easy: Microsoft’s official tool automates most of the work for you.
- BIOS settings matter: You must set your USB drive as the first boot device to start the installation.
- Troubleshooting is straightforward: Most issues have simple fixes, from USB formatting to BIOS updates.
📑 Table of Contents
- What You Need Before You Start
- Creating a Bootable USB Drive for Windows 11
- How to Install Windows 11 From Your USB Drive
- Quick Tips for a Smooth Installation
- Comparing USB Installation Methods
- Troubleshooting Common USB Installation Issues
- Can I Install Windows 11 Directly From USB on Any Computer?
- Benefits of Installing Windows 11 From a USB Drive
- Final Thoughts
What You Need Before You Start
Before you begin, make sure you have everything ready. Gathering your tools ahead of time saves you frustration later. Here is what you need.
USB Flash Drive Requirements
You need a USB flash drive with at least 8 GB of storage space. A 16 GB drive is even better because it gives you extra room. Make sure the drive is empty or backed up. The installation process will erase everything on the USB drive. You can use any brand of USB drive. SanDisk, Samsung, and Kingston all work well. A USB 3.0 drive is faster, but USB 2.0 will still work.
System Requirements for Windows 11
Your computer must meet the Windows 11 system requirements before you start. Here are the key specs:
- Processor: 1 GHz or faster with at least two cores on a compatible 64-bit processor
- RAM: 4 GB minimum
- Storage: 64 GB or more
- TPM: Trusted Platform Module version 2.0
- Secure Boot: UEFI firmware with Secure Boot capability
- Graphics: DirectX 12 compatible with a WDDM 2.0 driver
- Display: At least 720p with a diagonal size greater than 9 inches
If your PC does not meet these requirements, you can still install Windows 11 using workarounds. But I recommend checking your hardware first. Use the PC Health Check app from Microsoft to verify compatibility.
Creating a Bootable USB Drive for Windows 11
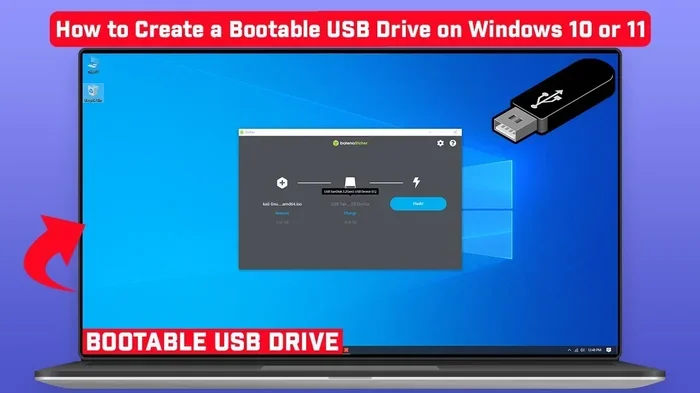
Now comes the most important step. You need to create a bootable USB drive that contains the Windows 11 installation files. There are two main ways to do this. I will cover both.
Method 1: Using the Media Creation Tool
Microsoft offers a free tool called the Media Creation Tool. This is the easiest and most reliable way to create your bootable USB. Here is how to do it:
- Go to the official Microsoft Windows 11 download page.
- Click on “Download now” next to the Media Creation Tool.
- Run the tool once it downloads.
- Accept the license terms.
- Select “Create installation media for another PC.”
- Choose your language, edition, and architecture (64-bit or ARM64).
- Select “USB flash drive” as the media type.
- Pick your USB drive from the list.
- Wait for the tool to download and prepare the files.
The Media Creation Tool handles everything for you. It downloads the Windows 11 ISO file, formats the USB drive, and copies all the necessary files. This whole process takes about 15 to 20 minutes depending on your internet speed.
Method 2: Using Rufus (Alternative Method)
If you prefer more control, you can use a free tool called Rufus. This method is great if the Media Creation Tool does not work for you. Here is what to do:
- Download Rufus from the official website (rufus.ie).
- Download the Windows 11 ISO file from Microsoft’s website.
- Open Rufus and select your USB drive.
- Click “SELECT” and choose the Windows 11 ISO file.
- Leave the partition scheme as GPT and the target system as UEFI.
- Click “START” and wait for the process to finish.
Rufus gives you more options for customization. It is especially useful if you need to install Windows 11 on a PC that does not meet the official TPM 2.0 requirement.
How to Install Windows 11 From Your USB Drive
Once your bootable USB is ready, it is time to install Windows 11 on your target computer. This process is straightforward, but you need to pay attention to a few details.
Setting BIOS Boot Priority
Before the installation begins, you need to tell your computer to boot from the USB drive instead of the internal hard drive. Here is how:
- Plug the USB drive into the PC where you want to install Windows 11.
- Restart the computer.
- Press the BIOS key repeatedly as the computer starts. Common keys are F2, F12, Del, or Esc. Check your motherboard or PC manufacturer’s website for the exact key.
- In the BIOS menu, find the “Boot” or “Boot Order” section.
- Move the USB drive to the top of the boot priority list.
- Save your changes and exit the BIOS.
Your computer will now restart and boot from the USB drive. You should see the Windows Setup screen appear.
The Windows Setup Wizard
Once the Windows Setup screen appears, follow these steps:
- Choose your language, time format, and keyboard layout.
- Click “Install Now.”
- Enter your product key. You can skip this step if you plan to activate later.
- Select the edition of Windows 11 you want to install.
- Accept the license terms.
- Choose “Custom: Install Windows only (advanced)” for a clean install.
- Select the drive or partition where you want to install Windows 11.
- Click “Next” and wait for the installation to complete.
The installation process takes about 20 to 30 minutes. Your computer will restart several times during this process. Do not turn off your PC while it is installing. Once it finishes, you will see the Windows 11 desktop and setup wizard.
Quick Tips for a Smooth Installation
A few small preparations can make a big difference. Here are some tips that will help you avoid common problems.
- Use a USB 3.0 port: This speeds up both the creation of the bootable drive and the installation process itself.
- Back up your data: A clean install erases everything on the selected drive. Make sure your important files are saved elsewhere.
- Keep your product key handy: If you are upgrading from Windows 10, your license should activate automatically. But having the key nearby is always smart.
- Connect to a stable Wi-Fi network: Windows 11 needs internet access to download updates and drivers during setup.
- Update your BIOS first: An outdated BIOS can cause boot issues. Check your manufacturer’s website for the latest firmware update.
Common Mistakes to Avoid
Many people run into trouble because of simple oversights. Here are the mistakes I see most often:
- Using a USB drive that is too small: If your drive has less than 8 GB, the Media Creation Tool will fail. Always use 8 GB or larger.
- Skipping the BIOS boot order: If you forget to change the boot priority, your PC will boot from the hard drive instead of the USB. You will not see the Windows Setup screen.
- Selecting the wrong partition: Double-check which drive you are installing to. Installing to the wrong partition can erase your existing data.
- Not formatting the USB drive first: If the USB drive has old files or an incorrect file system, the bootable creation process may fail. Format it as NTFS or FAT32 before starting.
- Ignoring the TPM requirement: Some users skip the TPM check and run into activation or update problems later. Make sure your PC supports TPM 2.0.
Expert Insights
Experienced IT professionals recommend a few extra steps that most guides skip. First, always verify the ISO file integrity after downloading. You can do this by checking the SHA-256 hash on Microsoft’s website. A corrupted ISO file can cause the installation to fail midway. Second, if you are installing on a laptop, keep it plugged into power during the entire process. A low battery can interrupt the installation and cause problems. Third, disconnect unnecessary USB devices during installation. External hard drives, printers, and card readers can sometimes confuse the Windows Setup wizard.
Comparing USB Installation Methods
There are several ways to install Windows 11, and each has its pros and cons. Here is a quick comparison of the most common methods.
| Method | Difficulty | Speed | Best For |
|---|---|---|---|
| USB Drive | Easy | Fast | Clean installs, new PCs, recovery |
| In-Place Upgrade | Very Easy | Medium | Upgrading from Windows 10 |
| Network Installation | Hard | Slow | IT professionals, large deployments |
| Cloud Download | Easy | Medium | PCs with fast internet and no USB |
The USB method stands out because it gives you the most control. You can perform a clean install, which removes all old files and settings. This is the best way to get the fastest and most stable Windows 11 installation. The in-place upgrade method keeps your files and apps, but it can carry over old problems. A clean USB install gives you a fresh start.
Troubleshooting Common USB Installation Issues
Sometimes things do not go as planned. Here are the most common problems and how to fix them.
USB Drive Not Showing in BIOS
If your computer does not recognize the USB drive during boot, try these fixes. First, try a different USB port. USB 2.0 ports are more universally compatible than USB 3.0 ports in older BIOS versions. Second, try a different USB drive. Some drives have compatibility issues with certain motherboards. Third, recreate the bootable USB using Rufus instead of the Media Creation Tool. Rufus offers more configuration options that can help with stubborn BIOS setups.
Installation Freezes or Crashes
If the installation freezes during the “Expanding Files” or “Installing Features” stage, try removing any unnecessary USB devices. Also, check that your USB drive is not damaged. A faulty USB drive can cause file corruption during the installation. If the problem persists, try using a different USB port on the back of the motherboard instead of a front panel port.
Windows 11 Does Not Activate After Installation
This is usually not a real problem. If you are upgrading from Windows 10, Windows 11 should activate automatically once you connect to the internet. If it does not, go to Settings, then Update & Security, then Activation. Click “Troubleshoot” and follow the prompts. If you purchased a license, make sure you enter the correct product key.
Can I Install Windows 11 Directly From USB on Any Computer?
The short answer is no, not every computer. Your PC needs to support the Windows 11 hardware requirements. Most computers built after 2018 should work fine. However, older PCs may not have TPM 2.0 or UEFI firmware. In those cases, you can still install Windows 11 using registry hacks or modified ISO files. But these methods are not officially supported by Microsoft and may cause problems with future updates.
If your computer is too old, you might be better off staying with Windows 10. Microsoft will support Windows 10 until October 2025. After that, it will no longer receive security updates. So even if you can install Windows 11 on an older PC, it may not be the best choice for long-term security.
Benefits of Installing Windows 11 From a USB Drive
There are many reasons why installing from a USB drive is a great choice. First, it is portable. You can carry your Windows 11 installation on a small drive and use it on multiple computers. Second, it is fast. USB 3.0 drives transfer data much faster than optical discs. Third, it gives you a clean installation. You are not stuck with old files, registry entries, or software that might be causing problems. Fourth, it works even when your PC has no operating system installed. You can set up a brand-new PC from scratch using just a USB drive.
Another big benefit is that you can create the bootable USB on one computer and use it on another. You do not need the target computer to have a working operating system. This is incredibly useful for repairing broken PCs or setting up multiple computers at once.
Final Thoughts
Installing Windows 11 directly from a USB drive is easier than most people think. With just a USB flash drive and the Media Creation Tool, you can have a fresh copy of Windows 11 running in under an hour. The key is preparation. Make sure your USB drive is compatible, your PC meets the system requirements, and you follow each step carefully. If you run into any issues, the troubleshooting tips in this guide should help you get back on track.
Do not be afraid to try a clean installation. It is one of the best ways to keep your computer running fast and smoothly. A fresh Windows 11 install removes months of digital clutter and gives your system a new lease on life. So grab a USB drive, follow this guide, and enjoy your new Windows 11 setup.
Frequently Asked Questions
Can I install Windows 11 from a USB drive on a laptop?
Yes, you can install Windows 11 from a USB drive on any laptop that meets the system requirements. The process is the same as on a desktop computer. Just make sure your laptop is plugged into power during the installation. Use the boot menu key (usually F12 or F2) to select the USB drive as the boot device.
What size USB drive do I need to install Windows 11?
You need at least an 8 GB USB flash drive. However, a 16 GB drive is recommended because it gives you extra space and avoids potential issues with smaller drives. Make sure the drive is empty before you start, as the formatting process will erase all data on it.
Do I need internet access to install Windows 11 from USB?
No, you do not need internet access to start the installation. The USB drive contains all the necessary files. However, you will need an internet connection to download updates, drivers, and to activate Windows 11 after the installation is complete. If you do not have internet access, you can skip activation and connect later.
Can I use the same USB drive to install Windows 11 on multiple computers?
Yes, you can reuse the same bootable USB drive on multiple computers. The USB drive will not be affected by the installation process on the target PC. You can keep the bootable USB in a safe place and use it anytime you need to reinstall Windows 11 or set up a new computer.
What is the difference between a clean install and an upgrade from USB?
A clean install erases everything on the selected drive and gives you a fresh copy of Windows 11. An upgrade installation keeps your files, apps, and settings while replacing the old operating system. A clean install generally results in better performance and fewer problems, but you will need to reinstall your applications and restore your files from a backup.
Why does my PC not boot from the USB drive after installation?
This usually happens because the BIOS boot order has not been changed back. After Windows 11 is installed, go into the BIOS and move your internal hard drive back to the top of the boot priority list. Also make sure you removed the USB drive after the installation is complete and before the first restart.
=== CONCLUSION ===
Can I install Windows 11 directly from a USB drive? Absolutely. This method is fast, reliable, and gives you full control over your installation. Whether you are performing a clean install or setting up a new PC, a bootable USB drive is all you need. Follow the steps in this guide, avoid the common mistakes, and you will have Windows 11 running smoothly in no time.
Remember to back up your data, check your system requirements, and take your time with each step. A Windows 11 USB installation is one of the most useful skills you can have as a computer user. Keep your bootable USB drive in a safe place, and you will always have a way to reinstall or repair your system whenever you need it.