Can I Make A Bootable USB Drive For Another Computer
Yes, you absolutely can make a bootable USB drive for another computer. It is a simple process that works across different PCs, whether you use Windows, Mac, or Linux. You just need a USB flash drive, an ISO file, and a free tool like Rufus or Etcher. This guide covers everything you need to know, from choosing the right USB drive to fixing common boot issues. Follow along and you will have your bootable USB ready in minutes.
Have you ever needed to install an operating system on a computer that does not have a working DVD drive? Or maybe you want to fix a PC that will not even start up properly. In both cases, a bootable USB drive is your best friend. The good news is that making a bootable USB for another computer is not only possible but also really straightforward. You do not need to be a tech expert to get this done. In this guide, I will walk you through every single step so you can create a USB flash drive that boots on any machine you plug it into.
Whether you are a student setting up a new laptop, an IT professional helping a client, or someone trying to rescue an old family computer, this article has you covered. I will explain the tools you need, the process step by step, and how to avoid the most common pitfalls. By the end, you will feel confident creating OS installation media on your own. Let us dive right in.
Key Takeaways
- Cross-Computer Compatibility: You can create a bootable USB on one computer and use it on a completely different machine without issues.
- Simple Tools Required: Free software like Rufus, Etcher, and the Windows USB/DVD Download Tool make the process easy for beginners.
- USB Drive Selection Matters: Using a reliable USB flash drive with enough storage (at least 8GB) ensures a smooth boot experience.
- BIOS/UEFI Settings Are Key: Changing the boot order in BIOS or UEFI settings is essential for the target computer to recognize the USB drive.
- Common Mistakes Are Avoidable: Skipping proper formatting, using a corrupted ISO file, or ignoring BIOS settings are the most frequent pitfalls.
- Works Across Operating Systems: You can make bootable USBs for Windows, Linux, or even macOS on almost any computer.
📑 Table of Contents
- What Is a Bootable USB Drive and Why Do You Need One?
- What You Need Before You Start
- Step-by-Step: How to Make a Bootable USB for Another Computer
- How to Boot from the USB Drive on Another Computer
- Can You Make a Bootable USB on a Mac for a Windows PC?
- USB Drive Formatting: FAT32 vs NTFS vs exFAT
- Common Mistakes to Avoid When Creating a Bootable USB
- Expert Insights: Tips for Advanced Users
- Key Takeaways
- Frequently Asked Questions
- Conclusion
What Is a Bootable USB Drive and Why Do You Need One?
A bootable USB drive is simply a USB flash drive that contains a complete operating system or installation files. When you plug it into a computer and turn it on, the PC boots from the USB instead of the hard drive. This lets you install a fresh operating system, run a live version of Linux, or repair a broken system.
Think of it like a portable operating system on a stick. You carry it around, plug it into any compatible computer, and it boots up just like a regular installation disk. Bootable USB drives have replaced CDs and DVDs for most people because they are faster, more convenient, and work with modern computers that no longer have optical drives.
Why Create a Bootable USB for Another Computer?
There are several situations where you might need to make a bootable USB for another computer:
- Installing a fresh operating system on a new or reformatted PC.
- Rescuing a computer that will not boot into Windows due to corruption or malware.
- Running a portable Linux environment for troubleshooting or privacy.
- Setting up multiple computers with the same operating system, like in a small office or school lab.
- Creating a system recovery drive that you can use on any similar machine.
The beauty of a bootable USB is that it works on almost any computer with a USB port. You do not need the original computer that the USB was created on. This makes it an incredibly versatile tool for computer repair and system deployment.
What You Need Before You Start
Before you begin, gather a few things. The process is simple, but having the right tools saves you time and frustration.
1. A USB Flash Drive
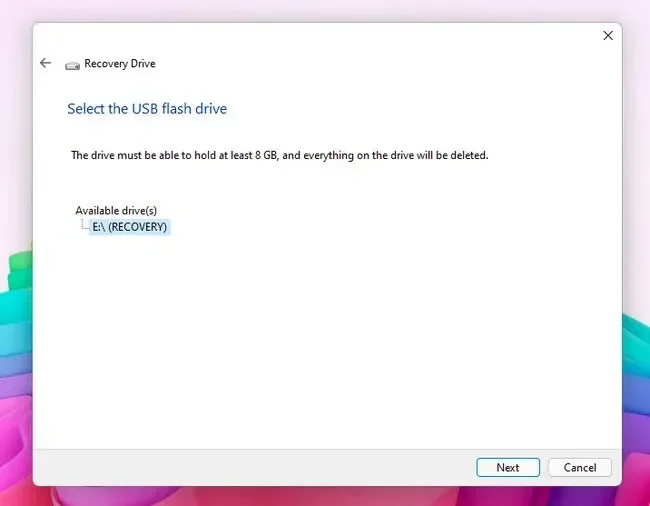
You need a USB flash drive with at least 8GB of storage. 16GB is even better if you plan to store extra files alongside the installation media. Make sure the drive is empty or that you back up any data on it, because the formatting process will erase everything.
Use a reliable brand if possible. Cheap, no-name USB drives sometimes fail during the writing process, which can corrupt your installation media. A good-quality USB stick will save you headaches down the road.
2. An ISO File
An ISO file is an exact copy of a software disc, packaged into a single file. For example, if you want to install Windows 11, you download the Windows 11 ISO file from Microsoft’s website. If you want Linux, you grab the ISO for your preferred distribution like Ubuntu or Fedora.
Make sure you download the ISO from a trusted source. Using a corrupted or tampered ISO file can cause problems during installation or even harm your computer.
3. A Free Bootable USB Tool
You need software to write the ISO file onto the USB drive and make it bootable. Here are the most popular and reliable options:
- Rufus (Windows only) – A lightweight, fast, and widely trusted tool.
- BalenaEtcher (Windows, Mac, Linux) – A user-friendly option that works across all platforms.
- Windows USB/DVD Download Tool (Windows only) – Microsoft’s official tool for creating Windows installation media.
- UNetbootin (Windows, Mac, Linux) – Great for Linux ISO files specifically.
Step-by-Step: How to Make a Bootable USB for Another Computer
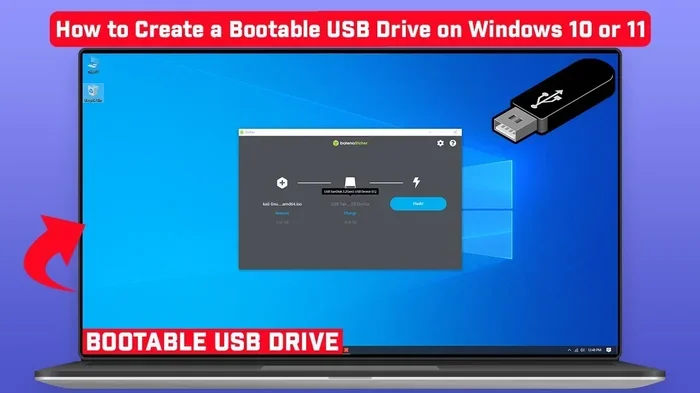
Now for the fun part. I will walk you through the process using Rufus as the primary example, since it is the most popular and works with almost every ISO file. The steps are similar for other tools as well.
Step 1: Download and Install Rufus
Go to the official Rufus website at rufus.ie and download the latest version. Rufus is a small, free program that does not require installation. Just download the executable file and run it. It works on Windows 7 and later, so almost everyone can use it.
Rufus is open-source and regularly updated, which means it supports the latest Windows versions, Linux distributions, and even some macOS ISO files. It is a go-to tool for anyone working with bootable USB drives.
Step 2: Insert Your USB Flash Drive
Plug your USB flash drive into the computer you are working on. Make sure it is the only USB drive connected, or you could accidentally format the wrong one. Rufus will automatically detect your USB drive and display it in the device dropdown menu.
If your USB drive does not show up, try a different USB port. Some older computers have USB 2.0 ports that work better for this purpose, though USB 3.0 ports are also fine.
Step 3: Select Your ISO File
Click the SELECT button in Rufus and browse to the ISO file you downloaded. Once selected, Rufus will display some details about the ISO, like the file system type and the estimated size. This is a good time to double-check that you picked the right ISO file.
Pro tip: If you are creating a Windows installation USB, Rufus will usually handle everything automatically. For Linux ISO files, you might need to choose the right partition scheme (MBR for older computers, GPT for newer UEFI systems).
Step 4: Start the Process
Click the START button in Rufus. A warning will appear telling you that all data on the USB drive will be erased. Click OK to continue. Rufus will now write the ISO file to the USB drive and make it bootable. This usually takes between 5 and 15 minutes depending on the size of the ISO and the speed of your USB drive.
Do not remove the USB drive or shut down the computer while Rufus is working. Let it finish completely. Once it says READY, your bootable USB drive is ready to go.
Step 5: Safely Remove the USB Drive
Once Rufus finishes, click the close button and safely eject the USB drive from your computer. Now you can take it to the other computer and use it to install or repair an operating system.
That is really all there is to it! The process is the same whether you are using Etcher or the Windows USB/DVD Download Tool. The main difference is the user interface. Rufus just happens to be the most feature-rich and reliable option for most users.
How to Boot from the USB Drive on Another Computer
Creating the bootable USB is only half the battle. You also need to tell the target computer to boot from the USB drive instead of its hard drive. This is done through the BIOS or UEFI settings.
Accessing BIOS or UEFI Settings
Every computer has a built-in firmware that controls the boot process. On older computers, this is called BIOS. On newer computers, it is called UEFI. To access it:
- Plug the bootable USB drive into the target computer.
- Turn on the computer.
- Immediately start pressing the boot menu key repeatedly. This is usually F12, F2, F10, F9, or DEL depending on the manufacturer.
- Look for a menu that lets you select the boot device.
- Choose your USB flash drive from the list.
If you miss the boot menu, you can also restart the computer and enter BIOS/UEFI directly. Once inside, look for a section called Boot Order or Boot Priority and move the USB drive to the top of the list.
Common Boot Issues and How to Fix Them
Sometimes things do not go perfectly the first time. Here are some common issues and their solutions:
- The computer does not recognize the USB drive. Try a different USB port, preferably a USB 2.0 port. Also check that the USB drive is properly formatted.
- You get a “No bootable device” error. This usually means the BIOS is not set to boot from USB. Go back into BIOS and double-check the boot order.
- The USB drive was created but will not boot. The ISO file might be corrupted, or you might need to recreate it using a different tool like Etcher.
- Secure Boot is blocking the USB. Some computers have Secure Boot enabled, which can prevent booting from certain USB drives. You may need to disable Secure Boot in BIOS settings temporarily.
These issues are normal and easy to fix. Once you have done it a couple of times, you will be able to troubleshoot them in minutes.
Can You Make a Bootable USB on a Mac for a Windows PC?
Yes, absolutely! This is one of the most common questions people ask. Can I make a bootable USB for another computer if I am using a Mac? The answer is yes. You can create a bootable USB for a Windows PC on a Mac, and vice versa.
On a Mac, you can use a built-in terminal command to create a bootable USB for Windows. Alternatively, tools like BalenaEtcher work on Mac and make the process even simpler. The resulting USB drive works on any Windows PC, regardless of what computer it was created on.
This cross-platform compatibility is one of the biggest advantages of using a bootable USB drive. You are not locked into using the same operating system on both computers. A USB flash drive created on a Mac works perfectly on a Windows machine, and a drive created on Windows works on a Mac too (for creating macOS installation media).
Quick Tips for Cross-Platform USB Creation
- Always use a freshly formatted USB drive for best results.
- Make sure the ISO file matches the target computer’s architecture (64-bit vs 32-bit).
- Use GPT partition scheme for UEFI computers and MBR for older BIOS systems.
- If you are unsure, Etcher is the safest option because it handles most of the settings automatically.
USB Drive Formatting: FAT32 vs NTFS vs exFAT
When you create a bootable USB, the formatting of the drive matters more than most people realize. Different file systems have different strengths, and choosing the right one ensures your USB boot drive works properly.
FAT32
FAT32 is the most compatible file system for booting. Almost every computer, old or new, can read a FAT32-formatted USB drive. However, FAT32 has a limitation: it cannot handle individual files larger than 4GB. This can be a problem for some Windows ISO files.
NTFS
NTFS supports larger files and is the default file system for modern Windows installations. However, not all computers can boot from an NTFS-formatted USB drive, especially older ones with legacy BIOS firmware.
exFAT
exFAT is a good middle ground. It supports large files like NTFS but has wider compatibility than NTFS. Some bootable USB tools use exFAT by default for this reason.
Most modern bootable USB creation tools handle the formatting automatically. They choose the best file system based on the ISO file and the target computer’s firmware. You generally do not need to worry about this unless you are creating the drive manually through disk management tools.
Common Mistakes to Avoid When Creating a Bootable USB
Even though the process is simple, there are a few mistakes that trip up a lot of people. Avoiding these will save you time and frustration:
- Using a corrupted ISO file. Always download ISO files from official sources and verify the file size and checksum if possible.
- Skipping the backup step. The formatting process erases everything on the USB drive. Always back up any important files first.
- Using a low-quality USB drive. Cheap USB drives can fail during the writing process. Invest in a reliable brand like SanDisk, Samsung, or Kingston.
- Ignoring BIOS settings on the target computer. Creating a perfect bootable USB means nothing if the target computer is not set to boot from USB.
- Using the wrong partition scheme. MBR works with older BIOS systems. GPT works with newer UEFI systems. Using the wrong one can cause boot failures.
- Removing the USB drive too early. Wait for the tool to finish completely before ejecting or removing the drive.
These mistakes are easy to avoid once you know about them. Being mindful of these steps will make your system restore or OS installation process smooth and hassle-free.
Expert Insights: Tips for Advanced Users
If you are comfortable with technology and want to take your bootable USB creation skills to the next level, here are some advanced tips:
- Create a multiboot USB drive. Tools like Ventoy let you put multiple ISO files on a single USB drive. This is perfect for IT professionals who need to carry several operating systems on one USB stick.
- Encrypt your bootable USB. If you are carrying sensitive recovery tools, consider encrypting the USB drive so only authorized users can access it.
- Keep your USB drives labeled. Use a label or a marker to identify what each bootable USB contains. This saves time when you have multiple drives for different purposes.
- Test your bootable USB regularly. A bootable USB that has been sitting in a drawer for months might not work. Test it on a spare computer periodically to make sure it is still functional.
These tips are especially useful if you maintain a collection of OS installation media for troubleshooting or setting up new computers. A well-organized set of bootable USB drives can save you hours of work when you need them most.
Key Takeaways
- Cross-Computer Compatibility: You can create a bootable USB on one computer and use it on a completely different machine without issues.
- Simple Tools Required: Free software like Rufus, Etcher, and the Windows USB/DVD Download Tool make the process easy for beginners.
- USB Drive Selection Matters: Using a reliable USB flash drive with enough storage (at least 8GB) ensures a smooth boot experience.
- BIOS/UEFI Settings Are Key: Changing the boot order in BIOS or UEFI settings is essential for the target computer to recognize the USB drive.
- Common Mistakes Are Avoidable: Skipping proper formatting, using a corrupted ISO file, or ignoring BIOS settings are the most frequent pitfalls.
- Works Across Operating Systems: You can make bootable USBs for Windows, Linux, or even macOS on almost any computer.
Frequently Asked Questions
Can I use any USB flash drive to create a bootable USB?
Most USB flash drives will work, but you should use one with at least 8GB of storage and from a reputable brand. Very old or very cheap USB drives may fail during the writing process or not have enough speed to boot properly. A reliable USB stick ensures your bootable USB drive works every time.
Will the bootable USB work on a computer with a different operating system?
Yes, in most cases. A bootable USB created on a Windows PC can be used on a computer running Linux or vice versa. The key is matching the ISO file to the target operating system, not the computer where the USB was created. This makes USB boot drives incredibly versatile tools for cross-platform work.
Do I need an internet connection to create a bootable USB?
You need an internet connection only to download the ISO file and the bootable USB tool. Once you have both files, you can create the bootable USB completely offline. This is useful in environments with limited or no internet access, such as during on-site computer repairs.
Can I reuse a bootable USB drive for other purposes?
Yes, you can reuse a bootable USB drive. Simply format it and use the same tool to write a new ISO file onto it. However, keep in mind that formatting erases all data on the drive, so back up any files you want to keep first.
Is it safe to create a bootable USB on a public or shared computer?
Generally, yes. The process of creating a bootable USB does not install anything permanently on the host computer. However, if you are concerned about privacy, avoid saving the ISO file or tool settings on the shared computer. Use a portable version of tools like Rufus or Etcher from a USB drive if possible.
What is the difference between MBR and GPT partition schemes?
MBR (Master Boot Record) is the older partitioning style used by computers with traditional BIOS firmware. GPT (GUID Partition Table) is the newer standard used by computers with UEFI firmware. For the best compatibility, use GPT for modern computers and MBR for older ones. Most bootable USB tools let you choose the partition scheme during the creation process.
Conclusion
Making a bootable USB drive for another computer is one of the most useful skills you can learn. Whether you need to install a fresh operating system, rescue a broken PC, or carry a portable troubleshooting environment, a bootable USB flash drive gets the job done. The process is simple, fast, and works across different computers and operating systems.
All you need is a reliable USB stick, an ISO file, and a free tool like Rufus or Etcher. Follow the steps in this guide, avoid the common mistakes, and you will have a working bootable USB in no time. Once you have done it a few times, you will wonder how you ever managed without one.
So go ahead, grab a USB flash drive, download your ISO file, and give it a try. You will be surprised how easy and empowering it is to have a portable operating system right at your fingertips. Your future self, facing a computer emergency, will thank you for it.