Can I Print Stickers On A Regular Printer At Home Easily
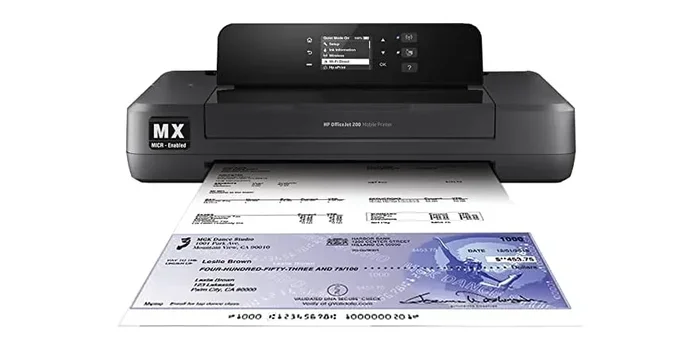
Yes, you can print stickers on a regular printer at home with the right paper, settings, and a little patience. Whether you use an inkjet or laser printer, printing stickers at home saves money and opens up creative possibilities. This guide walks you through everything from choosing sticker paper to achieving professional-quality results.
Have you ever wondered whether your everyday home printer can handle sticker production? The answer is a clear yes. You do not need an expensive specialty machine to create beautiful stickers right from your desk. Printing stickers on a regular printer has become incredibly accessible, and thousands of people do it every day for fun, business, and craft projects.
Whether you want to label your homemade jam jars, create custom laptop decals, or launch a small sticker business, your existing printer can do the job. The secret lies in understanding the right materials, settings, and techniques. This guide covers everything you need to know about home sticker printing from start to finish.
We will walk you through printer types, paper choices, design tips, and step-by-step instructions. By the end, you will feel confident starting your own DIY sticker projects at home. Let us dive in.
Key Takeaways
- Regular printers work great for stickers: Both inkjet and laser printers handle home sticker printing with the correct setup.
- Sticker paper is the key ingredient: Using proper printable sticker sheets or adhesive paper makes all the difference in quality.
- Design matters as much as printing: Your sticker design, resolution, and color settings directly impact the final result.
- Cutting tools simplify the process: A paper cutter or craft knife helps you achieve clean, professional edges on your DIY stickers.
- Avoid common mistakes: Wrong paper type, incorrect printer settings, and low-resolution images are the top pitfalls to watch for.
📑 Table of Contents
- Can You Really Print Stickers on a Regular Printer?
- Choosing the Right Sticker Paper for Your Printer
- How to Set Up Your Printer for Sticker Printing
- Designing Your Stickers for Best Results
- Cutting and Finishing Your Printed Stickers
- Common Mistakes to Avoid When Printing Stickers at Home
- Creative Ideas for Home-Printed Stickers
- Final Thoughts on Printing Stickers at Home
Can You Really Print Stickers on a Regular Printer?
The short answer is absolutely. A regular printer can produce high-quality stickers when paired with the right materials. Many people assume they need a commercial printing press or a dedicated sticker machine. In reality, a standard inkjet or laser printer handles this task wonderfully.
Sticker printing at home has exploded in popularity. People love the freedom to design custom printable stickers without minimum order quantities. You print exactly what you want, when you want it. This flexibility makes home printing ideal for personal projects and small businesses alike.
Before you start, though, you need to understand a few basics. Not all printers perform equally well for sticker production. And not all sticker papers work with every printer type. We will cover these details below so you can set yourself up for success.
Inkjet vs. Laser Printers for Sticker Printing
Most home printers fall into two categories: inkjet and laser. Both can produce excellent stickers, but they differ in important ways.
Inkjet printers use liquid ink sprayed onto paper. They tend to produce vibrant colors and smooth gradients. This makes them popular for color printing stickers with photos or detailed artwork. Inkjet printers work well with most printable sticker sheets available on the market.
Laser printers use toner powder fused onto paper with heat. They produce sharp text and crisp lines. Laser-printed stickers often resist water and smudging better than inkjet prints. If you plan to sell waterproof stickers, laser printing with vinyl sticker paper gives excellent durability.
Here is a quick comparison to help you choose:
- Inkjet: Better for photo-quality images, wider paper compatibility, lower upfront cost.
- Laser: Better for text-heavy designs, water resistance, faster printing speed.
Whichever type you own, you can create stunning DIY stickers with the right approach.
Choosing the Right Sticker Paper for Your Printer
The paper you choose makes or breaks your sticker project. Regular printer paper simply will not work for stickers. You need adhesive paper or sticker paper specifically designed for printing.
Not all sticker paper is the same. Different types suit different needs and printer models. Let us explore the main options available for home printer sticker production.
Types of Sticker Paper
Glossy sticker paper gives your designs a shiny, professional finish. It is perfect for product labels, decorative decals, and photo stickers. Glossy paper enhances color vibrancy and makes your printable stickers pop.
Matte sticker paper offers a non-reflective, smooth surface. It works well for minimalist designs, text-heavy labels, and indoor stickers. Matte paper is easier to write on with markers if you want to add handwritten notes.
Vinyl sticker paper is the most durable option. It resists water, UV light, and scratches. Vinyl is ideal for outdoor stickers, laptop decals, and bumper stickers. Most vinyl papers work best with laser printers, though some inkjet-compatible options exist.
Clear sticker paper lets the background of your design show through. It creates a window-like effect popular for product labels and window decals. Clear paper comes in both glossy and matte finishes.
Matching Paper to Your Printer
Always check that your sticker paper is compatible with your printer type. Inkjet sticker paper has a special coating that absorbs liquid ink properly. Using laser paper in an inkjet printer can cause smearing and poor adhesion.
Similarly, laser sticker paper withstands the heat of a laser printer. Inkjet paper may warp or melt under laser temperatures. Most sticker paper brands clearly label whether they work with inkjet, laser, or both printers.
When shopping for sticker paper for regular printer use, look for brands that explicitly state compatibility. Popular options include Avery, Online Labels, and Brother. These brands offer reliable quality for home sticker printing.
How to Set Up Your Printer for Sticker Printing
Setting up your printer correctly is one of the most important steps. Wrong settings lead to wasted paper, blurry prints, and frustrating results. Follow these steps to get the best output every time.
Step-by-Step Setup Process
Start by loading your sticker paper into the printer tray. Most sticker sheets fit standard letter or A4 sizes. Make sure the printable side faces the correct direction. Check your paper packaging for guidance on which side goes up or down.
Next, adjust your printer settings. Go to your print dialog and select the paper type that matches your sticker paper. If you are using glossy paper, choose the glossy or photo paper setting. This tells the printer to adjust ink output and drying time accordingly.
Set your print quality to the highest setting available. High-quality printing ensures sharp details and vivid colors. For vinyl sticker paper, you may want to select the highest DPI (dots per inch) setting, usually 300 DPI or above.
Before printing a full sheet, do a test print on regular paper first. This lets you check alignment, colors, and sizing without wasting expensive sticker sheets. Once the test looks perfect, you can print your actual stickers with confidence.
Printer Settings to Always Check
Here are the key settings to verify before every print job:
- Media Type: Match this to your sticker paper (glossy, matte, vinyl, etc.).
- Print Quality: Use the highest or best quality setting.
- Color Mode: Ensure it is set to color, not grayscale or black and white.
- Scaling: Set to 100% or actual size unless you need a specific resize.
- Orientation: Portrait or landscape depending on your sticker layout.
Getting these settings right dramatically improves your sticker printing results. Take a moment to review them before every job.
Designing Your Stickers for Best Results
Great sticker design goes hand in hand with great printing. Even with perfect printer settings, a poorly designed file will produce disappointing stickers. Understanding basic design principles helps you create professional-looking stickers at home.
Resolution and Image Quality
Resolution is the most critical design factor. Always work at 300 DPI (dots per inch) or higher. Low-resolution images look pixelated and blurry when printed at sticker size. If you are downloading stock images, make sure they are high resolution.
For text-based stickers, use clean fonts that remain legible at small sizes. Decorative fonts may look beautiful on screen but become hard to read once printed. Stick with simple, bold fonts for the best results.
Color Mode and File Format
Always design in CMYK color mode for printing. RGB colors look vibrant on screens but can shift when printed. CMYK ensures your colors match your expectations on paper.
Save your final design as a PDF or PNG file. These formats preserve quality and support transparent backgrounds. Avoid JPEG files for stickers, as they can introduce compression artifacts and reduce sharpness.
When using design software, make sure your canvas size matches your sticker paper dimensions. If you are using a standard 8.5 x 11 inch sheet, set your document size accordingly. This prevents scaling issues and wasted paper.
Using Templates for Quick Designs
If you are new to sticker design, templates save enormous time. Many sticker paper brands offer free templates on their websites. These templates already include cut lines and proper sizing for their specific paper products.
You can also find templates in design tools like Canva, Adobe Illustrator, and GIMP. Simply search for “sticker template” and choose one that matches your paper size. Templates make DIY sticker creation accessible to everyone, regardless of design experience.
Cutting and Finishing Your Printed Stickers
Printing is only half the process. Cutting your stickers cleanly gives them a professional finish. Several tools and techniques make this step easy and efficient.
Cutting Tools for Home Sticker Making
A paper cutter or trimmer works great for straight-edged stickers. It gives precise, consistent cuts every time. Simply align your printed sheet and slice along the edges of each sticker.
For irregular or custom shapes, a craft knife or scissors works well. Place your printed sheet on a cutting mat to protect your table. Take your time and follow the outline of your design carefully.
Some crafters use electronic cutting machines like Cricut or Silhouette. These machines cut sticker shapes automatically from printed sheets. They are a great investment if you plan to produce large volumes of custom stickers regularly.
Adding a Protective Coating
For extra durability, consider applying a clear laminate or sealant over your printed stickers. This adds a layer of protection against moisture, fading, and scratching. It is especially useful for outdoor stickers or products that will be handled frequently.
Spray-on clear coats work well for glossy and matte finishes. Simply spray a light, even layer over the entire sheet and let it dry completely before cutting. Always test on a scrap piece first to ensure the coating does not affect your print quality.
Common Mistakes to Avoid When Printing Stickers at Home
Even experienced sticker makers run into problems occasionally. Knowing the common pitfalls helps you avoid frustration and wasted materials.
Using the Wrong Paper Type
The most frequent mistake is using the wrong paper for your printer type. Putting inkjet paper in a laser printer (or vice versa) causes smearing, poor adhesion, and sometimes printer damage. Always double-check compatibility before loading paper.
If you have ever dealt with issues in other software while preparing your sticker designs, you might relate to problems like a line that won’t delete in Microsoft Excel when working on layout templates. These small frustrations happen, but they are easy to resolve with the right approach.
Ignoring Printer Alignment
Misaligned prints waste sticker paper and ink. Run your printer’s alignment test regularly, especially after loading new paper. Most printers have a built-in alignment tool accessible through the settings menu.
Skipping the Test Print
Never skip the test print on regular paper. It takes just a few seconds and can save you an entire sheet of expensive sticker paper. A quick test reveals alignment issues, color problems, and sizing errors before they cost you real materials.
Overloading the Paper Tray
Sticker paper is thicker than regular paper. Overloading the tray can cause jams and misfeeds. Load fewer sheets than usual and fan them before inserting. This keeps the paper feeding smoothly through the printer.
Creative Ideas for Home-Printed Stickers
Once you master the basics, the creative possibilities are endless. Here are some popular ways people use home-printed stickers in their daily lives.
- Product labels: Create branded labels for candles, soaps, jams, and other handmade products.
- Planner stickers: Design decorative stickers for bullet journals and planners.
- Laptop decals: Personalize your laptop or water bottle with custom vinyl stickers.
- Wedding favors: Print custom labels for wedding favors, gift tags, and party supplies.
- Business branding: Create promotional stickers for your small business or brand.
- Kids’ crafts: Make personalized name stickers, reward stickers, and educational labels.
Each of these applications benefits from the convenience of printing stickers on a regular printer. You control the design, quantity, and quality without leaving your home.
If you ever need to organize contact information for your sticker business, remember that keeping your phone numbers properly formatted helps with customer communication. For iPhone users, learning about adding prefixes to numbers on iPhone can help you manage business contacts more efficiently.
Similarly, when you are building sticker templates or organizing your design files, you might encounter layout challenges in spreadsheet software. If you ever face a stubborn formatting issue like a line that won’t delete in Microsoft Excel, know that these small hurdles are normal and easily solvable.
Final Thoughts on Printing Stickers at Home
Printing stickers on a regular printer is one of the most rewarding DIY skills you can learn. It combines creativity with practical problem-solving, and the results are genuinely satisfying. Whether you are making stickers for personal use, gifts, or a small business, your home printer is capable of producing professional-quality output.
The key is starting with the right materials. Invest in quality sticker paper compatible with your printer type. Take time to learn your printer’s settings and preferences. Design with print quality in mind, and always do test prints before committing to a full sheet.
As you gain experience, you will develop your own workflow and preferences. You will learn which papers work best for your specific printer, which designs look most vibrant, and which cutting methods give the cleanest finish. This knowledge builds over time and makes each project easier and more enjoyable.
So go ahead and give it a try. Print stickers on a regular printer today and discover how simple and fun home sticker production can be. You might just start a new hobby or even a small business from your kitchen table.
Frequently Asked Questions
Can any regular printer print stickers?
Most regular printers can print stickers as long as you use the correct sticker paper. Both inkjet and laser printers work well for home sticker printing. Just make sure your sticker paper matches your printer type and adjust the settings accordingly.
What is the best sticker paper for a regular printer?
The best sticker paper depends on your needs. Glossy paper works great for vibrant colors and photo stickers. Vinyl paper is ideal for durable, waterproof stickers. Matte paper suits minimalist designs and indoor use. Always choose paper specifically rated for your printer type.
Do I need special ink to print stickers?
No, you do not need special ink. Your regular printer ink or toner works perfectly for sticker printing. The key is using sticker paper designed for your printer type. The paper coating handles the adhesive properties, not the ink itself.
Can I make waterproof stickers with a regular printer?
Yes, you can make waterproof stickers using vinyl sticker paper and a laser printer. Vinyl paper resists moisture and UV damage. For extra protection, you can also apply a clear laminate sealant over your printed stickers to boost water resistance.
How do I get clean edges on my printed stickers?
Use a paper cutter for straight edges or a craft knife for custom shapes. Cutting mats protect your surface and make precision cutting easier. For the cleanest results, let your printed stickers dry fully before cutting to prevent smudging.
Is it cheaper to print stickers at home or buy them?
Printing stickers at home is generally much cheaper, especially for small quantities. A pack of sticker paper costs a few dollars and produces dozens of stickers. Buying stickers commercially adds shipping costs and minimum order requirements that home printing avoids entirely.
=== CONCLUSION ===
Can I print stickers on a regular printer? Absolutely yes. With the right sticker paper, correct printer settings, and a bit of creative effort, you can produce beautiful stickers from the comfort of your home. Home sticker printing is affordable, flexible, and incredibly rewarding.
Remember to match your paper to your printer type, always do test prints, and invest time in good design. These simple steps transform ordinary prints into professional-quality stickers. Whether you are labeling products, decorating your workspace, or launching a sticker business, your regular printer is all you need to get started.