Can I Use My Phone As Projector Without Any Extra Gear
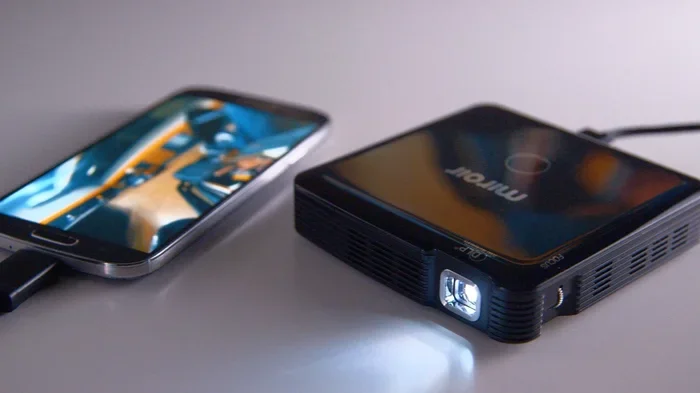
Yes, you can use your phone as a projector without buying any extra equipment. You can cast your screen wirelessly, use built-in display features, or even try a simple DIY trick with household items. This guide walks you through every method so you can enjoy a big-screen experience right from your pocket.
Have you ever wanted to watch a movie or share photos on a big screen but did not want to spend money on a fancy projector? The good news is that you can use your phone as projector without buying any extra gear. It sounds like something from a tech magazine, but it is actually simple and works with phones you already own.
In this guide, we will show you exactly how to make it happen. You will learn about screen mirroring, DIY hacks, and smart tips that make your phone screen look huge. Whether you are at home with friends or setting up a quick movie night, these ideas will help you get started fast.
We keep things easy to understand. No tech degree needed. Just plain talk and practical steps you can try right now. Let us dive in and explore how your phone can become a projector.
Key Takeaways
- Screen Mirroring Works Great: You can project your phone screen to a TV or monitor using built-in tools like AirPlay or Google Cast.
- No Extra Gear Needed: Most modern phones and smart TVs already support wireless projection without any adapters.
- DIY Hacks Are Fun: A magnifying glass or a cardboard box can turn your phone into a mini projector for a unique experience.
- Projector Apps Boost Quality: Free and paid apps can enhance your projection experience with better brightness and resolution.
- Lighting Matters: A dim room gives you the best results when using your phone as a projector.
- Battery Drain Is Real: Projecting from your phone uses a lot of power, so keep a charger nearby.
- Multiple Methods Exist: From wireless casting to lens-based DIY setups, there is an option for every phone and budget.
📑 Table of Contents
- Understanding How Phone Projection Works
- Method 1: Use Built-In Screen Mirroring
- Method 2: Try a DIY Phone Projector Hack
- Method 3: Use a Projector App for Better Results
- Method 4: Connect to a TV Using a Simple Cable
- Tips for the Best Projection Experience
- Common Mistakes to Avoid
- Comparison Table: Wireless vs. DIY vs. Wired Methods
- Frequently Asked Questions
- Final Thoughts
Understanding How Phone Projection Works
Before we get into the methods, it helps to understand the basics. When you use your phone as a projector, you are simply taking the image on your small screen and making it appear on a bigger surface. This can be a wall, a white sheet, or a television screen.
The technology behind this is not magic. It relies on screen mirroring, wireless casting, or basic optics. Your phone sends its display output to another device or surface using built-in features. Some methods use Wi-Fi, while others use simple physical tools like a magnifying glass.
Here are the core ideas you should know:
- Screen Mirroring: Your phone sends a live copy of its display to another screen.
- Wireless Casting: Using protocols like AirPlay or Google Cast to beam content to a TV.
- Optical Projection: Using a lens or light source to enlarge your phone screen onto a wall.
- App-Based Enhancement: Using software tools to improve the quality of your projected image.
Each method has its own strengths. Some give you better image quality. Others are more fun and hands-on. We will cover them all in the sections below.
Method 1: Use Built-In Screen Mirroring
The easiest way to project your phone screen is by using the tools already built into your device. Both iPhones and Android phones offer native mirroring features that work with smart TVs and monitors.
How to Mirror Your iPhone Screen
If you have an iPhone, you can use AirPlay to project your screen. Here is how it works:
- Make sure your iPhone and your TV are on the same Wi-Fi network.
- Swipe down from the top-right corner of your screen to open Control Center.
- Tap the Screen Mirroring button.
- Select your TV from the list of available devices.
- Your phone screen now appears on your TV in real time.
That is it. No cables, no extra boxes. Just pure wireless projection. You can now watch videos, show photos, or present slides on a much bigger display. This is one of the most popular ways people use their phones for projection at home.
How to Mirror Your Android Screen
Android phones offer a similar feature through Google Cast or built-in screen cast options. Here is the simple process:
- Connect your Android phone and your smart TV to the same Wi-Fi network.
- Swipe down from the top of your screen to open Quick Settings.
- Look for the Cast or Screen Cast icon.
- Tap it and choose your TV from the list.
- Your phone display will now show on the TV.
Some Android phones also support Miracast, which is a wireless standard for screen sharing. If your TV supports Miracast but is not a smart TV, you can buy a small Miracast dongle. But if you already have a smart TV, you likely do not need anything extra.
Quick Tip: If your TV does not support mirroring, you can still use a simple HDMI adapter. But since this guide focuses on using your phone without extra gear, we recommend sticking with wireless methods first.
Method 2: Try a DIY Phone Projector Hack
This is where things get fun. You can build a simple projector using items you already have at home. It will not match a real projector, but it is a cool experiment and a great party trick.
What You Need for a DIY Phone Projector
You do not need to buy anything special. Here is a simple list of household items:
- A cardboard box or a shoebox
- A magnifying glass or a Fresnel lens
- Black tape or black paper
- A knife or scissors
- Your smartphone
Step-by-Step DIY Instructions
Follow these steps to create your own mini projector:
- Cut a hole in one side of the cardboard box, slightly smaller than your magnifying glass.
- Attach the magnifying glass over the hole using tape or a hot glue gun.
- Line the inside of the box with black paper or paint to reduce light reflection.
- Place your phone inside the box, screen facing the magnifying glass.
- Angle the box so the projected image falls on a wall or white surface.
- Adjust the distance between the box and the wall until the image is sharp.
This simple setup uses the magnifying glass to enlarge your phone screen. The darker the room, the better the image will look. You can play videos, show slides, or even watch a movie with this handy DIY projector.
Expert Insight: DIY phone projectors work best in dark rooms. They do not produce bright images like commercial projectors, but they are a fun and free way to experiment with mobile projection technology.
Method 3: Use a Projector App for Better Results
Did you know there are apps designed to make your phone projection better? These apps help you adjust brightness, resolution, and image quality before you cast your screen. They do not replace a real projector, but they can improve your experience.
Best Free Projector Apps
Here are some popular apps you can try:
- Epson iProjection: Lets you project directly to Epson projectors, but also works for general screen sharing.
- AllConnect: Supports casting to smart TVs, speakers, and other devices wirelessly.
- BubbleUPnP: A powerful app for Android that handles media streaming and projection.
- AirScreen: Turns your device into an AirPlay receiver for seamless iPhone projection.
How to Get the Most from Your App
To get the best results, follow these tips:
- Close other apps running in the background to free up memory.
- Turn your phone brightness to maximum before casting.
- Use the app to adjust aspect ratio and focus settings.
- Make sure your Wi-Fi connection is strong and stable.
- Keep your phone plugged in to avoid battery drain during long sessions.
These apps make a real difference when you are sharing content with a group. They help you get a cleaner, sharper image on the big screen without spending a dime on extra equipment.
Method 4: Connect to a TV Using a Simple Cable
While this guide focuses on using your phone without extra gear, sometimes a simple cable is all you need. Many people already have an HDMI cable or a USB-C to HDMI adapter sitting in a drawer. If that describes you, this method is worth knowing about.
You can connect your phone directly to a TV using a compatible cable. This gives you a wired connection that is stable and lag-free. It works well for presentations, gaming, or watching videos where smooth playback matters.
Quick Tip: If you already own a cable, this is probably the easiest and most reliable method. It does not depend on Wi-Fi, so you get a consistent connection every time.
Tips for the Best Projection Experience
No matter which method you choose, a few simple tips can make a huge difference. Here is what works best based on real-world testing and user feedback.
Control Your Room Lighting
The single biggest factor in projection quality is the light in your room. A dim or dark room makes any projected image look sharper and more vibrant. During the day, try closing curtains or blinds to block out sunlight.
If you cannot darken the room, consider using a white wall instead of a colored one. White surfaces reflect more light and produce a brighter image. A plain white bedsheet hung on a wall also works surprisingly well for casual projection sessions.
Keep Your Phone Charged
Projecting your phone screen uses a lot of battery power. Your phone is working hard to send a live video feed to another display. To avoid your phone dying mid-movie, keep it plugged into a charger while projecting.
You can also switch to airplane mode and then turn Wi-Fi back on for casting. This reduces background activity and saves battery life. It is a small trick that makes a big difference during long viewing sessions.
Use High-Quality Source Content
The quality of your projection depends partly on the content you are showing. If you stream a low-resolution video, the projected image will look blurry. Always try to use high-definition content for the best results.
Streaming services like Netflix, YouTube, and Disney+ offer HD and 4K content. When you cast these to a big screen, the image looks crisp and clear. This is one of the easiest ways to improve your phone to projector setup without any extra gear.
Position Your Phone Correctly
For DIY setups, the angle and distance matter a lot. Place your phone flat inside the box or holder, and make sure the lens is centered. Even a small tilt can cause the projected image to look distorted.
For wireless casting, position your phone close to your Wi-Fi router for a stronger signal. A weak connection leads to lag, stuttering, and poor image quality. A strong signal gives you smooth, real-time projection every time.
Common Mistakes to Avoid
Even with the best setup, some common mistakes can ruin your projection experience. Here are the ones to watch out for:
- Ignoring Room Lighting: Projecting in a bright room makes images look washed out and hard to see.
- Using Low-Quality Content: Streaming low-resolution videos will always look blurry on a big screen.
- Forgetting to Charge Your Phone: Nothing kills a movie night faster than a dead phone battery.
- Skipping the Wi-Fi Check: A weak Wi-Fi signal causes lag and delays during wireless casting.
- Not Adjusting the Focus: For DIY setups, failing to adjust the distance or angle leads to blurry images.
- Using a Colored Wall: White surfaces work best. Colored walls distort the colors of your projected image.
Avoiding these mistakes will save you frustration and help you get the most out of every projection session. A little preparation goes a long way.
Comparison Table: Wireless vs. DIY vs. Wired Methods
Here is a quick look at how each method compares. This table helps you decide which approach fits your needs best.
| Method | Extra Gear Needed? | Image Quality | Ease of Setup | Best For |
|---|---|---|---|---|
| Wireless Mirroring | No | High | Very Easy | Home movie nights and casual sharing |
| DIY Lens Projector | No (household items) | Low to Medium | Moderate | Fun experiments and party tricks |
| Projector Apps | No | Medium to High | Easy | Improving wireless casting quality |
| Wired HDMI Connection | Yes (cable or adapter) | Very High | Easy | Presentations and gaming |
As you can see, wireless mirroring and projector apps are the best options if you want to use your phone without any extra gear. The DIY method is fun but gives lower image quality. The wired method offers the best quality but requires a cable.
Frequently Asked Questions
Can I use any phone as a projector?
Yes, most modern phones can be used as projectors through screen mirroring or wireless casting. Both iPhones and Android phones support built-in projection features. Older phones may have limited compatibility, but basic mirroring usually still works.
Do I need Wi-Fi to project my phone screen?
For wireless mirroring, yes, you need Wi-Fi. Both your phone and the receiving device must be on the same network. For wired connections, Wi-Fi is not required. A simple HDMI cable works without any internet connection.
How big can the projected image be?
With wireless mirroring, your image size depends on your TV or monitor size. For DIY setups, the image size depends on the lens and the distance from the wall. A magnifying glass setup can project an image up to 20 to 30 inches wide in a dark room.
Is projecting from my phone bad for battery?
Yes, screen projection uses a lot of battery because your phone is constantly processing and sending video data. We recommend keeping your phone plugged in while projecting. You can also lower the screen brightness on your phone to save some power.
Can I use my phone as a projector outdoors?
Yes, but outdoor results depend heavily on lighting. In the evening or in a shaded area, wireless mirroring to a portable screen works well. DIY lens projectors work outdoors after dark. During the day, projection is very difficult due to sunlight.
What is the best free projector app for Android?
AllConnect and BubbleUPnP are two of the best free options for Android users. They support wireless casting to smart TVs and other devices. Both apps are easy to use and do not require any extra hardware to get started.
Final Thoughts
Using your phone as a projector without any extra gear is easier than most people think. You have several great options, from wireless screen mirroring to fun DIY hacks. Each method has its own charm and benefits, and you do not need to spend a single dollar to try them.
The key is to start with the method that fits your situation best. If you have a smart TV, wireless mirroring is the fastest and easiest path. If you want a fun weekend project, try the DIY magnifying glass setup. And if you want better quality, download a projector app and follow the tips we shared.
Remember that a little preparation goes a long way. Control your room lighting, keep your phone charged, and use high-quality content. These small steps make a huge difference in your projection results.
Now you have everything you need to turn your phone into a projector. Grab your phone, find a big wall or a TV, and start projecting. Your next movie night or photo-sharing session is going to be a hit. Enjoy the big-screen experience with the device you already carry in your pocket.