How to Get Rid of White Space Behind Pictures in PowerPoint
White space behind pictures in PowerPoint can ruin an otherwise great slide design. You can get rid of white space behind pictures in PowerPoint using built-in tools like the Remove Background feature, transparent fill settings, and shape techniques. This guide covers every practical method you need to make your images look clean and professional.
Nothing kills a professional slide faster than a jarring white box behind an image. You spend time picking the perfect graphic, choosing the right colors, and arranging your text. Then you add the picture, and there it is — a chunk of white space behind pictures in PowerPoint that throws off the entire design. It looks sloppy, unpolished, and distracting.
If you have ever wondered how do I get rid of white space behind pictures in PowerPoint, you are not alone. This is one of the most common formatting frustrations for PowerPoint users. The good news is that several simple methods fix this problem quickly. Whether you are a beginner or a seasoned presenter, these techniques will help you create cleaner, more polished slides in minutes.
Key Takeaways
- Use the Remove Background tool: PowerPoint’s built-in feature quickly eliminates unwanted white space around images.
- Set image transparency: Adjusting fill transparency helps blend images seamlessly into your slide background.
- Use Shape Fill with pictures: Placing images inside shapes removes extra white borders automatically.
- Crop images properly: Correct cropping techniques prevent white space from appearing in the first place.
- Group and align objects: Smart alignment keeps your visuals tight and free of awkward gaps.
- Export as PNG with transparency: Saving images with transparent backgrounds ensures a clean look in every presentation.
📑 Table of Contents
- Why White Space Behind Pictures Appears in PowerPoint
- How to Remove White Space Using the Remove Background Tool
- Setting a Transparent Background for Your Images
- Using Shape Fill to Eliminate White Space
- Cropping and Resizing Images to Fit Perfectly
- Advanced Tips for Clean Image Placement in PowerPoint
- Comparison Table: Methods to Remove White Space Behind Pictures
- Common Mistakes People Make with Image Backgrounds
- Expert Insights on Image Handling in PowerPoint
- Key Takeaways
- Conclusion
Why White Space Behind Pictures Appears in PowerPoint
Before diving into solutions, it helps to understand why this happens. When you insert a picture into a slide, PowerPoint often keeps the original file format. Many images come with a solid white or colored background baked into the file. PowerPoint does not automatically remove that background. Instead, it displays the image exactly as it is, including any surrounding white space.
Another common cause is the image’s aspect ratio. When you stretch or resize a picture to fit a slide layout, PowerPoint sometimes adds padding. This padding shows up as white space behind pictures in PowerPoint. Understanding these root causes makes it easier to pick the right fix for your specific situation.
Common File Formats That Cause White Space
Certain image formats are more likely to carry unwanted backgrounds. Here are the usual suspects:
- JPEG files: These do not support transparency. Any white area in the original file stays white.
- BMP files: Similar to JPEG, these lock in whatever background color exists in the image.
- Standard PNG files: While PNG supports transparency, not all PNGs actually have transparent backgrounds.
- SVG files: These sometimes render with a default white fill depending on how they were saved.
Knowing your file format helps you choose the best removal method. For example, a JPEG will need different treatment than a transparent PNG.
How to Remove White Space Using the Remove Background Tool
PowerPoint includes a built-in tool designed specifically for this problem. The Remove Background feature uses smart detection to separate your picture from its background. It works well in most cases and requires no extra software.
Step-by-Step Guide to Using Remove Background
- Click on the picture you want to edit.
- Go to the Picture Format tab on the ribbon.
- Click Remove Background in the Adjust group.
- PowerPoint will automatically mark the background in magenta.
- Adjust the selection using the Mark Areas to Keep and Mark Areas to Remove tools.
- Click Keep Changes when you are happy with the result.
This method is fast and effective for most images. However, it works best with pictures that have clear contrast between the subject and the background. Complex images with similar tones may need extra manual marking.
Tips for Better Results with Remove Background
- Zoom in closely to fine-tune your markings.
- Use the Mark Areas to Remove tool for stubborn white patches.
- Refresh the detection by toggling the remove button off and on again.
- Work with high-resolution images for cleaner edge detection.
Once you remove the background, PowerPoint treats the image as a transparent graphic. This means no more white space behind pictures in PowerPoint. The image blends naturally with whatever slide background you have chosen.
Setting a Transparent Background for Your Images
Sometimes the Remove Background tool is not enough. In those cases, making the image background transparent manually gives you more control. This technique works especially well when you want a soft, blended look rather than a sharp cutout.
Method 1: Change Picture Transparency
PowerPoint lets you adjust the transparency of an entire picture or specific areas. Here is how:
- Insert your picture onto the slide.
- Right-click the image and select Format Picture.
- Go to the Picture or Fill section.
- Adjust the Transparency slider to your liking.
- Click Close to apply the changes.
This method softens the white background, making it less obvious. It does not make it fully transparent, but it significantly reduces the visual impact of white space behind pictures in PowerPoint.
Method 2: Use the Recolor Feature
Another option is to recolor the image. PowerPoint can replace the white color with a color that matches your slide background. Try this:
- Select your picture.
- Go to Picture Format and click Recolor.
- Choose a color set that matches your slide theme.
- The white areas will shift to match your chosen color.
This trick works best when your slide has a solid background color. If your slide uses a gradient or image background, the recolor method may not blend perfectly.
Using Shape Fill to Eliminate White Space
One of the most reliable ways to avoid white space behind pictures in PowerPoint is to use shapes. By placing your image inside a shape, you control exactly how the picture fits and what background shows through.
How to Fill a Shape with a Picture
Follow these steps to create a clean, border-free image using shape fill:
- Insert a shape from the Insert menu. Choose a rectangle, rounded rectangle, or any shape you prefer.
- Right-click the shape and select Format Shape.
- Click Picture or texture fill in the Fill section.
- Click File or Clipboard to insert your image.
- Adjust the Offset X and Offset Y values to position the image correctly.
- Set the Transparency to 0% for a crisp look.
The shape acts as a frame. It clips the image to its exact boundaries, which means no white border or extra space appears around the picture. This is especially useful for PowerPoint image placement where you want a precise, professional look.
Why Shape Fill Works So Well
Shape fill gives you complete control. You decide the exact size, position, and crop of your image. Unlike the standard insert method, there is no risk of PowerPoint adding padding or white space. Many professional designers use this technique for clean, modern slide layouts.
Cropping and Resizing Images to Fit Perfectly
Sometimes the simplest fix is the best one. Proper cropping and resizing prevent white space from showing up in the first place. Instead of trying to remove it after the fact, you can stop it from happening.
Best Practices for Cropping Images in PowerPoint
- Crop before you insert: Use an image editor to remove excess white space from your picture file before adding it to PowerPoint.
- Use the Crop tool: Select the picture, go to Picture Format, and click Crop. Drag the handles to remove unwanted areas.
- Maintain aspect ratio: Hold the Shift key while dragging to keep your image from stretching and creating distortion.
- Crop to the subject: Focus on the main part of the image and remove any empty or unnecessary space.
When you crop tightly around your subject, there is less chance of white space behind pictures in PowerPoint. The image fills its designated space naturally and looks intentional rather than accidental.
Using the Crop to Shape Feature
PowerPoint also lets you crop images into specific shapes. This is a great way to eliminate extra space while adding visual interest. Here is how:
- Select your picture.
- Go to Picture Format and click Crop.
- Hover over Crop to Shape in the dropdown menu.
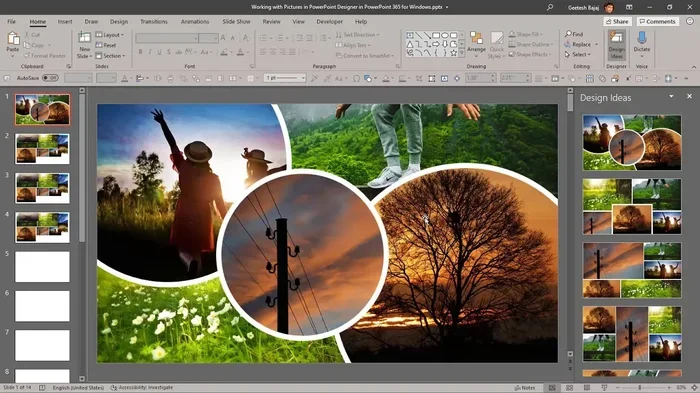
- Choose your preferred shape — circle, rounded rectangle, or any available option.
This method creates a polished, designed look. The image fills the shape perfectly with no visible white edges.
Advanced Tips for Clean Image Placement in PowerPoint
Once you handle the basics, a few advanced techniques take your slide design to the next level. These tips address the root causes of white space behind pictures in PowerPoint and help you build consistently clean layouts.
Align and Group Your Objects
Misaligned images often look like they have extra white space, even when they do not. PowerPoint’s alignment tools fix this instantly:
- Select multiple images or objects.
- Go to Format and click Align.
- Choose Align Center, Align Left, or Align Right depending on your layout.
- Use Distribute Horizontally or Distribute Vertically for even spacing.
Grouping objects keeps them together as one unit. This prevents accidental shifts that can introduce unwanted gaps and white space.
Export Images with Transparent Backgrounds
If you create a transparent image in another program, save it as a PNG file with transparency enabled. When you insert this PNG into PowerPoint, the background stays transparent. This is the most foolproof way to avoid white space behind pictures in PowerPoint because the problem never exists in the first place.
Most image editors — including free options like GIMP and Canva — let you export with a transparent background. Just make sure you choose PNG format, as JPEG does not support transparency.
Use the Slide Master for Consistent Backgrounds
If you frequently deal with white space behind pictures in PowerPoint across multiple slides, consider using the Slide Master. This tool lets you set a consistent background for all slides in your presentation. When your slide background is uniform, any remaining white space around images becomes less noticeable.
- Go to View and click Slide Master.
- Select the slide layout you want to edit.
- Set a background color or image that complements your pictures.
- Click Close Master View to apply the changes.
This approach saves time and ensures a cohesive look throughout your entire presentation.
Quick Tips to Remember
- Always start with high-quality images. Low-resolution pictures magnify white space problems.
- Preview your slides in presentation mode. What looks fine in edit mode may show white space during the actual presentation.
- Use the eyedropper tool. Match your image background to your slide background for a seamless blend.
- Save your work frequently. Some background removal edits can be tricky to undo if you make a mistake.
- Test on multiple devices. Your slides may look different on a projector or another computer.
Comparison Table: Methods to Remove White Space Behind Pictures
Not every method works the same way for every image. Here is a quick comparison to help you pick the right approach:
| Method | Best For | Difficulty | Result Quality |
|---|---|---|---|
| Remove Background Tool | Images with clear contrast | Easy | High |
| Set Transparency | Subtle blending needs | Easy | Medium |
| Shape Fill | Precise framing and layout | Medium | Very High |
| Crop Image | Images with excess empty space | Easy | High |
| Export as Transparent PNG | Professional and reusable graphics | Medium | Highest |
| Recolor Feature | Solid-color slide backgrounds | Easy | Medium |
Each method has its strengths. For quick fixes, the Remove Background tool is your best friend. For precise, professional results, shape fill and transparent PNG exports deliver the cleanest look. Many experienced PowerPoint users combine several of these techniques depending on the specific image and slide design.
Common Mistakes People Make with Image Backgrounds
Avoiding mistakes saves you time and frustration. Here are the most common errors people make when dealing with white space behind pictures in PowerPoint:
- Forgetting to save as PNG: Saving a transparent image as a JPEG brings the white background back.
- Overusing the Remove Background tool: It can sometimes remove parts of your actual image. Always double-check the result.
- Ignoring slide backgrounds: A white image on a white slide creates invisible elements that look like missing pictures.
- Not grouping objects: Ungrouped images shift during editing, creating gaps and misalignment.
- Using low-resolution images: Blurry or pixelated images make white space problems look worse.
Steering clear of these mistakes keeps your presentations looking sharp and professional every time.
Expert Insights on Image Handling in PowerPoint
Professional designers agree that image formatting is one of the most overlooked aspects of slide design. A great picture with a messy background can drag down an otherwise excellent presentation. The key is to treat every image as a design element that needs intentional placement.
One expert tip is to always remove backgrounds before inserting images into PowerPoint. Doing this in an external editor gives you more control and better results. Tools like remove.bg or PowerPoint’s own background remover work well, but external editors offer finer adjustments.
Another pro insight is to use consistent image styles throughout your deck. If you crop one image into a circle, crop all images into circles. This creates visual harmony and makes white space behind pictures in PowerPoint a non-issue because every image follows the same clean format.
Key Takeaways
- Use the Remove Background tool: PowerPoint’s built-in feature quickly eliminates unwanted white space around images.
- Set image transparency: Adjusting fill transparency helps blend images seamlessly into your slide background.
- Use Shape Fill with pictures: Placing images inside shapes removes extra white borders automatically.
- Crop images properly: Correct cropping techniques prevent white space from appearing in the first place.
- Group and align objects: Smart alignment keeps your visuals tight and free of awkward gaps.
- Export as PNG with transparency: Saving images with transparent backgrounds ensures a clean look in every presentation.
Conclusion
White space behind pictures in PowerPoint is a fixable problem. You have multiple powerful tools at your fingertips, from the built-in Remove Background feature to shape fill techniques and transparent PNG exports. Each method serves a different purpose, and the best approach depends on your specific image and slide design.
The most important takeaway is to be proactive. Remove backgrounds before inserting images, crop tightly around your subjects, and use shape fill for precise control. These habits prevent white space behind pictures in PowerPoint from ever becoming an issue in the first place.
Start applying these techniques in your next presentation. You will notice an immediate improvement in the cleanliness and professionalism of your slides. Your audience will focus on your content, not on distracting white boxes around your images. With a little practice, removing unwanted background space becomes second nature, and your PowerPoint presentations will stand out from the crowd.
Keep experimenting with these methods. Try combining the Remove Background tool with shape fill for the best of both worlds. Share these tips with your team so everyone creates cleaner slides. The more you practice, the faster and more natural these steps become. Soon, you will never have to deal with white space behind pictures in PowerPoint again.
Frequently Asked Questions
Why does my picture have a white background in PowerPoint?
Most image files like JPEGs do not support transparency. When you insert them into PowerPoint, the original white background from the file stays intact. PowerPoint displays the image exactly as it exists in the file, including any solid background color.
Can I make a picture background transparent in PowerPoint?
Yes, you can. Use the Remove Background tool under the Picture Format tab. Alternatively, insert your image into a shape and set the shape fill to the picture. This clips the image and removes any visible white space around the edges.
What is the best file format for images without white space in PowerPoint?
PNG files with transparent backgrounds work best. They preserve transparency and do not add any unwanted white space. Always avoid JPEG files for images that need a clean, border-free look in your slides.
How do I remove the background from a picture before inserting it into PowerPoint?
Use a free online tool like remove.bg or an image editor like GIMP or Canva. Remove the background, save the image as a transparent PNG, and then insert it into PowerPoint. This guarantees no white space appears behind the picture.
Does the Remove Background tool work on all images?
It works best on images with clear contrast between the subject and the background. Complex images with similar colors may need manual marking. For those cases, use the Mark Areas to Keep and Mark Areas to Remove tools to refine the selection.
Can I use shape fill to fit multiple pictures the same way?
Absolutely. Create one shape with a picture fill, then duplicate it and swap out the image. This ensures all your pictures have the same size, crop, and framing. It is a great way to maintain consistency and eliminate white space behind pictures in PowerPoint across your entire deck.