Does The Room Have To Be Dark For A Projector Setup
You do not always need a completely dark room for a projector. The answer depends on your projector’s brightness, the type of screen you use, and the ambient light in your space. Modern projectors with high lumen ratings can deliver a great picture even in rooms with some light. However, managing light properly will always improve your viewing experience.
Setting up a projector is one of the most exciting upgrades you can make to your home entertainment space. But one question keeps coming up again and again: does the room have to be dark for a projector to work well? The short answer is no. You can enjoy a great image in various lighting conditions. But the longer answer involves understanding brightness, screen types, and a few simple tricks that make a big difference.
Many people assume that a projector only works well in a pitch-black room. That idea comes from the early days of home theater setups. Back then, projectors had low brightness and needed darkness to show a clear picture. Today, technology has changed a lot. Modern projectors are much more powerful. They can push bright, vibrant images even in rooms with windows or overhead lighting. Does the room have to be dark for a projector setup? Not necessarily. But knowing how light affects your image will help you get the best results every time.
In this guide, we will walk through everything you need to know about projector lighting. We will cover brightness levels, screen choices, room adjustments, and practical tips. Whether you are setting up a home theater or a casual movie night in the living room, this article has you covered. Let us dive in and make your projector experience the best it can be.
Key Takeaways
- Dark rooms are not mandatory: A projector can work in various lighting conditions depending on brightness and screen type.
- Lumens matter most: Higher lumen projectors handle ambient light much better than low-lumen models.
- Screen choice is critical: A high-gain or ambient light rejecting screen can dramatically improve image quality.
- Simple room adjustments help: Closing curtains, dimming lights, and positioning matter a lot.
- Projector mode settings make a difference: Using the right mode can boost contrast and color in bright rooms.
- Evening viewing is ideal: Natural light fades at night, giving you the best picture without extra effort.
📑 Table of Contents
- Why Ambient Light Affects Projector Image Quality
- Understanding Projector Brightness: Lumens Explained
- Choosing the Right Screen for Your Room
- Room Setup Tips to Improve Projector Image Quality
- Projector Versus TV: Which Works Better in Bright Rooms?
- Common Mistakes People Make With Projector Lighting
- Expert Tips for the Best Projector Viewing Experience
- Final Thoughts
Why Ambient Light Affects Projector Image Quality
Before we get into solutions, it helps to understand the problem. Ambient light is any light in the room that is not coming from the projector itself. This includes sunlight through windows, ceiling lights, lamps, and even the glow from a TV stand. When ambient light hits your screen, it washes out the image. The result is a faded, washed-out picture that lacks contrast and color.
Think of it this way. A flashlight looks bright in a dark room, right? But shine that same flashlight in a brightly lit room and it barely shows. The same principle applies to your projector. The more ambient light in the room, the harder your projector has to work to produce a visible image. This is why many people believe a dark room is a must. In reality, it is just one factor in the equation.
How Ambient Light Reduces Contrast
Contrast is the difference between the darkest blacks and the brightest whites on your screen. A projector creates these differences by projecting light onto a surface. When room light adds extra illumination, the blacks on your screen become gray. The whites lose their punch. The overall image looks flat and lifeless. This is the biggest enemy of any projector setup.
The good news is that you can fight back. You do not need to sit in a completely sealed room to enjoy a sharp image. The key is managing light rather than eliminating it entirely. A few small changes can bring back the contrast and make your picture pop again.
Understanding Projector Brightness: Lumens Explained
The most important spec to look at when buying a projector is its brightness rating, measured in lumens. Lumens tell you how much light the projector outputs. The higher the lumen count, the brighter the image. And a brighter image handles ambient light much better.
Here is a simple breakdown of projector brightness levels and what they mean for your room setup:
- 1,000 to 1,500 lumens: These projectors work best in dark rooms. They are common in budget models and older units. You will want to dim or turn off lights when using them.
- 2,000 to 3,000 lumens: This range handles moderate ambient light well. You can use them in a room with some natural light or dim overhead lighting.
- 3,000 to 5,000 lumens: These are bright projectors. They can handle rooms with significant light, including living rooms with windows during the day.
- 5,000+ lumens: These are commercial-grade or high-end home theater projectors. They can produce a clear image even in brightly lit spaces.
If your projector has a low lumen count, a dark room becomes much more important. But if you own a bright projector, you have a lot more flexibility. Does the room have to be dark for a projector? With enough lumens, you can relax that rule quite a bit.
How to Check Your Projector’s Lumens
Finding your projector’s lumen rating is easy. Check the product manual, the manufacturer’s website, or the original box. Most projectors list the brightness prominently in their specs. If you cannot find the exact number, search the model number online. You will find the details quickly. Once you know your lumen count, you will have a much better idea of what kind of lighting conditions work best for you.
Choosing the Right Screen for Your Room
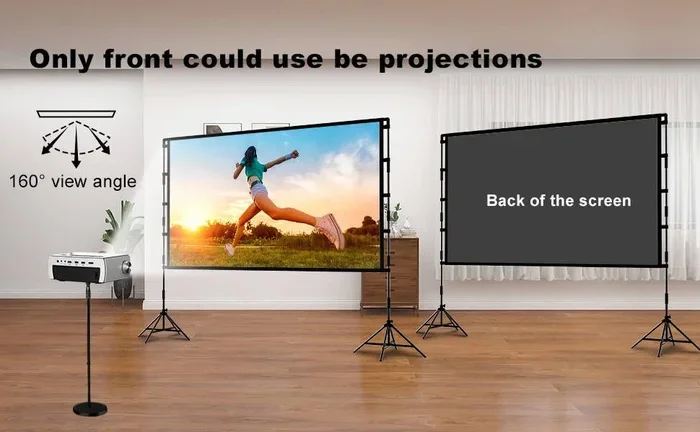
The screen you use plays a huge role in how your projector image looks. A standard white wall might work in a dark room. But in a room with any ambient light, the wrong screen can ruin even the best projector. Choosing the right screen is one of the smartest things you can do for your setup.
Not all projector screens are created equal. Some are designed to reflect light directly back at the viewers. Others are designed to reject ambient light from the sides and above. Understanding this difference can change your entire viewing experience.
High-Gain Screens
A high-gain screen reflects more light back to the viewers. This means a brighter image, even in a room with some light. These screens work well for projectors with lower lumen counts. They boost the image and help you get a better picture without needing a completely dark room.
However, high-gain screens have a tradeoff. They work best when viewers are seated within a specific angle. If someone sits too far to the side, the image can look dim or washed out. So you need to think about seating arrangement when choosing a high-gain screen.
Ambient Light Rejecting Screens
Ambient light rejecting screens, often called ALR screens, are designed for rooms with lots of light. These screens use special materials and structures to reflect the projector light directly to the viewers while absorbing or deflecting ambient light from other directions. The result is a much sharper, more vibrant image even in a bright room.
ALR screens are more expensive than standard screens. But if you plan to use your projector in a living room or a space with windows, they are worth the investment. They make a noticeable difference and can turn a mediocre image into a stunning one.
Using a Black Sheet as a Projector Screen
Some people wonder if they can use a black sheet as a projector screen. The short answer is no. Black absorbs light rather than reflecting it. A black surface will make your image nearly invisible. If you need a budget-friendly screen, a white bedsheet or a dedicated projector screen is a much better choice. You can also check if a black sheet can work for a projector screen to understand why white or gray surfaces are always better.
Room Setup Tips to Improve Projector Image Quality
You do not need to build a sealed theater room to get great projector performance. A few smart adjustments to your space can dramatically improve your image. These tips work whether you are in a completely dark room or a space with natural light.
Control Natural Light with Curtains
Sunlight is the biggest enemy of projector image quality. If your room has windows, consider installing blackout curtains or heavy drapes. You do not need to keep them closed all the time. But during movie nights or presentations, closing them can make a huge difference. Even partially closing the curtains can reduce glare and improve contrast.
Another option is to use light-filtering blinds. These let you control the amount of light entering the room without making it completely dark. You can dim the sunlight just enough to enjoy a clear picture while still keeping the room comfortable.
Manage Artificial Lighting
Overhead lights and lamps can also wash out your projector image. The simplest fix is to turn them off or dim them during use. If you need some light for safety or comfort, try placing small, low-level lights behind the seating area. This keeps the room from being completely pitch black while still preserving image quality.
Some people use LED strip lights behind their TV stand or along the back wall. These create a cozy atmosphere and reduce eye strain without affecting the projector image much. Just make sure the lights are not pointing directly at the screen.
Projector Placement Matters
Where you place your projector affects image quality just as much as lighting does. The ideal position depends on your room layout, screen size, and projector type. Most projectors work best when they are placed perpendicular to the screen and at the correct throw distance.
You can also put a projector on a shelf if you do not have ceiling mounting options. Just make sure the shelf is stable and at the right height. Avoid placing the projector where people will walk in front of the beam. That creates shadows and interrupts the image.
Use the Right Projector Mode
Many projectors come with different display modes. These modes adjust brightness, contrast, and color settings to match different viewing conditions. The most common modes include:
- Dynamic or Bright Mode: Increases overall brightness. Great for rooms with ambient light.
- Cinema or Dark Mode: Boosts contrast and deepens blacks. Best for dark rooms.
- Standard Mode: A balanced setting that works in most conditions.
- Game Mode: Reduces input lag and adjusts colors for gaming.
Switching to the right mode can make a big difference. If you are watching in a room with some light, try Dynamic or Bright mode. You will immediately notice a clearer, more vibrant image.
Projector Versus TV: Which Works Better in Bright Rooms?
Many people compare projectors to TVs when deciding on a home entertainment setup. TVs have a built-in advantage in bright rooms because their screens emit light directly. Projectors, on the other hand, rely on reflected light. This makes them more susceptible to ambient light interference.
But modern projectors have closed the gap significantly. A high-lumen projector paired with an ambient light rejecting screen can compete with a TV in a well-lit room. The key is choosing the right equipment for your space and lighting conditions.
If you are considering using your projector as a regular TV setup, it is worth noting that projectors work well for this purpose too. You can stream content, play games, and even browse the web. To learn more about using a projector as a TV, check out our guide on can I use a projector as a TV.
When a TV Might Be the Better Choice
There are situations where a TV simply makes more sense. If your room has large windows with direct sunlight and you do not want to deal with curtains or screens, a TV will give you a more consistent image. TVs also tend to be easier to set up and maintain. They do not require a dark environment or special screens to look good.
But if you want a large, cinematic image and are willing to manage the lighting a bit, a projector is hard to beat. The experience of watching a big screen in your own space is something a TV simply cannot replicate.
Common Mistakes People Make With Projector Lighting
Even with the best projector, simple mistakes can ruin your viewing experience. Avoiding these common errors will help you get the most out of your setup.
- Ignoring ambient light: Many people set up their projector and forget about the room’s lighting. A quick check of where light sources are pointing can save you from a washed-out image.
- Using the wrong screen: A standard white wall works in a dark room. But in a bright space, it will reflect everything, including ambient light. Choose a screen designed for your lighting conditions.
- Placing the projector too close: This can cause the image to be too bright in the center and dim around the edges. Follow the manufacturer’s recommended throw distance.
- Forgetting to clean the lens: Dust and fingerprints on the lens scatter light and reduce image sharpness. A quick wipe before each use can make a noticeable difference.
- Using the wrong projector mode: Running your projector in cinema mode in a bright room will make the image look dull. Always match your mode to the lighting conditions.
Avoiding these mistakes does not require expensive equipment. It just takes a little awareness and a few simple adjustments. Once you build these habits, your projector will look its best every time you use it.
Expert Tips for the Best Projector Viewing Experience
We asked experienced home theater enthusiasts and AV professionals for their top tips. Here is what they recommend for getting the best image quality from your projector in any room.
Tip 1: Watch During Evening Hours
Natural light is your projector’s biggest challenge. Watching in the evening, when the sun has set, automatically reduces ambient light. You get a better image without making any other changes to your room. This is the simplest and most effective tip you can follow.
Tip 2: Use a Blue Light Filter
If you need some light in the room for comfort, use warm, dim lighting. Avoid bright white or blue-toned lights. These can interfere with the projector’s color accuracy. Soft, warm LED lights placed behind the seating area create a cozy atmosphere without hurting image quality.
Tip 3: Consider a Short Throw Projector
Short throw projectors are designed to project a large image from a short distance. This means you can place the projector closer to the screen, reducing the chance of shadows from viewers walking by. They also tend to be more compact and easier to position in smaller rooms.
Tip 4: Test Before You Commit
Every room is different. Before you finalize your setup, test your projector in the actual room at different times of day. Note how the image looks with the curtains open, partially closed, and fully closed. This hands-on testing will help you find the sweet spot for your specific space.
Final Thoughts
So, does the room have to be dark for a projector setup? The answer is more flexible than you might think. While a dark room always helps, it is not a strict requirement. With the right projector brightness, the proper screen, and a few simple room adjustments, you can enjoy a fantastic image in almost any lighting condition.
Start by understanding your projector’s lumen rating. Then choose a screen that matches your room’s lighting. Make small changes like closing curtains, dimming lights, and selecting the right projector mode. These steps add up and make a real difference. You do not need a dedicated home theater room to enjoy big-screen entertainment. A little knowledge and a few adjustments are all it takes.
The best projector setup is one that fits your life and your space. Do not let the idea of a dark room stop you from enjoying a projector. Experiment with different settings, find what works for you, and make your viewing experience as enjoyable as possible. With the right approach, your projector can deliver an amazing image no matter what time of day or what kind of room you are working with.
Remember, the goal is to create a setup that you love coming back to. Whether it is a movie night with family, a gaming session, or a presentation at work, your projector can deliver. Just manage the light, pick the right equipment, and enjoy the show.
Frequently Asked Questions
Can I use a projector in a room with windows during the day?
Yes, you can use a projector in a room with windows during the day. A projector with at least 3,000 lumens and an ambient light rejecting screen will handle daylight well. Closing the curtains or blinds helps a lot too.
What is the best projector brightness for a living room?
For a living room with some ambient light, look for a projector with 2,500 to 3,500 lumens. This range provides a bright enough image to compete with overhead lights and natural light from windows.
Does a projector screen make a difference in bright rooms?
Yes, absolutely. A projector screen makes a huge difference in bright rooms. An ambient light rejecting screen or a high-gain screen reflects the projector light more efficiently while reducing the impact of room light on image quality.
Is it better to watch a projector in the dark or with dim lights?
Watching with dim lights is a good middle ground. It reduces eye strain while still preserving image quality. You do not need total darkness to enjoy a great projector image.
What happens if you use a projector in a bright room?
In a bright room, the projector image will look faded and washed out. Colors lose their vibrancy and contrast drops significantly. Using a brighter projector or managing the room light can fix this problem.
Can I stream content using a projector with a Fire Stick?
Yes, you can stream content using a projector with a Fire Stick. A Fire Stick works great with projectors and gives you access to all major streaming services for a complete home entertainment setup.