Build Your Diy Tv Antenna Using Coax Cable For Free
Building a DIY TV antenna using coax cable is one of the easiest ways to enjoy free over-the-air channels at home. You do not need expensive equipment or technical skills. With just a few common materials and this simple guide, you can create a working antenna in under an hour. This article covers everything from tools and materials to placement tips and common mistakes.
Key Takeaways
- Save Money: A DIY TV antenna using coax cable costs almost nothing compared to monthly cable bills.
- Easy to Build: Anyone with basic tools can assemble a working antenna in less than an hour.
- Free Channels: You can access local HD channels without paying for a cable subscription.
- Better Placement Matters: Where you put your antenna makes a huge difference in signal strength.
- Common Mistakes Are Avoidable: Simple errors like wrong cable length or poor positioning can ruin your reception.
- Works with Most TVs: Any TV with a built-in tuner or a USB digital tuner can use your homemade antenna.
📑 Table of Contents
- What Is a DIY TV Antenna Using Coax Cable?
- Why Build Your Own TV Antenna for Free?
- Tools and Materials You Will Need
- Step-by-Step Guide to Building Your Coax Cable Antenna
- Tips for Maximizing Your TV Signal Reception
- Common Mistakes to Avoid When Building a DIY Antenna
- How to Test and Improve Your Antenna Performance
- Conclusion
What Is a DIY TV Antenna Using Coax Cable?
A DIY TV antenna using coax cable is a homemade device that picks up over-the-air broadcast signals and sends them to your television through a coaxial cable. These signals carry local channels like ABC, NBC, CBS, Fox, and PBS in high definition. You do not need a cable subscription to watch them.
The idea might sound complicated, but it is surprisingly simple. People have been building homemade antennas for decades. With a piece of coax cable, some basic tools, and a little patience, you can create a functional antenna that delivers clear picture quality. The best part? It costs nearly nothing.
Over-the-air (OTA) broadcasting has made a strong comeback. Many households are cutting the cord and looking for free TV antenna solutions. A coax-based DIY antenna fits perfectly into this trend. It works with any TV that has a built-in digital tuner or a USB digital tuner adapter.
You might wonder if a homemade antenna really works as well as store-bought ones. The answer is yes. The signal does not care whether it comes from a fancy retail antenna or a hand-built coax design. What matters is the construction, placement, and your location relative to broadcast towers.
This guide walks you through every step. You will learn what materials you need, how to build the antenna, how to position it for the best signal, and how to avoid common pitfalls. By the end, you will be watching free HD channels without paying a dime to a cable company.
Why Build Your Own TV Antenna for Free?
There are many reasons to build a DIY TV antenna using coax cable instead of buying one. Let us look at the biggest advantages.
Save Money on Monthly Bills
The average cable bill in the United States runs over $100 per month. That adds up fast. A homemade antenna costs almost nothing. You likely already have most of the materials lying around your house. Even if you need to buy a few items, the total cost stays under $10.
Access Local Channels in HD
With a good antenna, you can receive all your local broadcast channels in full high definition. This includes news, sports, weather, and kids’ programming. The picture quality often exceeds what you get from a cable provider because the signal goes straight from the broadcast tower to your TV.
No Monthly Fees or Contracts
Once your antenna is built and set up, there are zero ongoing costs. No contracts. No hidden fees. No surprise rate hikes. You own the equipment and you own the reception. It is yours forever.
Works During Power Outages and Emergencies
If your internet goes down or your streaming service has an outage, your antenna still works. Broadcast signals do not depend on the internet or a cable company’s servers. This makes a DIY TV antenna a reliable backup for emergencies.
Eco-Friendly Choice
Building something yourself reduces waste. You reuse materials instead of buying new plastic products that end up in landfills. It is a small but meaningful way to live more sustainably.
Many people who build a DIY TV antenna using coax cable are surprised by how many channels they receive. In some areas, you can pick up 50 or more channels, including sub-channels that carry additional content like educational programming, movies, and local government broadcasts.
If you also want to stream content from your phone or tablet to your TV, you can explore how to connect your phone to TV with an HDMI cable for even more viewing options alongside your free OTA channels.
Tools and Materials You Will Need
Before you start building, gather everything you need. Having all materials ready saves time and frustration. Here is a complete list.
Essential Materials
- Coaxial cable: A length of RG6 or RG59 coax cable, about 10 to 25 feet long. This forms the main element of your antenna.
- F-type connector: One male F-type connector to attach the cable to your TV or splitter.
- Cable stripper or utility knife: For preparing the coax cable ends.
- Scissors or wire cutters: To cut the cable to the right length.
- Electrical tape or heat shrink tubing: To secure and insulate connections.
- A piece of cardboard or wood board: This serves as the mounting base for your antenna element.
- Aluminum foil or a wire hanger: Optional, for creating a reflector to boost signal strength.
Tools You May Need
- Screwdriver: For mounting the antenna to a board.
- Pliers: For bending wire if you use a wire hanger reflector.
- Measuring tape: To get the right cable length.
- Marker or pen: To mark cutting points on the cable.
Optional Upgrades
- Signal amplifier: If you live far from broadcast towers, a small amplifier can boost your TV reception significantly.
- Weatherproof enclosure: If you plan to place the antenna outside, a plastic container protects it from rain and moisture.
- Balun transformer: This converts the unbalanced coax signal to a balanced signal for better performance.
Most of these items are available at hardware stores or online for very low prices. You do not need anything fancy. A basic setup works perfectly well for most homes.
For those who also want to use older equipment like a VCR alongside their new antenna setup, check out how to use your VCR with digital TV for a complete home entertainment setup without modern cable boxes.
Step-by-Step Guide to Building Your Coax Cable Antenna
Now comes the fun part. Follow these steps carefully and you will have a working antenna in no time. Each step is simple and straightforward.
Step 1: Cut the Coax Cable to the Right Length
Measure and cut your coax cable to about 10 feet. This length works well for most setups. If you need a longer run, go up to 25 feet, but keep in mind that longer cables can weaken the signal slightly. Use your cable stripper to remove about one inch of the outer jacket from each end of the cable.
Step 2: Strip and Prepare the Cable Ends
Carefully peel back the braided shield and the foil shield. Do not cut into the inner dielectric layer. You should see the center conductor (the copper wire) and the dielectric insulation beneath it. Leave the insulation intact. Twist the braided shield together neatly.
Step 3: Attach the F-Type Connector
Slide the F-type connector onto one end of the cable. Push it firmly until the center conductor pokes through the back of the connector. Use your pliers to crimp the connector tightly. This end plugs directly into your TV’s coax input or into a splitter.
Step 4: Create the Antenna Element
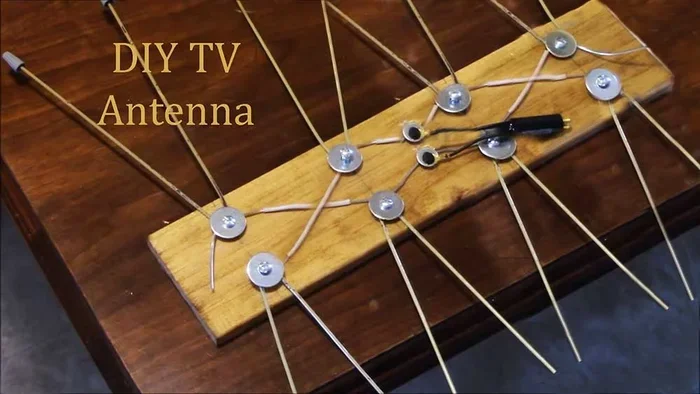
At the other end of the cable, strip back about 3 inches of the outer jacket. Separate the braided shield from the center conductor. Spread the braided shield out flat like a fan. This fan-shaped element is what captures the broadcast signal. The length and shape of this element affect how well your antenna performs.
Step 5: Mount the Antenna on a Base
Attach the fan-shaped element to a piece of cardboard or a small wood board. Use tape or small screws to hold it in place. Make sure the element is flat and the cable runs straight from it to the F connector. A rigid base keeps the antenna stable and prevents signal loss from movement.
Step 6: Add a Reflector (Optional but Recommended)
Take a piece of aluminum foil or straighten a wire hanger and attach it behind the antenna element. The reflector bounces signals toward the element, improving reception. Leave a small gap between the reflector and the element, about half an inch. This gap prevents signal interference.
Step 7: Connect and Scan for Channels
Plug the F connector into your TV’s coaxial input. Run your TV’s channel scan or auto-tune function. Your TV will search for all available broadcast signals in your area. Once the scan is complete, you should see a list of available channels. Use the arrow buttons to start watching!
If you want to display your free channels on a larger screen, consider how to use a projector as a TV for an immersive viewing experience without any extra subscription costs.
Tips for Maximizing Your TV Signal Reception
Getting great reception from your DIY TV antenna using coax cable depends on more than just the build. Placement and positioning play a huge role. Here are proven tips to get the best results.
Place Your Antenna Near a Window
Windows let broadcast signals pass through with minimal obstruction. Place your antenna near a window that faces the direction of the nearest broadcast towers. You can find tower locations using online tools like the FCC DTV Reception Maps website.
Get Your Antenna Up High
Height matters. The higher you place your antenna, the better the signal reception. Try mounting it on a windowsill, a shelf near the ceiling, or even outside on a roof or attic. Avoid placing it near the floor or behind large furniture.
Keep It Away from Electronic Interference
Electronic devices like microwaves, Wi-Fi routers, and cordless phones can interfere with your antenna signal. Keep your antenna at least a few feet away from these devices. Also avoid placing it near metal objects that can block or reflect signals in unwanted ways.
Experiment with Different Positions
Do not settle on the first spot you try. Move your antenna around and run a channel scan after each move. Even a few inches of adjustment can make a big difference. Some people find that a corner of a room works better than the center of a wall.
Use a Longer Coax Cable If Needed
If the best signal spot is far from your TV, use a longer coax cable. However, keep in mind that very long cable runs can reduce signal strength. If you need more than 50 feet, consider adding a signal amplifier to boost the signal along the way.
Point the Antenna Toward Broadcast Towers
Most broadcast towers are located in or near the center of a city. Find the direction of your local towers and point your antenna that way. A compass app on your phone makes this easy. If towers are in multiple directions, you may need to try different orientations.
Check for Channel Availability in Your Area
Not every location receives the same number of channels. Rural areas may have fewer towers nearby. Urban areas typically have many more options. Before building your antenna, check what channels are available at your address using a station finder tool.
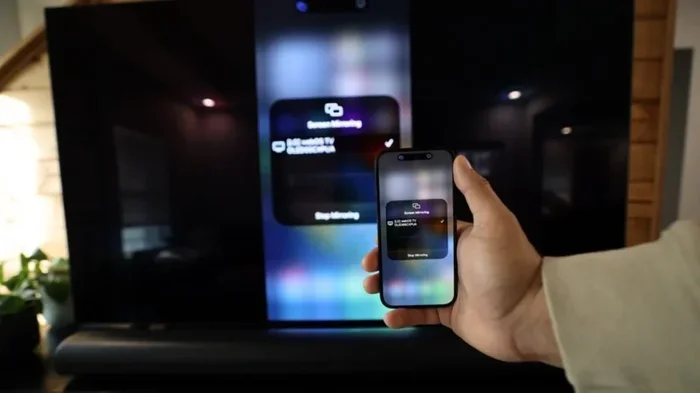
For those who want to stream content wirelessly from a phone to a TV without needing WiFi, you can also learn how to mirror your phone to your smart TV without WiFi and combine that with your free OTA channels for a complete entertainment setup.
Common Mistakes to Avoid When Building a DIY Antenna
Even a simple project like this has pitfalls. Avoiding these common mistakes saves you time and frustration.
Using the Wrong Type of Coax Cable
Not all coax cables are created equal. RG6 and RG59 are the best choices for antenna applications. Avoid thin, cheap cables with high signal loss. The cable quality directly affects how much signal reaches your TV.
Cutting the Inner Conductor
When stripping the cable, be very careful not to nick or cut the center copper conductor. A damaged conductor breaks the signal path and ruins your reception. Take your time and strip slowly.
Ignoring the Connector
A loose or poorly crimped F connector causes signal loss. Make sure the connector is tight and secure. A small amount of solder or electrical tape around the connection can also help maintain a solid contact.
Placing the Antenna in a Closet or Cabinet
Enclosed spaces block broadcast signals. Do not hide your antenna inside a cabinet or closet. It needs a clear line of sight to the broadcast towers for the best performance.
Skipping the Channel Scan
After moving or adjusting your antenna, always run a new channel scan. The channel lineup can change, and your TV needs to find the current available channels. Skipping this step means you might miss channels that are now in range.
Building Too Complicated an Antenna
You do not need a complex design with multiple elements. A simple single-element coax antenna works remarkably well for most homes. Keep it simple. The best antenna is the one that works reliably in your specific location.
If you are also managing multiple devices in your home entertainment setup, you might consider whether you can plug your router into your TV for additional streaming features alongside your free OTA channels.
How to Test and Improve Your Antenna Performance
After building and positioning your antenna, you should test its performance and make improvements as needed. This ensures you get the best possible picture quality.
Check Signal Strength on Your TV
Most modern TVs have a signal strength or signal quality indicator in the settings menu. Navigate to the antenna or tuner settings and look for this feature. A strong signal shows as high percentage bars. A weak signal shows low bars or intermittent reception.
Use a Signal Meter App
Download a free signal meter app on your phone. These apps estimate signal strength based on your location and the broadcast towers in your area. They help you pinpoint the best direction and placement for your antenna.
Try Different Cable Lengths
Sometimes a shorter cable gives better results because there is less signal loss. If your current cable is very long, try shortening it and see if the picture improves. You can always add a longer cable later if needed.
Add a Second Element
If your single-element antenna does not pick up enough channels, try adding a second element. Cut another piece of coax cable the same length and attach it parallel to the first element. Two elements working together can significantly boost signal capture.
Move Outdoors
If indoor placement does not give satisfactory results, take the antenna outside. Mount it on a windowsill facing the towers, or hang it from a tree or porch. Outdoor placement almost always improves reception. Just make sure to protect the cable connections from moisture.
Remember that broadcast signals travel in straight lines. Hills, tall buildings, and dense forests can block or weaken signals. If you live in a challenging location, a small amplifier can make a big difference in your TV reception quality.
Conclusion
Building a DIY TV antenna using coax cable is one of the smartest things you can do if you want to cut the cord and save money on entertainment. The entire project costs almost nothing, takes less than an hour, and delivers free HD channels for years to come.
You now know what materials you need, how to build the antenna step by step, and how to position it for the best signal. You also know the common mistakes to avoid and how to troubleshoot poor reception. With this knowledge, you are ready to start watching free over-the-air television.
The beauty of a homemade antenna is its simplicity. There are no complicated circuits, no expensive components, and no technical degree required. Just a coax cable, a connector, and a little patience. The result is a reliable, free source of local news, sports, weather, and entertainment.
Give it a try tonight. Build your antenna, run a channel scan, and enjoy the channels you have been paying for. Once you see how easy and rewarding it is, you will wonder why you ever paid for cable at all.
Frequently Asked Questions
Can I use any coax cable to build a DIY TV antenna?
RG6 and RG59 coax cables work best for building a DIY TV antenna using coax cable. These are the most common types found in homes. Avoid very thin or damaged cables, as they cause too much signal loss and reduce channel quality.
How many channels can I expect to receive with a homemade antenna?
The number of channels varies by location. In urban areas, you may receive 30 to 50 or more channels. In rural areas, 10 to 20 channels is more typical. Your distance from broadcast towers and the presence of obstructions like hills or buildings affect the total count.
Do I need a special TV to use a DIY antenna?
No. Any TV with a built-in digital tuner can use a DIY antenna. If your TV is older and lacks a digital tuner, you can buy a USB digital tuner adapter for a small cost. This adapter lets your TV receive over-the-air channels through the coax input.
Will a DIY antenna work as well as a store-bought one?
Yes. The signal does not know whether it comes from a homemade or store-bought antenna. What matters is the design, placement, and your location. A well-built DIY TV antenna using coax cable can match or even outperform expensive retail models.
Can I use my DIY antenna outside?
Absolutely. Outdoor placement usually gives better reception than indoor placement. Just make sure the cable connections are protected from rain and moisture. A simple plastic container or weatherproof electrical tape around the connections works well for outdoor use.
Is it legal to build and use a DIY TV antenna?
Yes, it is completely legal. In fact, the FCC encourages viewers to use antennas to receive free over-the-air broadcast signals. There are no regulations against building or using a homemade antenna in the United States or most other countries.