Can You Print 12×12 Photos And Scrapbook Pages At Home
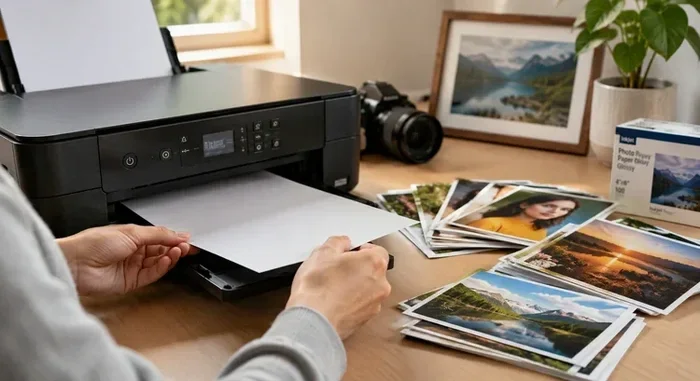
Yes, you can print 12×12 photos and scrapbook pages at home if you have the right printer and supplies. This guide covers everything from choosing a compatible printer to selecting the best paper and settings for crisp, vibrant results. Whether you are a scrapbooker or a photo enthusiast, printing 12×12 at home saves money and gives you full creative control.
Key Takeaways
- Home printing is possible: Many inkjet printers support 12×12 paper sizes with the right setup.
- Printer choice matters: Dedicated photo printers deliver better quality than standard all-in-one units.
- Paper type affects results: Glossy, matte, and cardstock papers all produce different looks for 12×12 projects.
- Settings are critical: Adjusting DPI and print quality settings makes a big difference in output sharpness.
- Design software helps: Tools like Canva and Adobe Spark make layout creation easy for scrapbook pages.
- Borderless printing is a game changer: It allows full-bleed designs across your 12×12 spreads.
📑 Table of Contents
- Can You Print 12×12 Photos and Scrapbook Pages at Home?
- Understanding 12×12 Photo Printing Basics
- Can Your Home Printer Handle 12×12 Prints?
- Choosing the Right Paper for 12×12 Prints
- Step-by-Step Guide to Printing 12×12 Pages
- Common Mistakes to Avoid When Printing 12×12
- Design Tips for Stunning 12×12 Scrapbook Pages
- Comparing Home Printing vs. Professional Printing Services
- Quick Tips for Better 12×12 Prints
- Expert Insights on Home 12×12 Printing
- Final Thoughts on Printing 12×12 at Home
Can You Print 12×12 Photos and Scrapbook Pages at Home?
If you have ever walked into a craft store and seen beautiful 12×12 scrapbook pages, you know how stunning they look. The big question is whether you can create that same magic at home. The short answer is yes. You absolutely can print 12×12 photos and scrapbook pages from your own printer. But there are a few things you need to know first.
Printing at home saves you time and money. You do not need to wait for shipping or pay extra for large-format prints. With the right setup, your home printer can produce results that rival professional prints. This guide will walk you through everything you need to get started.
We will cover printer types, paper choices, software options, and step-by-step instructions. By the end, you will feel confident about tackling your own 12×12 projects. Let us dive in.
Why Print 12×12 at Home?
There are many reasons to print 12×12 pages from home. First, you have complete creative control. You choose the photos, the layout, and the paper type. Second, it is cost-effective over time. Third, you can print as many copies as you want without leaving your house.
Many scrapbookers also love the convenience of printing at home. You can work on a project late at night or early in the morning. There is no need to visit a print shop during business hours. This flexibility makes home printing very appealing for hobbyists and professionals alike.
Understanding 12×12 Photo Printing Basics
Before you hit print, it helps to understand what 12×12 actually means. This refers to the paper size, which is 12 inches by 12 inches. That is a square format. It is larger than standard 8.5×11 letter paper, which means you need a printer that can handle it.
What Is the 12×12 Paper Size?
The 12×12 paper size is a square format commonly used in scrapbooking. It is also called 12×12 inch paper or 12×12 cardstock. Many scrapbookers prefer this size because it gives them plenty of room for photos, embellishments, and journaling. You can find 12×12 paper in different weights and finishes.
Standard printers usually max out at 8.5×11 or 8.5×14. So you need a printer that supports larger media sizes. Some printers have a rear feed tray that can handle 12×12 paper. Others may require you to feed the paper through the manual feed slot.
Resolution and Print Quality Explained
Resolution matters a lot when printing large photos. It is measured in DPI, which stands for dots per inch. The higher the DPI, the sharper the print. For 12×12 prints, you want to aim for at least 300 DPI. This ensures your photos look crisp and detailed.
If you print at a lower resolution, the image may look pixelated or blurry. Always check your image resolution before sending it to the printer. Most photo editing software lets you see the DPI and dimensions of your file. This is a quick way to confirm your image is print-ready.
Can Your Home Printer Handle 12×12 Prints?
Not all printers can handle 12×12 paper. Some are limited to letter or legal size. So you need to check your printer specifications before you start. Look for the maximum paper size your printer supports. This information is usually in the user manual or on the manufacturer website.
Inkjet vs. Laser Printers for 12×12
Inkjet printers are generally the best choice for photo printing. They use liquid ink that produces vibrant colors and smooth gradients. Laser printers use toner and are better suited for text documents. For 12×12 photo prints, inkjet is the clear winner.
However, not all inkjet printers are created equal. A dedicated photo printer will give you much better results than a standard all-in-one inkjet. Photo printers use more ink cartridges and finer nozzles. This means smoother color transitions and sharper details.
Printers That Support 12×12 Paper
Several popular printers can handle 12×12 paper. Here are some options to consider:
- Epson Expression Photo HD XP-15000: This printer supports up to 13×19 inch paper, so 12×12 is no problem. It uses a six-color ink system for rich, vibrant prints.
- Canon PIXMA Pro MegaTank MT-5300: A tank-style printer with excellent photo quality. It handles large paper sizes and is cost-effective for high-volume printing.
- HP Envy Photo 7855: A more affordable option that supports 12×12 paper. It is a great choice for casual scrapbookers and home users.
- Epson SureColor P600: A professional-grade photo printer that handles 12×12 with ease. It is ideal for serious scrapbookers and photographers.
When choosing a printer, look for borderless printing support. Borderless printing lets your images extend to the edge of the paper. This is especially important for scrapbook pages where you want a full-bleed look.
Choosing the Right Paper for 12×12 Prints
The paper you choose has a huge impact on the final result. Different papers create different effects. Some are glossy and shiny. Others are matte and smooth. Your choice depends on the look you want for your scrapbook pages.
Types of 12×12 Paper
Here are the most common paper types used for 12×12 printing:
- Glossy photo paper: This paper has a shiny finish that makes colors pop. It is great for vibrant photos and bold scrapbook layouts.
- Matte photo paper: Matte paper has a smooth, non-reflective finish. It looks elegant and is easy to write on with markers or pens.
- Luster paper: Luster paper is a hybrid between glossy and matte. It has a subtle sheen without being too shiny.
- Cardstock: Thicker paper that holds up well in albums. Cardstock is ideal for scrapbook covers and heavy embellishments.
- Vellum: A translucent paper that adds a creative touch. Vellum is often used for layering on scrapbook pages.
Paper Weight and Thickness
Paper weight is measured in GSM or pounds. For 12×12 scrapbook pages, you want paper that is at least 60 to 80 lbs. Thicker paper prevents ink from bleeding and gives your pages a premium feel. Very thin paper may curl or warp when it absorbs ink.
Always check that your printer can handle the paper weight you choose. Some printers have a maximum paper weight limit. Exceeding this limit can cause jams or damage to the printer.
Step-by-Step Guide to Printing 12×12 Pages
Now that you know the basics, let us walk through the actual printing process. Following these steps will help you get the best results every time.
Step 1: Prepare Your Design
Start by creating your layout in design software. Popular options include Canva, Adobe Spark, and Photoshop. Set your canvas size to 12×12 inches at 300 DPI. This ensures your design is the right size and resolution for printing.
Arrange your photos and embellishments on the canvas. Leave enough space between elements so nothing looks crowded. Remember that what you see on screen may look slightly different when printed. Calibrate your monitor if possible for more accurate colors.
Step 2: Select the Right Paper
Load your 12×12 paper into the printer. Check your printer manual for the correct paper path. Some printers have a rear tray that expands to handle larger paper. Others require you to use the manual feed slot.
Make sure the paper is loaded flat and aligned properly. Misaligned paper can cause crooked prints or jams. Fan the paper stack before loading to prevent sheets from sticking together.
Step 3: Adjust Printer Settings
Go to your print settings and make these adjustments:
- Select 12×12 as the paper size.
- Choose photo quality or best print mode.
- Set the DPI to 300 or higher.
- Enable borderless printing if your printer supports it.
- Select the correct paper type from the printer driver menu.
These settings make a big difference in print quality. Taking a few extra minutes to configure them properly saves you from disappointing results.
Step 4: Print a Test Page
Before you print your final design, print a test page. This lets you check the colors, alignment, and overall quality. If something looks off, you can adjust the settings and try again.
Test pages save paper and ink in the long run. They are a small step that makes a big difference. Many professional print shops also recommend this practice.
Step 5: Print and Let It Dry
Once you are happy with the test page, print your final 12×12 pages. Let the ink dry completely before handling the paper. Fresh ink can smudge easily, especially on glossy paper.
If you are printing multiple pages, stack them carefully. You can place a sheet of clean paper between each print to prevent ink transfer. This simple tip keeps your finished pages looking their best.
Common Mistakes to Avoid When Printing 12×12
Even experienced printers make mistakes. Here are some common pitfalls to watch out for.
Using the Wrong Paper Size
This sounds obvious, but it happens more than you think. Always double-check that your document is set to 12×12 inches. If your software defaults to 8.5×11, your design will be cropped or scaled down. This ruins the entire layout.
Ignoring Printer Margins
Some printers have unprintable areas near the edges. If you are not using borderless printing, your design may get clipped. Check your printer’s margin specifications and adjust your layout accordingly.
Skipping Color Calibration
Colors on your screen rarely match colors on paper exactly. This is because screens use light to display color, while printers use ink. Calibrating your monitor and using color management tools helps reduce the gap between what you see and what you get.
Using Low-Quality Images
Printing a small, low-resolution image on a large 12×12 page will look terrible. Always use high-resolution images for large prints. A good rule of thumb is that your image should be at least 3600×3600 pixels for a 12×12 print at 300 DPI.
Not Using the Correct Paper Type Setting
Your printer driver has settings for different paper types. If you select the wrong one, the printer will not optimize ink output correctly. This can result in smudging, bleeding, or dull colors. Always match the paper type setting to the actual paper you are using.
Design Tips for Stunning 12×12 Scrapbook Pages
Printing is only half the process. The design of your scrapbook page is what makes it truly special. Here are some tips to help you create beautiful layouts.
Plan Your Layout Before You Design
Before you open any software, sketch your layout on paper. Decide where your focal photo goes and where the supporting images will be. Having a plan saves time and reduces frustration during the design process.
Use Templates for Quick Results
Many design tools offer 12×12 scrapbook templates. These pre-made layouts give you a starting point that you can customize. You can change photos, adjust colors, and add text. Templates are perfect for beginners who are still learning the software.
Balance Your Page
A well-designed scrapbook page has visual balance. Distribute photos and embellishments evenly across the page. Avoid clustering everything in one corner. Leave some white space so the page does not feel overwhelming.
Add Personal Touches
The best scrapbook pages tell a story. Add handwritten journaling, personal notes, or meaningful quotes. These touches make your pages unique and heartfelt. They transform a simple photo layout into a treasured keepsake.
Comparing Home Printing vs. Professional Printing Services
You might wonder whether home printing is really better than using a professional service. Let us compare the two options.
| Factor | Home Printing | Professional Service |
|---|---|---|
| Cost per page | Lower for small batches | Higher setup fees but cheaper for bulk |
| Convenience | Print anytime, anywhere | Must visit or ship to a print shop |
| Print quality | Very good with the right printer | Excellent, especially for large runs |
| Creative control | Full control over design and paper | Limited to available paper options |
| Turnaround time | Immediate | Can take days or weeks |
| Best for | Small batches, custom projects | Large orders, special finishes |
For most scrapbookers, home printing is the better choice. It offers flexibility, creative freedom, and cost savings. Professional services make more sense for very large orders or when you need specialty finishes like foil stamping or embossing.
Quick Tips for Better 12×12 Prints
- Clean your printer heads regularly to prevent clogged nozzles and faded prints.
- Store your paper in a cool, dry place to prevent moisture damage.
- Use genuine ink cartridges for the best color accuracy and print longevity.
- Print in a dust-free environment to keep particles from sticking to wet ink.
- Save your templates so you can reuse them for future scrapbook projects.
- Experiment with different paper finishes to discover your favorite look and feel.
- Keep a printing log to track which settings work best for each paper type.
Expert Insights on Home 12×12 Printing
Professional scrapbookers and photographers agree that home printing has come a long way. Modern printers produce results that were once only possible with expensive large-format equipment. The key is understanding your tools and taking the time to set them up correctly.
Many experts recommend investing in a dedicated photo printer if you print 12×12 pages regularly. The print quality is noticeably better than what you get from a standard all-in-one printer. The ink systems in dedicated photo printers are designed specifically for photographic output, which means smoother gradients and more accurate colors.
Another expert tip is to always use the printer manufacturer’s recommended paper settings. Each printer model has specific requirements for optimal performance. Using the correct settings ensures your printer delivers its best possible output.
Final Thoughts on Printing 12×12 at Home
Printing 12×12 photos and scrapbook pages at home is entirely achievable. You do not need expensive equipment or professional training. With the right printer, quality paper, and proper settings, you can create beautiful pages that rival anything from a print shop.
The key to success is preparation. Take the time to understand your printer, choose the right paper, and design your layouts carefully. Follow the steps outlined in this guide, and you will be well on your way to producing stunning 12×12 prints from the comfort of your home.
Start with a simple project if you are new to this. Print a single 12×12 page and evaluate the results. As you gain confidence, you can tackle more complex layouts and experiment with different paper types and designs. The beauty of home printing is that you can learn and improve at your own pace.
Remember, practice makes perfect. Every print teaches you something new about your printer and your preferences. Soon, printing 12×12 pages at home will become second nature. Enjoy the creative process and have fun with your scrapbook projects.
Frequently Asked Questions
Can any printer print 12×12 paper?
No, not all printers support 12×12 paper. You need to check your printer’s maximum paper size specification. Many standard printers max out at 8.5×11 inches. Look for printers that explicitly list 12×12 or larger as a supported paper size in their specifications.
What DPI should I use for 12×12 photo prints?
For the best results, use 300 DPI when printing 12×12 photos. This resolution ensures sharp, detailed prints without pixelation. If you print at a lower DPI, the image may appear blurry or grainy, especially when viewed up close in a scrapbook.
Is borderless printing necessary for 12×12 scrapbook pages?
Borderless printing is not strictly necessary, but it is highly recommended. It allows your images and designs to extend all the way to the edge of the paper. This creates a polished, professional look that is especially important for scrapbook layouts with full-bleed backgrounds.
How much does it cost to print 12×12 pages at home?
The cost depends on your printer, ink type, and paper choice. On average, a single 12×12 print on quality photo paper costs between 50 cents and 2 dollars. This is significantly cheaper than professional printing services, especially when you print multiple pages for a single scrapbook album.
Can I use regular cardstock for 12×12 prints?
Yes, you can use regular cardstock as long as it fits within your printer’s maximum paper weight and size limits. However, cardstock designed specifically for photo printing will give you better results. It is formulated to absorb ink properly and prevent bleeding or warping.
What software is best for designing 12×12 scrapbook layouts?
Popular options include Canva, Adobe Spark, Photoshop, and free alternatives like GIMP and Photopea. Canva is especially beginner-friendly and offers many 12×12 templates. Choose software based on your skill level and budget. Most of these tools let you set a custom canvas size of 12×12 inches.
=== CONCLUSION ===
Printing 12×12 photos and scrapbook pages at home is easier than you might think. With the right printer, quality paper, and proper settings, you can create beautiful, professional-looking pages without leaving your house. This guide has covered everything from printer selection to design tips and common mistakes to avoid.
The most important takeaway is that preparation is everything. Take the time to set up your printer correctly, choose the right paper, and design your layouts with care. Your effort will pay off in stunning 12×12 prints that you can be proud of.
Start experimenting today. Print a test page, try different paper types, and refine your process. The more you practice, the better your results will become. Happy printing and happy scrapbooking!