Can I Use Raspberry Pi With A Laptop Heres Everything
Yes, you can use Raspberry Pi with a laptop in multiple ways, from turning it into a headless server to using it as a portable workstation. You can connect the two devices through USB, HDMI, SSH, or even Wi-Fi depending on what you want to achieve. This guide covers every method, setup step, and creative project idea so you can get started right away.
Have you ever wondered if you can use Raspberry Pi with a laptop? The short answer is absolutely yes. Whether you want to turn your tiny computer into a headless server, a portable workstation, or a fun DIY project, connecting it to a laptop opens up a world of possibilities.
Many people buy a Raspberry Pi but feel confused about how to use it alongside their existing computer. The good news is that you do not need a fancy setup or expensive gear. A standard laptop and a Raspberry Pi can work together beautifully with just a few cables and some simple steps.
In this guide, we will walk through every way you can connect and use a Raspberry Pi with a laptop. We will cover hardware connections, software setups, and even cool projects you can try at home. By the end, you will know exactly how to make these two devices work as a team.
Key Takeaways
- Multiple Connection Methods: You can link a Raspberry Pi to a laptop via USB, HDMI, SSH, or Wi-Fi for different use cases.
- Headless Setup Is Powerful: Running a Raspberry Pi without a monitor saves resources and lets you control it entirely from your laptop.
- Compatible with Most Models: Raspberry Pi 3, 4, and 5 all work well with laptops, each offering different performance levels.
- Creative Projects Are Endless: From media centers to web servers, pairing a Raspberry Pi with a laptop opens up many DIY possibilities.
- Power and Accessories Matter: A reliable power supply, USB hub, and microSD card are essential for a smooth experience.
- Remote Desktop Works Great: You can control your Raspberry Pi directly from your laptop screen using VNC or SSH tools.
📑 Table of Contents
- What Is Raspberry Pi and Why Connect It to a Laptop?
- How to Connect Raspberry Pi to a Laptop
- Using Raspberry Pi as a Headless Device
- Best Raspberry Pi Models for Laptop Users
- Common Challenges When Using Raspberry Pi With a Laptop
- Creative Projects You Can Build Using Raspberry Pi and a Laptop
- Expert Insights on Using Raspberry Pi With a Laptop
- Key Takeaways
- Frequently Asked Questions
- Conclusion
What Is Raspberry Pi and Why Connect It to a Laptop?
A Raspberry Pi is a small, affordable single-board computer. It is about the size of a credit card but can do many things a regular desktop computer does. You can browse the web, write code, run servers, and even build smart home devices with it.
So why connect it to a laptop? Well, your laptop brings a screen, keyboard, and mouse to the table. The Raspberry Pi brings its own processing power and GPIO pins for hardware projects. Together, they create a flexible setup that can serve many purposes.
Some people use their laptop as the main display while the Raspberry Pi handles background tasks. Others use SSH or remote desktop tools to control the Pi from afar. No matter your goal, the connection gives you more power and flexibility than either device alone.
How People Typically Use Both Devices Together
Here are the most common reasons people connect a Raspberry Pi to a laptop:
- Headless server: Run a web server or file server without needing a separate monitor.
- Development workstation: Write and test code on the Pi while using the laptop as a terminal.
- Media center: Stream content from the Pi to your laptop or external display.
- Learning tool: Practice Linux commands and electronics projects using both devices.
- Network testing: Use the Pi as a network device while monitoring it from your laptop.
How to Connect Raspberry Pi to a Laptop
Connecting a Raspberry Pi to a laptop is simpler than most people think. There are several methods you can choose from depending on what equipment you have and what you want to accomplish. Let us walk through each option step by step.
Method 1: USB Connection
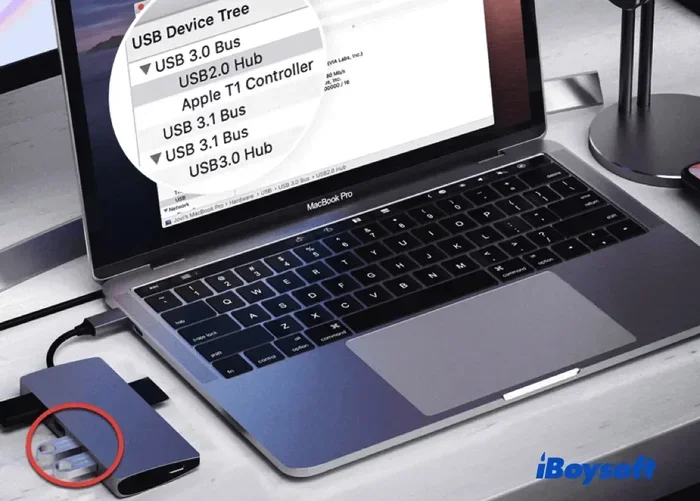
You can connect your Raspberry Pi to a laptop using a USB cable. This method works well for basic file transfers and powering the device. Most people use a micro USB or USB-C cable depending on their Raspberry Pi model.
Here is what you need to do:
- Plug the micro USB or USB-C end into the Raspberry Pi.
- Connect the other end to your laptop.
- Make sure your laptop recognizes the device.
- Install any necessary drivers if prompted.
Keep in mind that a standard USB cable may not provide enough power for some Pi models. You might need a powered USB hub to keep everything running smoothly.
Method 2: HDMI Cable
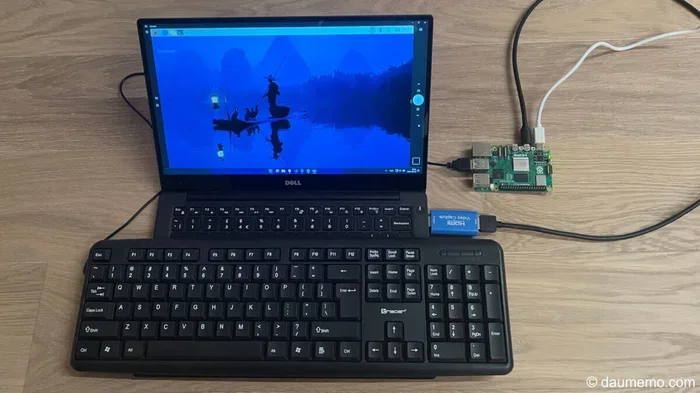
Using an HDMI cable is the most straightforward way to connect a Raspberry Pi to a display. If your laptop has an HDMI port, you can plug the Pi directly into it. If not, you can use an HDMI-to-USB adapter.
This method turns your laptop screen into a monitor for the Raspberry Pi. It is great for initial setup and for projects where you want a dedicated display. Just remember that you will need a separate keyboard and mouse for the Pi.
Method 3: SSH and Wi-Fi Connection
SSH (Secure Shell) lets you control your Raspberry Pi remotely from your laptop over a Wi-Fi network. This is one of the most popular methods for people who want a clean, cable-free setup.
To get started with SSH:
- Install Raspberry Pi OS on a microSD card.
- Enable SSH by creating an empty file named “ssh” in the boot folder.
- Connect both devices to the same Wi-Fi network.
- Open a terminal on your laptop and type “ssh [email protected]”.
Once connected, you can run commands, transfer files, and manage your Pi entirely from the laptop screen. It feels like the Pi is sitting right in front of you even though it is not.
Method 4: Remote Desktop
If you want a full graphical interface on your laptop while controlling the Pi, remote desktop is the way to go. Tools like VNC (Virtual Network Computing) let you see and interact with the Pi’s desktop from your laptop.
To set this up, you need to install a VNC server on the Raspberry Pi and a VNC viewer on your laptop. Once configured, you can move your mouse, open apps, and manage files as if you were sitting right in front of the Pi.
Using Raspberry Pi as a Headless Device
A headless setup means running the Raspberry Pi without a monitor, keyboard, or mouse. Instead, you control everything from your laptop through a terminal or remote desktop. This approach is popular among developers and hobbyists who want a clean, minimal setup.
Running a Raspberry Pi in headless mode has several advantages. It uses fewer resources, takes up less desk space, and lets you access your Pi from anywhere on the same network. Many people run their Pi as a headless server for months without ever connecting a monitor.
Setting Up a Headless Raspberry Pi
Here is a quick guide to get your Pi running headless:
- Flash Raspberry Pi OS onto a microSD card using the Raspberry Pi Imager tool.
- Create an empty “ssh” file in the boot partition of the SD card.
- Create a “wpa_supplicant.conf” file to connect to your Wi-Fi network automatically.
- Insert the SD card into the Pi and power it on.
- Find the Pi’s IP address using your router’s admin panel.
- Open a terminal on your laptop and SSH into the Pi using its IP address.
Once you are in, you can install any software you need, configure settings, and start using the Pi as a dedicated tool. The laptop becomes your control center for everything.
Best Uses for a Headless Raspberry Pi
- Web server: Host a personal website or blog.
- File server: Store and share files across your home network.
- Media server: Stream movies and music using software like Plex.
- Smart home hub: Control IoT devices and sensors around your home.
- VPN server: Secure your internet connection when working remotely.
Best Raspberry Pi Models for Laptop Users
Not all Raspberry Pi models are the same. Some are better suited for laptop pairing than others depending on your needs and budget. Here is a look at the most popular options.
| Model | Processor | RAM | Best For | Price Range |
|---|---|---|---|---|
| Raspberry Pi 3 Model B+ | 1.4 GHz Quad-Core | 1GB | Basic projects and learning | $25-$35 |
| Raspberry Pi 4 Model B | 1.5 GHz Quad-Core | 2GB-8GB | Desktop replacement and servers | $35-$75 |
| Raspberry Pi 5 | 2.4 GHz Quad-Core | 4GB-8GB | High-performance tasks and multitasking | $60-$80 |
| Raspberry Pi Zero 2 W | 1 GHz Quad-Core | 512MB | Lightweight and portable projects | $15 |
The Raspberry Pi 4 and Pi 5 are the best choices for most laptop users. They offer enough processing power for multitasking, media streaming, and light development work. If you are just starting out, the Pi 3 or Pi Zero are budget-friendly options that still deliver great results.
What to Look for When Choosing a Model
Here are a few things to keep in mind when picking a Raspberry Pi for laptop use:
- RAM: More RAM means smoother multitasking between the Pi and your laptop.
- Connectivity: Look for built-in Wi-Fi and Bluetooth for wireless laptop pairing.
- USB Ports: More ports mean you can connect peripherals without a hub.
- Power Requirements: Make sure your laptop or power bank can supply enough juice.
- GPIO Pins: If you plan on building hardware projects, more pins give you more flexibility.
Common Challenges When Using Raspberry Pi With a Laptop
While connecting a Raspberry Pi to a laptop is generally easy, you might run into a few bumps along the way. Knowing these challenges ahead of time can save you a lot of frustration.
Power Supply Issues
The most common problem is insufficient power. If your Raspberry Pi keeps restarting or shows a lightning bolt icon, it is not getting enough power. A standard laptop USB port may not provide the full 5V 3A that some Pi models need.
The fix is simple: use a dedicated power supply designed for your Raspberry Pi model. A good quality USB-C power adapter or a powered USB hub can solve this problem quickly.
Slow Performance
If your Pi feels sluggish when connected to a laptop, it might be because of the microSD card speed. Cheap, slow cards can bottleneck the entire system. Investing in a high-speed microSD card (Class 10 or UHS-I) can make a noticeable difference.
Another reason for slow performance is running too many programs at once. The Raspberry Pi has limited resources compared to a full desktop, so keep an eye on what is running in the background.
Network Connection Problems
Sometimes the Pi and laptop cannot find each other on the network. This usually happens when they are connected to different Wi-Fi bands or when the firewall on your laptop is blocking the connection.
To fix this, make sure both devices are on the same network. You can also try connecting the Pi via Ethernet cable for a more stable connection during setup.
Display and Resolution Issues
When using an HDMI connection, you might encounter display problems like a blank screen or incorrect resolution. This often happens when the Pi and laptop have different display capabilities.
You can fix this by editing the config.txt file on the SD card to set the correct resolution before booting up the Pi. Adding specific HDMI settings can force the Pi to output a signal your laptop can display properly.
Creative Projects You Can Build Using Raspberry Pi and a Laptop
Now that you know how to connect and manage your devices, let us talk about the fun part: projects. The combination of a Raspberry Pi and a laptop gives you a powerful toolkit for building all kinds of cool things.
Build a Portable Media Center
Install software like Kodi or LibreELEC on your Raspberry Pi and use your laptop as the remote control. You can stream movies, music, and photos from your Pi to any display in your home. The laptop handles the interface while the Pi does the heavy lifting of decoding and playing media files.
Create a Personal Cloud Storage
Turn your Raspberry Pi into a private cloud using Nextcloud or OpenMediaVault. You can access your files from your laptop through a web browser, just like using Google Drive or Dropbox. The difference is that your data stays on your Pi, giving you full privacy and control.
Build a Network-Attached Storage (NAS)
Connect an external hard drive to your Raspberry Pi and share it across your home network. Your laptop can access these files anytime. This is a great way to create a low-cost backup solution or a shared drive for the whole family.
Set Up a Programming Learning Station
If you are learning to code, a Raspberry Pi paired with a laptop makes an excellent learning environment. You can write code on your laptop, transfer it to the Pi, and run it directly. This setup teaches you real-world skills like remote server management and cross-platform development.
Build a Smart Home Dashboard
Use the Pi to run a smart home dashboard that you can view on your laptop. Connect sensors, smart plugs, and cameras to the Pi, then monitor everything from your browser. It is a fun and practical way to learn about IoT (Internet of Things) technology.
Quick Tips for a Smooth Experience
- Always use a high-quality microSD card from a reputable brand.
- Keep your Raspberry Pi OS updated for the best security and performance.
- Use a powered USB hub if you are connecting multiple peripherals.
- Label your cables and keep your setup organized to avoid confusion.
- Back up your Pi’s SD card regularly using tools like Win32 Disk Imager.
- Use a static IP address for your Pi to make SSH connections more reliable.
- Invest in a good case to protect your Pi from dust and accidental damage.
Expert Insights on Using Raspberry Pi With a Laptop
Experienced makers and developers agree that pairing a Raspberry Pi with a laptop is one of the best ways to get started with embedded computing. The laptop provides the familiar interface while the Pi introduces you to Linux, networking, and hardware projects.
Many experts recommend starting with a headless SSH setup. It teaches you essential command-line skills that are valuable in any tech career. Once you are comfortable with SSH, you can explore remote desktop connections and more advanced networking setups.
Another pro tip is to use your laptop as a development machine while the Pi serves as a testing environment. Write your code on the laptop, push it to the Pi, and see how it runs on real hardware. This workflow mirrors how professional software teams work and gives you real-world experience.
Power management is also something experts emphasize. Always use the official Raspberry Pi power supply or a high-quality third-party alternative. Unstable power can corrupt your SD card and cause data loss, which is something you want to avoid at all costs.
Key Takeaways
- Multiple Connection Methods: You can link a Raspberry Pi to a laptop via USB, HDMI, SSH, or Wi-Fi for different use cases.
- Headless Setup Is Powerful: Running a Raspberry Pi without a monitor saves resources and lets you control it entirely from your laptop.
- Compatible with Most Models: Raspberry Pi 3, 4, and 5 all work well with laptops, each offering different performance levels.
- Creative Projects Are Endless: From media centers to web servers, pairing a Raspberry Pi with a laptop opens up many DIY possibilities.
- Power and Accessories Matter: A reliable power supply, USB hub, and microSD card are essential for a smooth experience.
- Remote Desktop Works Great: You can control your Raspberry Pi directly from your laptop screen using VNC or SSH tools.
Frequently Asked Questions
Can I use any laptop with a Raspberry Pi?
Yes, you can use any laptop with a Raspberry Pi as long as it has the right ports or supports wireless connections. Whether you have a Windows PC, a MacBook, or a Chromebook, you can connect and control a Raspberry Pi. The connection method might vary slightly depending on your operating system, but the basics remain the same.
Do I need internet to connect a Raspberry Pi to a laptop?
No, you do not need internet for all connection methods. USB and HDMI connections work without any internet access. However, if you want to use SSH or remote desktop over Wi-Fi, both devices need to be on the same local network. The Raspberry Pi and laptop can communicate directly without an internet connection as long as they share a network.
What cable do I need to connect a Raspberry Pi to a laptop?
The cable you need depends on the connection method. For USB, you need a micro USB or USB-C cable. For HDMI, you need a standard HDMI cable or an HDMI-to-mini HDMI adapter. For wireless connections, you just need both devices on the same Wi-Fi network. A good Ethernet cable can also help with a stable wired connection during initial setup.
Can I use my laptop as a monitor for Raspberry Pi?
Yes, you can use your laptop as a monitor for a Raspberry Pi through an HDMI connection or a remote desktop setup. The HDMI method requires your laptop to have an HDMI input, which is rare on modern laptops. A more practical approach is using VNC or SSH to view and control the Pi’s desktop on your laptop screen wirelessly.
Is it safe to leave a Raspberry Pi connected to a laptop 24/7?
Yes, it is generally safe to leave a Raspberry Pi running continuously as long as it has a stable power supply and proper cooling. Raspberry Pi devices are designed to run for long periods. Just make sure your power source is reliable and that the Pi is in a well-ventilated area to prevent overheating.
Can I charge my laptop using a Raspberry Pi?
No, you cannot charge a laptop using a Raspberry Pi. The Raspberry Pi consumes power rather than supplying it. In fact, you need to power the Pi separately using a dedicated power adapter. The Pi uses between 3 and 5 watts of power depending on the model and workload, which is far less than what a laptop needs to charge.
Conclusion
Using a Raspberry Pi with a laptop is one of the most rewarding things you can do in the world of computing. Whether you are a beginner exploring your first tech project or an experienced developer looking for a compact server, this combination delivers incredible value and versatility.
The methods we covered in this guide give you everything you need to get started. From simple USB and HDMI connections to advanced headless SSH setups, you can choose the approach that fits your needs best. The Raspberry Pi is a tiny but mighty device that pairs beautifully with any laptop.
Remember to start with the basics, experiment with different setups, and gradually take on more complex projects as you grow your skills. The learning journey never ends with a Raspberry Pi, and having your laptop as a companion makes every step easier and more enjoyable.
So go ahead, grab your Raspberry Pi, fire up your laptop, and start building something amazing today. The possibilities are truly endless when these two powerful little devices work together.