Can I Connect My Wii Console To My TV With HDMI Cable
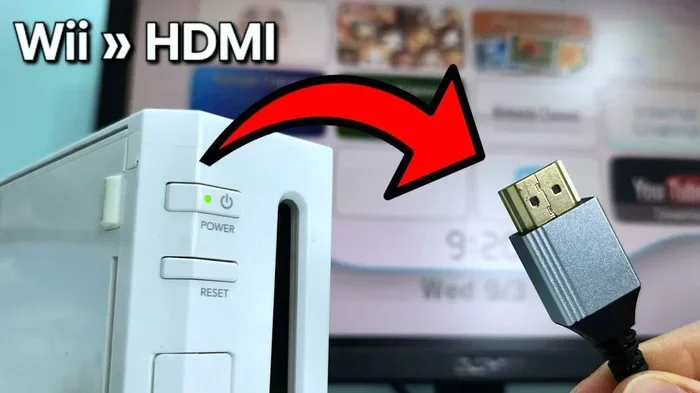
Yes, you can connect your Wii to your TV with an HDMI cable, but it requires a Wii to HDMI converter since the original console does not have a native HDMI port. This guide walks you through every connection method, from converter boxes to component cables, so you can enjoy your favorite Nintendo games in the best possible quality. Whether you are setting up a retro gaming station or improving your current setup, you will find clear, practical steps right here.
Maybe you just picked up a used Nintendo Wii from a garage sale. Or perhaps you are digging out an old console from the closet and want to hook it up to your new flat-screen TV. Either way, the big question is the same. Can I connect my Wii to my TV with an HDMI cable? The short answer is yes, but there is a little more to it than just plugging in a cable. Your Wii was released back in 2006, long before HDMI became the standard for every gaming device. So the console itself does not come with an HDMI port. That does not mean you are stuck, though. With the right adapter or converter, you can absolutely get your Wii running on a modern television and enjoy your favorite games with much better picture and sound.
In this guide, we will walk you through every option available. You will learn why the Wii lacks native HDMI support, which converter to buy, how to set everything up step by step, and what to do if something goes wrong. We will also compare the different connection methods so you can pick the best one for your setup. By the end, you will know exactly how to get your Wii connected and running smoothly on any TV in your home.
Key Takeaways
- The Wii does not have a built-in HDMI port, so you need a converter adapter to use HDMI cables.
- A Wii to HDMI converter is the most popular and easiest way to get digital video output on modern TVs.
- Component and composite AV cables are alternative options if you do not want to buy a converter.
- Picture quality improves significantly when you use the right cable or converter compared to the stock AV cables.
- Setting up your Wii with HDMI takes only minutes and requires very few tools or technical skills.
- Common issues like no signal or blurry picture can usually be fixed with simple troubleshooting steps.
📑 Table of Contents
- Understanding Your Wii Console’s Video Output Options
- Can You Directly Connect a Wii to HDMI?
- How to Connect Your Wii to Your TV Using HDMI
- Step-by-Step Guide to Setting Up Your Wii with HDMI
- Comparing Connection Methods for Your Wii
- Common Problems and How to Fix Them
- Expert Tips for Better Picture Quality
- Is Connecting Your Wii with HDMI Worth It?
- Conclusion
Understanding Your Wii Console’s Video Output Options
Before you buy any cables or adapters, it helps to understand what your Wii can actually output. Nintendo designed the Wii to work with several types of video connections. Each one delivers a different level of picture quality. Knowing your options makes it much easier to choose the right setup for your TV.
The Original Wii AV Cables
When you first bought your Wii, it came with a composite AV cable. This is the yellow, red, and white cable set. The yellow cable carries the video signal. The red and white cables handle the left and right audio channels. This setup works fine on older televisions, especially CRT models. But on a modern HDTV, the picture can look blurry or washed out. The resolution is limited to 480i, which is standard definition. That is not terrible, but it is not sharp either. If you are okay with that level of quality, you can just use the cables that came in the box. However, most people today want a clearer picture on their big-screen TVs.
What HDMI Means for Older Consoles
HDMI stands for High-Definition Multimedia Interface. It carries both video and audio through a single cable. This makes it super convenient. Almost every modern TV has at least one HDMI port. The problem is that the Wii was never built with HDMI output in mind. Nintendo used the AV cables as the standard connection method. So if you want to use HDMI, you need a bridge between the old console and the new TV. That bridge comes in the form of a converter box or an adapter. These small devices take the Wii’s original signal and convert it into a digital HDMI signal that your TV can display clearly.
Can You Directly Connect a Wii to HDMI?
Here is the honest truth. You cannot plug an HDMI cable directly into the back of a Wii console. There is no HDMI port on the Wii. So any claim that you can just run an HDMI cable from the console to the TV is incorrect. You need a middleman. That middleman is a converter. The good news is that converters are inexpensive and very easy to use. You do not need any technical skills to set one up. Most people have their Wii running through HDMI within ten minutes of opening the box.
Some people wonder if they can use component cables instead. Component cables use red, green, and blue connectors for video plus red and white for audio. The Wii does support component video output. This gives a noticeably better picture than composite cables. But component cables still do not carry digital signals the way HDMI does. If you want the clearest possible image on your HDTV, a converter is the way to go. It transforms the Wii’s analog signal into a clean digital output that your TV can display at its best.
How to Connect Your Wii to Your TV Using HDMI
Now let us get into the practical stuff. There are three main ways to connect your Wii to a TV using HDMI or HDMI-adjacent methods. Each has its own pros and cons. Let us break them all down so you can decide which works best for your situation.
Option 1: Using a Wii to HDMI Converter
This is by far the most popular method. A Wii to HDMI converter is a small box that plugs into the back of your Wii where the AV cable normally goes. Then you run an HDMI cable from the converter to your TV. It is simple, clean, and effective. Most converters also let you adjust the output resolution. You can often choose between 480p, 720p, or even 1080p. This means you can upscale the Wii’s signal to look much sharper on a big screen. Brands like RetroTINK and XRGB-Mini make well-known converters that gamers trust. Prices typically range from 20 to 50 dollars. That is a small investment for a much better gaming experience.
Setting up a converter is straightforward. Plug the Wii AV cable into the converter. Connect the HDMI cable from the converter to your TV. Switch your TV to the correct HDMI input. Power on the Wii. You should see the Wii menu on your screen right away. If the picture looks wrong, check the converter’s settings. Most converters have a small menu you can navigate using the Wii remote. From there, you can adjust resolution, scan type, and other display options.
Option 2: Using Component Cables for Better Quality
If you do not want to spend money on a converter, component cables are a solid alternative. The Wii supports component video output natively. You can buy official Nintendo component cables or third-party versions. Component cables deliver a sharper image than the stock composite cables. Colors look more vibrant. The picture is noticeably cleaner, especially on larger screens. The trade-off is that component cables still use an analog signal. They do not offer the same digital clarity as a true HDMI connection. But for many casual gamers, the improvement over composite cables is more than enough.
To use component cables, plug the green, blue, and red video connectors into the matching ports on the back of the Wii. Connect the red and white audio cables as well. Then plug the other ends into your TV. Make sure your TV is set to the right input. On the Wii, go to the settings menu and select screen settings. Change the TV resolution to 480p. This unlocks the best quality your Wii can output through component cables. It is a simple change that makes a big difference.
Option 3: Composite AV Cables (The Basic Connection)
The composite AV cable method is the most basic option. It uses the yellow, red, and white cables that came with the Wii. This method works on virtually any TV, old or new. The picture quality is the lowest of all the options. On a modern HDTV, the image may look soft or blurry. But if you just want to get your Wii working quickly and do not care about perfect picture quality, this method gets the job done. It costs nothing extra since the cables come included with the console.
Some people try to improve the composite signal by using an AV-to-HDMI converter. These are different from the dedicated Wii to HDMI converters we discussed earlier. AV-to-HDMI converters are more generic and may not deliver the best results. They can introduce lag or lower the image quality. If you go this route, choose a reputable brand and read reviews before buying. A cheap converter can do more harm than good.
Step-by-Step Guide to Setting Up Your Wii with HDMI
Follow these steps to get your Wii connected to your TV using an HDMI converter. The process is simple and takes just a few minutes.
- Gather your equipment. You need a Wii console, a Wii to HDMI converter, an HDMI cable, and the Wii AV cable that came with the console.
- Plug the AV cable into the Wii. Connect the yellow, red, and white plugs into the matching ports on the back of the console.
- Connect the AV cable to the converter. The other end of the AV cable plugs into the input side of the converter box.
- Attach the HDMI cable. Plug one end of the HDMI cable into the output port on the converter. Plug the other end into an available HDMI port on your TV.
- Power on the devices. Turn on your TV and switch it to the HDMI input you used. Then power on your Wii.
- Adjust the display settings. On the Wii, go to the Wii Settings menu. Navigate to screen settings and select the correct TV resolution. Choose 480p for the best balance of quality and compatibility.
- Test everything. Play a game or navigate the Wii menu. Check that the picture looks clear and the sound comes through. Adjust the converter settings if needed.
Once you complete these steps, your Wii will be running through HDMI. The picture should be much clearer than it was with the original composite cables. If you experience any issues, double-check all your connections. Make sure the HDMI cable is fully seated in both the converter and the TV. Sometimes simply unplugging and replugging everything solves the problem.
Comparing Connection Methods for Your Wii
Not sure which method is right for you? Here is a quick comparison of the three main options. This table breaks down the key differences so you can make an informed choice.
| Connection Method | Picture Quality | Cost | Ease of Setup | Best For |
|---|---|---|---|---|
| HDMI Converter | Excellent (up to 1080p) | 20-50 dollars | Very Easy | Best overall quality on modern TVs |
| Component Cables | Good (480p) | 10-20 dollars | Easy | Budget-friendly quality boost |
| Composite AV Cables | Fair (480i) | Free (included) | Very Easy | Quick setup on any TV |
As you can see, the HDMI converter offers the best picture quality by a wide margin. Component cables are a solid middle ground. Composite cables work in a pinch but will not give you the sharp image you want on a modern TV. If you plan to play your Wii regularly, investing in a converter is absolutely worth it.
Common Problems and How to Fix Them
Even with a straightforward setup like this, you might run into a few hiccups. Here are the most common issues people face when connecting a Wii to a TV with HDMI and how to solve them.
No signal on the TV. This is the most common problem. First, check that the HDMI cable is firmly connected to both the converter and the TV. Then make sure your TV is set to the correct HDMI input. Try a different HDMI port on your TV if the first one does not work. If you still see nothing, try a different HDMI cable. Sometimes the cable itself is the issue.
Blurry or fuzzy picture. This usually happens when the Wii’s output resolution does not match your TV’s capabilities. Go into the Wii settings and change the screen resolution. Try 480p first. If that does not help, try other resolution options available on your converter. Also, make sure your TV is not set to a zoom or stretch mode. These modes can distort the image and make it look blurry.
No sound. If the picture looks fine but you cannot hear anything, check your TV’s audio settings. Make sure the TV is not muted and the volume is turned up. On some TVs, you need to set the audio output to the correct source. Also check that the red and white audio cables are properly connected if you are using them alongside the HDMI connection.
Wii remote not syncing. This is not a cable issue, but it often happens at the same time. Open the SD card slot cover on the front of the Wii. Press the red sync button inside the slot. Then press the red sync button on the Wii remote. The lights on the remote should stop blinking and stay lit. This means the remote is connected.
Expert Tips for Better Picture Quality
Want to get the most out of your Wii on a modern TV? Here are some expert tips that make a real difference. First, always use a high-quality HDMI cable. Cheap cables can cause signal drops or display artifacts. A well-made HDMI cable costs just a few dollars and lasts for years. Second, clean the back of your Wii console before plugging anything in. Dust and dirt can interfere with the connections and cause intermittent problems. Use a soft, dry cloth to wipe down the ports.
Third, consider the placement of your Wii and converter. Keep them in a well-ventilated area. These devices can generate heat during extended gaming sessions. Good airflow prevents overheating and keeps everything running smoothly. Fourth, update your Wii system software if possible. While the Wii is no longer receiving official updates, some settings can be tweaked through the system menu to improve compatibility with modern TVs.
Finally, if you have multiple gaming consoles, think about organizing your setup. A simple HDMI switch can let you connect your Wii, Wii U, and other consoles to a single TV without unplugging cables every time. This is a small upgrade that saves a lot of hassle. It is the kind of detail that makes your entire gaming area feel more polished and functional.
For more tips on setting up gadgets and tech in your home, check out our article on 10 Gadgets To Make Moms Life Easier. It has great ideas for making your tech setup work better for the whole family.
Is Connecting Your Wii with HDMI Worth It?
The answer is a resounding yes. Connecting your Wii to your TV using an HDMI converter transforms the gaming experience. The picture is sharper. The colors are more vivid. The sound is clearer. You get to enjoy classic Nintendo games on a modern screen without any of the fuzziness or distortion that comes with the original AV cables. For just 20 to 50 dollars, you can breathe new life into an old console. That is an incredible value.
Whether you are a longtime fan revisiting old favorites or a parent introducing your kids to the games you grew up with, the HDMI connection makes everything look and sound better. It takes just a few minutes to set up, and the results last for as long as you own the console. There is really no reason not to do it.
If you have ever wondered about other ways to improve your home entertainment setup, you might also enjoy reading about adding prefixes to numbers on iPhone for better contact organization. Small tech tweaks like these can make a big difference in how you use your devices every day.
So go ahead. Grab a converter, plug in an HDMI cable, and get back to playing your favorite Wii games. Your TV will thank you. Your eyes will thank you. And your inner gamer will be happier than ever.
Conclusion
Connecting your Wii to your TV with an HDMI cable is absolutely possible, and it is easier than you might think. You just need the right converter or adapter to bridge the gap between the old console and your modern television. Whether you choose a dedicated Wii to HDMI converter, component cables, or the original composite AV cables, each method has its place. The converter route gives you the best picture quality and the cleanest setup. Component cables offer a nice upgrade without extra electronics. And composite cables work when you need a quick and free solution.
The key takeaway is that you should not let the lack of a native HDMI port stop you from enjoying your Wii on a big screen. With a small investment and a few minutes of your time, you can upgrade your setup and play your favorite games with better clarity and sound. Follow the steps in this guide, troubleshoot any issues that come up, and you will be gaming in no time. Your Wii was built to last, and with the right connection, it can keep bringing you joy for years to come.
Frequently Asked Questions
Can I plug an HDMI cable directly into my Wii console?
No, the Wii does not have an HDMI port. You need a Wii to HDMI converter to use HDMI cables. The converter plugs into the Wii’s AV output and then connects to your TV via HDMI. It is a simple and affordable solution.
What kind of HDMI converter do I need for a Wii?
You need a Wii to HDMI converter specifically designed for the Nintendo Wii. These converters take the Wii’s analog AV signal and convert it to a digital HDMI output. Look for converters that support 480p or higher resolution for the best picture quality on your TV.
Will connecting my Wii via HDMI improve the picture quality?
Yes, absolutely. The original composite AV cables that come with the Wii produce a standard definition picture. Using a converter with HDMI lets you upscale the signal and display it in much higher resolution. The difference is very noticeable on modern flat-screen TVs.
Can I use component cables instead of an HDMI converter?
Yes, the Wii supports component video output. Component cables use red, green, and blue connectors for video. They offer better picture quality than composite cables but still do not provide the digital clarity of a true HDMI connection. Component cables are a good budget option if you do not want to buy a converter.
Why is there no sound when I connect my Wii via HDMI?
No sound usually means the TV is not set to the correct input or the audio cables are not connected properly. Make sure your TV is on the right HDMI input. Also check that the red and white audio cables from the Wii are securely plugged in. Some converters handle audio through HDMI while others require separate audio connections.
How much does a Wii to HDMI converter cost?
Most Wii to HDMI converters cost between 20 and 50 dollars. Prices vary depending on the brand and features. Basic models are affordable and work well. More advanced converters offer extra options like resolution adjustment and scan line filtering for a more authentic retro look.
=== QUICK TIPS ===
Quick Tip: Keep your original AV cables even if you switch to HDMI. They are useful if you ever need to connect your Wii to an older TV or set up a second display in another room.
Quick Tip: Label your HDMI cables. If you have multiple devices connected to your TV, a simple label maker can save you a lot of confusion when switching inputs.
Quick Tip: Store your converter in a safe place when not in use. These small devices are easy to lose, and replacing one means extra cost and hassle.