How Do I Turn Off Hyphenation In Adobe Indesign Guide
Turning off hyphenation in Adobe InDesign is simple once you know where to look. This guide walks you through every method, from basic paragraph settings to advanced typography controls. You will learn how to stop unwanted hyphens, fix line breaks, and create polished, professional layouts with ease.
If you have ever stared at a page in Adobe InDesign and thought, “Why is every other word split by a hyphen?” you are not alone. Hyphenation can be a helpful tool for filling gaps in justified text. But sometimes it just makes your layout look messy and unprofessional. The good news is that turning off hyphenation in Adobe InDesign is quick and straightforward. In this guide, we will walk you through every method, setting, and trick you need to know.
Whether you are a beginner just getting started with InDesign or a seasoned designer looking for a refresher, this article has you covered. We will explore the basic steps, advanced settings, and common pitfalls. By the end, you will know exactly how to control hyphenation and create cleaner, more polished layouts. Let us dive in.
Key Takeaways
- Quick Access Method: You can turn off hyphenation directly in the Paragraph panel or Control bar for fast results.
- Paragraph Style Control: Applying hyphenation settings through paragraph styles gives you consistent formatting across your entire document.
- Character-Level Override: Use the No Break option to prevent specific words from hyphenating or breaking across lines.
- Advanced Composer Settings: Switching between the Adobe Single-Line and Paragraph composers gives you finer control over line breaks and hyphenation.
- Hyphenation Zone and Limits: Adjusting the hyphenation zone and limits helps reduce unnecessary hyphens even when hyphenation is enabled.
- Document-Wide Changes: You can modify hyphenation settings across multiple paragraphs or your entire document at once.
- Common Mistakes to Avoid: Watch out for overriding styles accidentally and ignoring justification settings that affect hyphenation behavior.
📑 Table of Contents
- What Is Hyphenation in Adobe InDesign and Why Turn It Off?
- How to Turn Off Hyphenation in Adobe InDesign: The Quick Method
- Turning Off Hyphenation Through Paragraph Styles
- Advanced Settings for Controlling Hyphenation
- Using No Break to Prevent Hyphens on Specific Words
- Switching Between Composers for Better Line Breaks
- Turning Off Hyphenation for Your Entire Document
- Common Mistakes When Turning Off Hyphenation
- Expert Insights: Best Practices for Hyphenation-Free Layouts
- Key Takeaways
- Frequently Asked Questions
- Conclusion
What Is Hyphenation in Adobe InDesign and Why Turn It Off?
Before we get into the how, let us talk about the what. Hyphenation is a feature in Adobe InDesign that breaks long words at the end of a line and connects them with a hyphen to the next line. This helps fill uneven spaces in justified text alignment. The software uses a built-in hyphenation dictionary and set of rules to decide where breaks should happen.
So why would you want to turn it off? Here are a few common reasons:
- Cleaner look: Hyphens can distract readers and make text harder to follow.
- Professional design: Many style guides and clients prefer text without hyphens.
- Better readability: Uneven hyphen breaks can disrupt the flow of reading.
- Creative control: You may want to control line breaks manually for aesthetic reasons.
- Short documents: In brochures, flyers, or short articles, hyphens often look out of place.
Understanding when to disable hyphenation helps you make better design decisions. Sometimes hyphens are fine for long body texts in newspapers. But for most design projects, turning them off creates a more refined result.
How to Turn Off Hyphenation in Adobe InDesign: The Quick Method
The fastest way to stop hyphenation is through the Paragraph panel or the top control bar. This method works great when you are working on a single paragraph or a small section of text. Here is how to do it step by step.
Method 1: Using the Paragraph Panel
First, select the text you want to modify. You can click anywhere inside a paragraph or highlight multiple paragraphs. Then follow these steps:
- Go to the Window menu at the top of the screen.
- Choose Type and Tables, then click Paragraph.
- In the Paragraph panel, look for the Hyphenation button. It looks like a small icon with a hyphen mark.
- Click the Hyphenation button to toggle it off. When it is off, the button will not be highlighted.
That is it. Your selected text will no longer have hyphenation applied. The change takes effect immediately, so you can see the results right away.
Method 2: Using the Control Bar
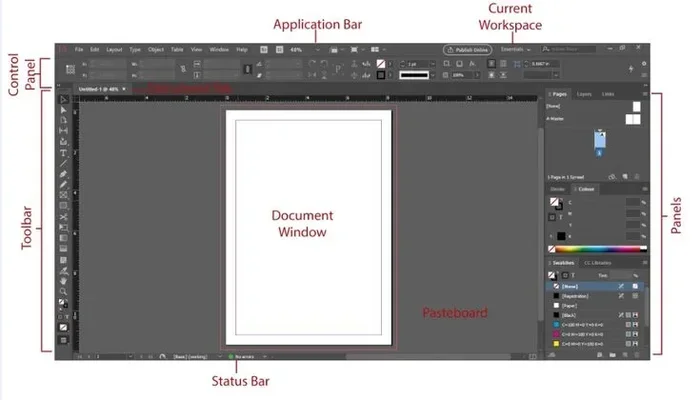
If you prefer a faster approach, the Control bar at the top of the workspace gives you quick access. With your text selected, look at the Control bar. You will see the Hyphenation icon there. Click it to turn hyphenation off. This method is perfect when you are working quickly and do not want to open a separate panel.
Quick Tip: If you cannot see the Hyphenation button in the Control bar, right-click the Control bar and make sure the Hyphenation option is checked. This ensures the button is always visible when you need it.
Turning Off Hyphenation Through Paragraph Styles
For a more organized and consistent approach, use paragraph styles. This is the recommended method for any multi-page document. When you turn off hyphenation at the style level, every paragraph using that style will automatically update. This saves you time and keeps your formatting uniform.
Step-by-Step: Modifying a Paragraph Style
Here is how to change hyphenation settings through a paragraph style:
- Open the Paragraph Styles panel by going to Window, then Styles, and clicking Paragraph Styles.
- Find the style you are using or create a new one by clicking the New Style button at the bottom of the panel.
- Double-click the style name to open the style options.
- On the left side, click Paragraph Style Options.
- Uncheck the box next to Hyphenate.
- Click OK to save your changes.
Now every paragraph assigned to that style will have hyphenation turned off. If you update the style later, all linked paragraphs update automatically. This is a huge time-saver for long documents like books, catalogs, or reports.
Pro Tip: Create a dedicated style for body text with hyphenation disabled. Apply it consistently across your document to maintain a clean, professional look throughout.
Advanced Settings for Controlling Hyphenation
Sometimes you do not want hyphenation on or off completely. Maybe you want fewer hyphens, or you want more control over where they appear. InDesign gives you advanced settings that let you fine-tune hyphenation behavior. These options are found in the Paragraph Style Options dialog box.
Hyphenation Zone
The hyphenation zone controls how much of a line can be left ragged before InDesign considers adding a hyphen. A larger hyphenation zone means InDesign will try harder to avoid hyphens by adjusting word and letter spacing instead. A smaller zone makes hyphenation more likely.
To adjust this, open your Paragraph Style Options, go to the Hyphenation section, and change the Hyphenation Zone value. Increasing this number often reduces the need for hyphens significantly.
Hyphenation Limits
You can also set limits on how many consecutive lines can end with a hyphen and how many letters a word must have before it can be hyphenated. These settings help prevent awkward breaks like “th-rough” or three hyphens in a row. Setting a limit of two consecutive hyphens and a minimum of four letters creates a much more natural look.
Letter Spacing and Word Spacing
InDesign also lets you control the amount of letter and word spacing allowed. When you tighten these values, InDesign has more flexibility to adjust spacing instead of hyphenating. This works hand in hand with your hyphenation settings to create balanced lines of text.
Using No Break to Prevent Hyphens on Specific Words
Sometimes you only need to stop hyphenation on certain words, not the entire paragraph. InDesign has a feature called No Break that does exactly this. When you apply No Break to a word or phrase, it prevents that word from breaking across lines or being hyphenated.
How to Apply No Break
Follow these steps to use No Break:
- Select the word or text you want to protect from breaking.
- Open the Character panel by going to Window, then Type and Tables, and clicking Character.
- Click the No Break button in the Character panel. It looks like a small arrow pointing to the right with a line through it.
- The selected text will now stay together on one line and will not be hyphenated.
Quick Tip: Use No Break sparingly. If you apply it to too many words, InDesign may create large gaps in your text or push lines to the next page awkwardly. Reserve it for proper nouns, brand names, or important phrases that should never be split.
Switching Between Composers for Better Line Breaks
InDesign uses a composer engine to determine how text is laid out on each line. The composer you choose affects hyphenation behavior significantly. There are two composers in Adobe InDesign: the Adobe Single-Line Composer and the Adobe Paragraph Composer.
Adobe Single-Line Composer
The Single-Line Composer breaks lines one at a time. It does not consider how lines interact with each other across the paragraph. This composer gives you more direct control over individual line breaks but may produce inconsistent spacing.
To switch to the Single-Line Composer, select your text, go to the Paragraph panel menu, and choose Adobe Single-Line Composer. This can be useful when you want precise control over specific lines without the software re-flowing your entire paragraph.
Adobe Paragraph Composer
The Paragraph Composer looks at the entire paragraph at once. It balances spacing and hyphenation across all lines for a more even result. This is the default composer for most InDesign users and works well for body text.
To switch to the Paragraph Composer, select your text, go to the Paragraph panel menu, and choose Adobe Paragraph Composer. For most projects, this composer produces the best overall results when combined with proper hyphenation settings.
Turning Off Hyphenation for Your Entire Document
If you need to turn off hyphenation across your whole document, you have a couple of efficient options. You do not need to go paragraph by paragraph.
Option 1: Edit the Base Paragraph Style
If your document uses paragraph styles consistently, simply edit the base style. Open Paragraph Styles, double-click your body text style, uncheck Hyphenate, and click OK. All paragraphs using that style will update instantly.
Option 2: Find and Change
You can also use the Find/Change feature to modify hyphenation settings across multiple paragraphs:
- Go to Edit, then Find/Change.
- Click the More Options button to expand the dialog.
- Switch to the Paragraph Style tab.
- Set up a search for paragraphs with hyphenation enabled.
- Apply a paragraph style with hyphenation turned off.
This method is especially useful when you inherit a document from someone else who used hyphenation throughout.
Common Mistakes When Turning Off Hyphenation
Even experienced InDesign users sometimes run into issues when adjusting hyphenation settings. Here are a few common mistakes and how to avoid them.
- Forgetting to update paragraph styles: If you manually turn off hyphenation for individual paragraphs but your style still has it enabled, your changes will revert when you edit the text later. Always update the style.
- Ignoring justification settings: Hyphenation works hand in hand with text justification. If your text is fully justified, turning off hyphenation may create uneven spacing. Adjust word spacing and letter spacing values to compensate.
- Overusing No Break: Applying No Break to too many words can cause text to overflow or create awkward page breaks. Use it strategically.
- Not checking the Hyphenation Zone: Even with hyphenation turned off, a tight hyphenation zone can cause unexpected behavior. Make sure your settings match your design goals.
- Applying changes to the wrong text frame: Always verify that you have the correct text frame selected before making hyphenation changes. InDesign documents often contain many overlapping frames.
Avoiding these mistakes keeps your workflow smooth and your layouts looking professional.
Expert Insights: Best Practices for Hyphenation-Free Layouts
Professional designers have a few tricks up their sleeves for keeping text clean without hyphens. Here are some expert tips to elevate your InDesign workflow.
Use optical margin alignment. This feature extends characters slightly past the text frame edges, creating a more even and polished text block. It works especially well when hyphenation is turned off and you are relying on spacing adjustments alone.
Adjust word spacing carefully. When you remove hyphens, InDesign compensates by adjusting word spacing. Keep the word spacing percentage balanced so lines do not look too loose or too tight. A range of 85% to 100% of the default spacing usually works well.
Use manual line breaks when needed. Sometimes the best solution is to insert a manual line break (Shift+Enter) to control where a line ends. This gives you complete control without relying on automatic hyphenation or line breaking.
Preview your layouts in multiple views. Switch between Preview mode and Normal mode frequently. What looks good on screen may not print the same way. Always check your final output.
Test with real content. Placeholder text behaves differently than real text. Run your hyphenation settings with actual copy to see how they perform in practice.
Key Takeaways
- Quick Access Method: You can turn off hyphenation directly in the Paragraph panel or Control bar for fast results.
- Paragraph Style Control: Applying hyphenation settings through paragraph styles gives you consistent formatting across your entire document.
- Character-Level Override: Use the No Break option to prevent specific words from hyphenating or breaking across lines.
- Advanced Composer Settings: Switching between the Adobe Single-Line and Paragraph composers gives you finer control over line breaks and hyphenation.
- Hyphenation Zone and Limits: Adjusting the hyphenation zone and limits helps reduce unnecessary hyphens even when hyphenation is enabled.
- Document-Wide Changes: You can modify hyphenation settings across multiple paragraphs or your entire document at once.
- Common Mistakes to Avoid: Watch out for overriding styles accidentally and ignoring justification settings that affect hyphenation behavior.
Frequently Asked Questions
Can I turn off hyphenation for just one paragraph in InDesign?
Yes, you can. Simply place your cursor inside the paragraph you want to change, then click the Hyphenation button in the Paragraph panel or Control bar. This overrides the paragraph style settings for that specific paragraph only. Keep in mind that this override will be lost if you later edit the text and the style re-applies. For permanent changes, update the paragraph style instead.
Why does my text still hyphenate even after I turned it off?
This usually happens when your text is using a paragraph style that still has hyphenation enabled. Check your Paragraph Styles panel and make sure the style applied to your text has the Hyphenate option unchecked. Also, verify that you did not accidentally override the setting by turning hyphenation back on for a specific paragraph.
What is the difference between No Break and turning off hyphenation?
Turning off hyphenation prevents words from being split with hyphens at line ends, but InDesign may still move words to the next line. No Break goes further by preventing a specific word from breaking across lines at all. The word will stay together and move to the next line as a unit if it does not fit. Use No Break for words you want to keep intact on a single line.
How do I reduce hyphenation without turning it off completely?
You can adjust the Hyphenation Zone, set consecutive hyphen limits, and increase the minimum word length for hyphenation. These settings are found in the Paragraph Style Options under the Hyphenation section. Widening the hyphenation zone and limiting consecutive hyphens significantly reduces the number of hyphens while still allowing some when necessary.
Does turning off hyphenation affect justified text alignment?
Yes, it can. Without hyphens, InDesign relies more on word and letter spacing to justify text evenly. This may result in slightly looser or tighter lines depending on your spacing settings. To get the best results with hyphenation turned off, adjust the word spacing and letter spacing values in your paragraph style to maintain a balanced appearance.
Can I set different hyphenation rules for different languages in InDesign?
Yes, you can. InDesign supports language-specific hyphenation dictionaries. You can assign different languages to different paragraphs or even different words within a paragraph. Each language has its own hyphenation rules and dictionary. Go to the Character panel, click the Language menu, and select the appropriate language for your text. This ensures correct hyphenation behavior for multilingual documents.
Conclusion
Turning off hyphenation in Adobe InDesign does not have to be complicated. Whether you use the quick Paragraph panel method, paragraph styles for document-wide control, or advanced settings for fine-tuning, InDesign gives you all the tools you need. The key is understanding where the settings live and how they interact with your text layout choices.
Remember to use paragraph styles for consistency, No Break for specific words, and the right composer for your project type. Avoid common mistakes like forgetting to update styles or overusing manual overrides. With these techniques in your toolkit, you can create clean, professional layouts that look great every time.
Now that you know exactly how to turn off hyphenation in Adobe InDesign, go ahead and apply these steps to your next project. Your text will look sharper, your layouts will feel more polished, and your readers will appreciate the cleaner reading experience. Happy designing.