How Do I Transfer A Word Document To An Iphone Easily
Transferring a Word document to your iPhone is easier than you think. You can use iCloud Drive, AirDrop, email, USB cable, or third-party cloud services to get your files on your phone quickly. This guide covers every method so you can pick what works best for you.
Need to move a Word document to your iPhone? You are not alone. Thousands of people search for how to transfer Word document to iPhone every single day. Whether you are a student, a professional, or a parent juggling multiple tasks, having your important files right on your phone makes life so much simpler. The good news is that there are many easy ways to do it. You do not need to be a tech expert either. This guide walks you through every method step by step. By the end, you will know exactly which method fits your needs best.
Your iPhone is a powerful tool for productivity. It lets you read, edit, and share documents from almost anywhere. But getting a Word file onto your phone can feel confusing at first. Different methods work better for different situations. Some are fast and wireless. Others are better for large files. We will cover all of them in plain language. No jargon. No complicated steps. Just simple, practical advice you can use right away. Let us dive in and make this easy for you.
Key Takeaways
- iCloud Drive is the easiest and most seamless way to transfer Word document to iPhone with automatic syncing.
- AirDrop works instantly when you are near another Apple device and need a fast wireless transfer.
- Email and messaging apps are great for smaller files and quick sharing on the go.
- USB and iTunes/Finder offer a reliable wired option for larger documents and offline access.
- Third-party cloud services like Google Drive and Dropbox give you flexible alternatives to iCloud.
- Avoid common mistakes like forgetting to install Microsoft Word or using incompatible file formats.
- The iPhone Files app is your central hub for managing all transferred documents.
📑 Table of Contents
- Why Transfer Word Documents to Your iPhone
- Method 1: Using iCloud Drive (The Easiest Way)
- Method 2: AirDrop, Email, and USB Transfer
- Method 3: Third-Party Cloud Services
- How to Open and Edit Word Documents on iPhone
- Common Mistakes to Avoid When Transferring Files
- Expert Tips for Seamless Document Transfer
- Which Method Should You Choose?
- Final Thoughts
Why Transfer Word Documents to Your iPhone
Having your Word documents on your iPhone opens up a lot of convenience. You can review important files while waiting in line. You can edit a report during your commute. You can share a contract with a colleague in seconds. Your phone is always with you, so your documents should be too.
Here are some real reasons why people transfer Word document to iPhone:
- Access anywhere: You do not need a laptop to read your files.
- Quick editing: Make changes on the go using the Microsoft Word app.
- Easy sharing: Send documents to coworkers or friends directly from your phone.
- Backup safety: Keep a copy of important files in your pocket.
- Productivity boost: Stay productive even when you are away from your desk.
Think about how often you use your phone compared to your computer. For most people, the phone wins. That is exactly why having your Word files on your iPhone matters so much. It keeps you connected to your work no matter where you are.
Method 1: Using iCloud Drive (The Easiest Way)
If you want the smoothest experience, iCloud Drive is your best friend. It is Apple’s built-in cloud storage, and it works perfectly with your iPhone. When you save a Word document to iCloud, it appears on all your Apple devices automatically.
Step-by-Step: How to Use iCloud Drive
- On your computer, open Microsoft Word and save your document.
- Choose iCloud Drive as the save location. You can do this from the “Save As” menu.
- Open your iPhone. Go to the “Files” app. It comes pre-installed on every iPhone.
- Navigate to iCloud Drive. Your Word document should be right there.
- Tap the file to open it. If needed, download the free Microsoft Word app from the App Store.
This method is incredibly simple because it handles everything in the background. You do not need cables, Bluetooth, or any extra apps. As long as you are signed into the same Apple ID on both devices, iCloud syncs your files automatically. It is hands-down the most popular way people transfer Word document to iPhone.
Quick Tip: Make sure iCloud Drive is turned on. Go to Settings, tap your name, then tap iCloud, and make sure iCloud Drive is switched on. This small step saves a lot of headaches later.
Method 2: AirDrop, Email, and USB Transfer
Sometimes you need a different approach. Maybe you do not use iCloud, or your file is too large for email. Let us look at three alternative methods that work great for transferring files to your iPhone.
Using AirDrop for Wireless Transfer
AirDrop is one of the fastest ways to move files between Apple devices. It uses Bluetooth and Wi-Fi to send files instantly. You do not need an internet connection either.
Here is how to use AirDrop to transfer Word document to iPhone:
- Turn on AirDrop on both your computer and iPhone. On your Mac, go to Finder and click AirDrop. On your iPhone, swipe down from the top right to open Control Center.
- Select the Word file on your computer.
- Click the Share button and choose AirDrop.
- Select your iPhone from the list of nearby devices.
- Accept the transfer on your iPhone. The file will appear in your Files app.
AirDrop is perfect when you are in the same room. It is fast, private, and requires no setup. Many people love using AirDrop for quick iPhone file transfers because it just works.
Using Email for Simple Transfers
Email is a straightforward option for smaller Word files. You can attach your document to an email and send it to yourself. Then open the email on your iPhone and download the attachment.
Keep in mind that most email providers have size limits. Gmail, for example, caps attachments at 25 megabytes. If your file is larger, email will not work well. This method is best for documents under a few megabytes.
Using USB Cable and iTunes or Finder
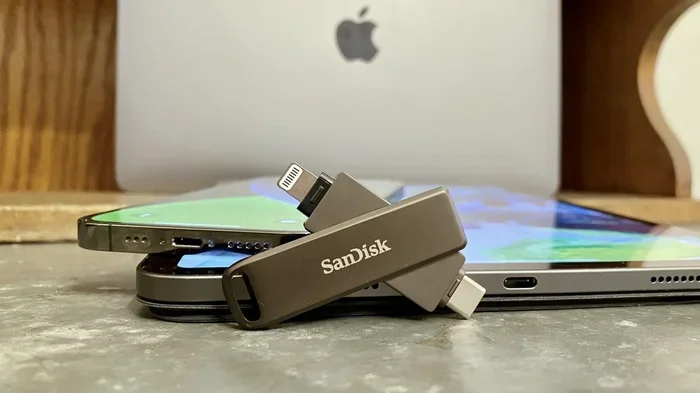
If you prefer a wired connection, you can use your iPhone USB cable. This method works well when you want to transfer files without using the internet or cloud storage.
Here is the basic process:
- Connect your iPhone to your computer using a USB cable.
- Open iTunes (on older Macs) or Finder (on newer Macs and all Windows PCs).
- Select your iPhone from the device list.
- Go to the Files tab and drag your Word document into the list.
- Safely eject your iPhone and open the Files app to find your document.
This method gives you full control over your files. It is especially useful when you need to transfer multiple documents at once or when you are in an area with poor internet connection.
Method 3: Third-Party Cloud Services
Not everyone uses iCloud. That is perfectly fine. There are many other cloud services that let you store and access files on your iPhone. Google Drive, Dropbox, and OneDrive are all excellent options.
Google Drive
Google Drive is free and gives you 15 gigabytes of storage. To use it, upload your Word document to Google Drive on your computer. Then open the Google Drive app on your iPhone and download the file. You can also open Word files directly in the Google Docs app.
Dropbox
Dropbox is another popular choice. It offers 2 gigabytes of free storage and works smoothly with the iPhone Files app. Upload your document on any device, and it syncs to your phone automatically.
OneDrive
If you already use Microsoft Office, OneDrive is a natural fit. It comes with 5 gigabytes of free storage. Your Word documents stay organized and easy to find on your iPhone. The OneDrive app also lets you edit documents directly on your phone.
All three services are great for transferring Word document to iPhone. Pick the one you already use, or try a few to see which feels most comfortable. Each one offers a reliable way to keep your files synced across devices.
For more helpful tips on making your digital life easier, check out 10 Gadgets To Make Moms Life Easier for great recommendations on productivity tools.
How to Open and Edit Word Documents on iPhone
Once you have your file on your iPhone, you need the right app to open and edit it. The good news is that you have several great options.
The Microsoft Word app is the gold standard for working with Word files on iPhone. It is free to download from the App Store. The app lets you view, edit, and format documents just like you would on a desktop. It also supports tracking changes, comments, and most formatting features.
If you prefer a simpler experience, the built-in Apple Pages app can open Word documents too. It is not a perfect match for complex formatting, but it handles most everyday documents just fine. Pages is free and comes pre-installed on your iPhone.
Another option is Google Docs. It works well for basic editing and collaboration. You can upload a Word file to Google Drive, open it in Google Docs, and make changes right on your phone. This is a great free alternative if you do not want to install Microsoft Word.
Quick Tip: Always keep your apps updated. App updates often fix bugs and add new features that make opening and editing documents smoother. Check the App Store regularly for updates to Microsoft Word, Google Drive, and other file apps.
Common Mistakes to Avoid When Transferring Files
Even simple tasks can go wrong if you do not watch out for common pitfalls. Here are mistakes people make when trying to transfer Word document to iPhone, and how to avoid them.
Forgetting to Install the Right App
Some people download a Word file to their iPhone but cannot open it. Why? Because they do not have an app that supports the .docx format. Always make sure you have Microsoft Word, Google Docs, or another compatible app installed before you try to open a document.
Using the Wrong File Format
Word documents come in different formats. The most common are .doc and .docx. Older formats like .doc may not open correctly on all apps. When possible, save your file as .docx for the best compatibility with iPhone apps.
Ignoring File Size Limits
Email attachments have size limits. iCloud has storage limits. Google Drive gives you 15 gigabytes for free. If your file is very large, choose a transfer method that can handle it. USB transfer or a cloud service with enough storage will save you from frustration.
Not Checking iCloud Settings
If you rely on iCloud Drive, make sure it is enabled on both your computer and iPhone. A missing setting can prevent your files from syncing. Go to Settings, tap your name, tap iCloud, and verify that iCloud Drive is turned on.
Skipping Backups
Always keep a backup copy of important documents. Do not rely on just one transfer method. If something goes wrong, having a backup saves you from losing your work entirely.
Expert Tips for Seamless Document Transfer
Want to make your workflow even smoother? Here are some pro tips that experienced users swear by.
Use the iPhone Files app as your command center. It is where all your downloaded files live. You can create folders, rename files, and organize documents just like you would on a computer. Getting comfortable with the Files app makes everything easier.
Set up automatic sync. If you use iCloud Drive, your files sync automatically whenever you connect to Wi-Fi. This means you never have to think about transferring files manually. Just save to iCloud on your computer, and your iPhone picks it up moments later.
Use PDF conversion when sharing. Sometimes converting a Word file to PDF before sending it prevents formatting issues. The recipient sees the document exactly as you intended. You can do this directly from Microsoft Word or Google Docs.
Keep your iPhone storage in check. Large documents take up space. Regularly review your Files app and delete documents you no longer need. This keeps your phone running fast and leaves room for new files.
Enable offline access for important files. If you know you will need a document without internet, download it to your iPhone ahead of time. Most cloud apps let you mark files for offline use. This is a lifesaver when you are traveling or in areas with weak signals.
For more productivity ideas and smart gadget recommendations that help you stay organized, explore 10 Gadgets To Make Moms Life Easier for useful tools that complement your iPhone workflow.
Which Method Should You Choose?
Every method has its strengths. Here is a quick comparison to help you decide.
| Method | Best For | Speed | Requires Internet |
|---|---|---|---|
| iCloud Drive | Automatic syncing across devices | Fast (automatic) | Yes |
| AirDrop | Quick transfers between Apple devices | Very fast | No |
| Small files and quick sharing | Moderate | Yes | |
| USB Cable | Large files and offline transfers | Fast | No |
| Google Drive / Dropbox | Cross-platform sharing | Fast | Yes |
If you want the least effort, go with iCloud Drive. If you need speed and are near another Apple device, use AirDrop. If you are working across different platforms, Google Drive or Dropbox is your best bet. And if you are dealing with large files or no internet, a USB cable gets the job done reliably.
Final Thoughts
Transferring a Word document to your iPhone does not have to be complicated. You have multiple options, and each one is straightforward once you know the steps. iCloud Drive offers the smoothest experience for Apple users. AirDrop gives you instant wireless transfers. Email works for quick shares. USB cable handles large files with ease. And third-party cloud services give you flexibility and choice.
The key is to pick the method that matches your situation. Once you try one or two of these approaches, you will wonder how you ever managed without them. Your iPhone becomes a powerful document tool when your files are right at your fingertips.
Start with the method that feels most natural to you. Experiment a little. Soon, moving files between your computer and your iPhone will become second nature. You will wonder how you ever worked without this level of convenience. Happy transferring!
Frequently Asked Questions
Can I transfer a Word document to iPhone without the internet?
Yes, you can. AirDrop and USB cable transfers do not require an internet connection. Both methods work offline and are great for transferring Word document to iPhone when you do not have Wi-Fi or cellular data available.
Do I need to buy Microsoft Word for iPhone?
No, you do not. The Microsoft Word app is free to download from the App Store. You can view and edit most Word documents without paying anything. Some advanced features may require a Microsoft 365 subscription, but basic use is completely free.
What is the best free app for opening Word files on iPhone?
Microsoft Word is the best free app for opening and editing Word files on iPhone. Google Docs is another excellent free option. Both apps handle .doc and .docx files well and offer a smooth experience for everyday document tasks.
Can I transfer multiple Word documents at once?
Yes, you can. iCloud Drive and USB cable transfers allow you to move multiple files at the same time. Simply select all the documents you want to transfer and follow the same steps. This saves a lot of time when you have several files to move.
Will my formatting stay intact when I open a Word file on iPhone?
Most of the time, yes. The Microsoft Word app for iPhone preserves formatting very well. However, complex layouts or unusual fonts may look slightly different. For the best results, use the .docx format and the official Microsoft Word app.
How do I find my transferred Word document on iPhone?
Open the Files app on your iPhone. Your documents will appear in iCloud Drive, On My iPhone, or in the app you used to download them. If you used AirDrop, the file lands in the Files app automatically. You can also use the search bar in the Files app to locate any document quickly.
=== CONCLUSION ===
Now you know how to transfer Word document to iPhone using multiple methods. Whether you choose iCloud Drive, AirDrop, email, USB cable, or a third-party cloud service, the process is simpler than you might think. Each method has its own advantages, so pick the one that fits your workflow best. Remember to keep your apps updated, avoid common mistakes, and use the expert tips we shared. Your iPhone is a powerful productivity tool, and having your Word documents right on it makes everything more convenient. Start today and experience the difference for yourself.