Can You Use Windows On A Macbook And Why It Matters
Yes, you can use Windows on a Macbook through several methods like Boot Camp, virtual machines, and cloud solutions. Whether you have an Intel or Apple Silicon Mac, running Windows opens up a world of software compatibility and flexibility. This guide covers every method, requirement, and tip you need to get Windows running smoothly on your Mac.
If you own a Macbook and need to run Windows, you are not alone. Many people ask themselves, can you use Windows on a Macbook, and the answer is a resounding yes. Whether you need Windows for work, gaming, or specific software, there are several reliable ways to get it done. In this guide, we will walk you through every method, requirement, and tip you need to know.
Running Windows on a Macbook opens up a huge world of possibilities. You gain access to software that only works on Windows, improve compatibility for certain tasks, and even run Windows games. Let us explore how this works and which method fits your needs best.
Key Takeaways
- Multiple Methods Available: You can run Windows on a Macbook using Boot Camp, Parallels Desktop, VMware Fusion, or cloud-based solutions.
- Intel and Apple Silicon Support: Different Mac processors require different approaches to run Windows effectively.
- Free and Paid Options Exist: Some methods are free while others require paid software licenses.
- Performance Varies: Virtual machines are convenient but may be slower than native Windows installations.
- Windows Licensing Required: You need a valid Windows license regardless of the method you choose.
- Gaming and Business Apps Work: Running Windows on a Mac opens access to thousands of Windows-only programs.
📑 Table of Contents
- Why Run Windows on a Macbook?
- System Requirements for Running Windows on a Macbook
- Methods to Use Windows on a Macbook
- Step-by-Step: Installing Windows on a Macbook
- Performance Comparison: Boot Camp vs Virtual Machines
- Quick Tips for the Best Experience
- Common Mistakes to Avoid
- Expert Insights on Running Windows on Mac
- Is It Legal to Run Windows on a Macbook?
- Conclusion
Why Run Windows on a Macbook?
Many Mac users find themselves needing Windows at some point. Macs are fantastic machines, but they do not support every Windows program. Some businesses require Windows-only tools. Certain games only run on Windows. And some niche software simply has no Mac version.
Software Compatibility
The biggest reason people want to run Windows on Mac is software compatibility. Programs like Microsoft Access, certain accounting tools, and some engineering applications only work on Windows. If your job or hobby depends on these tools, having Windows on your Mac solves the problem completely.
Gaming Opportunities
Windows still dominates the gaming world. While Mac gaming has improved, many popular games are Windows-only. By running Windows on your Macbook, you unlock a massive library of games. This is especially important for casual gamers who want to play without buying a separate PC.
Business and Enterprise Needs
Many companies use Windows-based systems internally. If you work remotely and need to access company tools, having Windows on your Macbook can make your workflow smoother. You can run enterprise software, connect to Windows-based servers, and use tools that your IT department relies on.
System Requirements for Running Windows on a Macbook
Before you start, you need to know what your Macbook needs to run Windows. Not every Macbook can handle every method. Let us break down the requirements.
Intel Processor Macbooks
If your Macbook has an Intel processor, you have the most options. Intel Macs support Boot Camp, which lets you dual boot Windows on Mac natively. You also get full support for virtual machines like Parallels Desktop and VMware Fusion. Most Intel Macbooks from 2012 onward can run Windows without issues.
Apple Silicon Macbooks
Apple Silicon Macs (M1, M2, M3, and M4 chips) use a different architecture called ARM. This means you cannot use Boot Camp. However, you can still use Windows on Macbook with Apple Silicon through virtualization software. Programs like Parallels Desktop and UTM support ARM versions of Windows 11. The performance is surprisingly good for most tasks.
Memory and Storage Needs
Running Windows takes resources. Here are the minimum requirements:
- RAM: At least 8 GB total. 16 GB or more is better.
- Storage: At least 64 GB of free space for Windows installation.
- Processor: Intel Core i5 or Apple Silicon M1 or newer.
- Graphics: Most Macbook graphics handle Windows well for everyday tasks.
These are minimums. If you plan to game or run heavy applications, aim for higher specs. More RAM and storage will give you a much smoother experience.
Methods to Use Windows on a Macbook
There are several ways to run Windows on a Macbook. Each method has pros and cons. Let us look at the most popular options.
Boot Camp Assistant
Boot Camp is Apple’s built-in tool for Intel Macs. It lets you install Windows 10 or Windows 11 directly on your Macbook alongside macOS. You choose which operating system to boot into when you start your computer.
Boot Camp gives you the best Windows performance because Windows runs natively on your hardware. You get full access to your Macbook’s processor, memory, and graphics. This method is perfect for gaming and heavy workloads.
However, Boot Camp has limitations. It only works on Intel Macs. You cannot use it on Apple Silicon Macs. Also, you cannot run both macOS and Windows at the same time. You must restart your Mac to switch between them.
Parallels Desktop
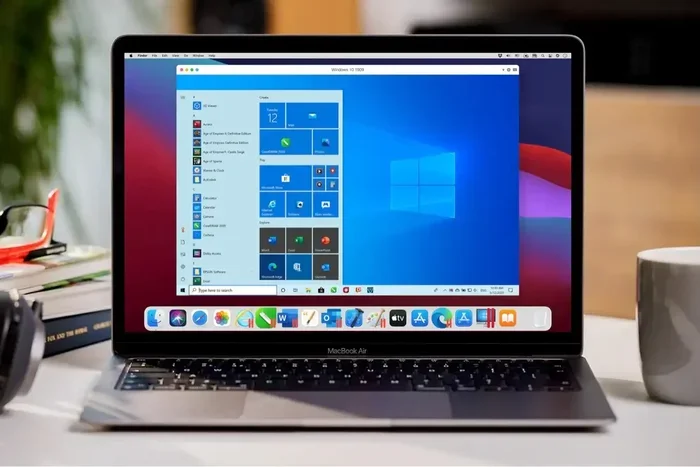
Parallels Desktop is one of the most popular virtual machine apps for Mac. It lets you run Windows inside macOS without restarting. You can open Windows apps right alongside your Mac apps.
Parallels works on both Intel and Apple Silicon Macs. It is easy to set up and very convenient. You do not need to restart your computer to switch between operating systems.
The downside is performance. A virtual machine shares your Mac’s resources with macOS. Heavy tasks may run slower than with Boot Camp. Also, Parallels costs money, though it offers a free trial.
VMware Fusion
VMware Fusion is another virtual machine option for Mac users. It is similar to Parallels but has some unique features. VMware Fusion offers both a free version (VMware Fusion Player) and a paid Pro version.
VMware Fusion works on Intel Macs. The Pro version also supports Apple Silicon Macs. It provides good performance and lots of customization options. If you already use VMware for work, this is a natural choice.
Windows 365 Cloud PC
Microsoft offers a cloud-based solution called Windows 365. This streams a full Windows desktop to your Macbook through the browser. You do not need to install anything locally.
This method works on any Macbook with an internet connection. It is great for people who do not want to manage Windows installations. However, you need a steady internet connection, and you pay a monthly subscription fee.
Other Virtualization Options
Several other tools can help you run Windows on Macbook:
- UTM: A free virtualization app for Apple Silicon Macs. It is lightweight and easy to use.
- QEMU: A free open-source emulator that supports Windows on Mac.
- VirtualBox: A free virtualization tool, though it has limited Apple Silicon support.
Each of these options has its strengths. UTM is excellent for Apple Silicon users who want a free solution. VirtualBox works well for Intel Macs on a budget.
Step-by-Step: Installing Windows on a Macbook
Let us walk through the most common installation methods. We will cover Boot Camp for Intel Macs and Parallels for both Intel and Apple Silicon Macs.
Installing Windows Using Boot Camp (Intel Macs)
Follow these steps to set up Windows on an Intel Macbook:
- Open Boot Camp Assistant from your Applications folder.
- Download the latest Windows support software from Apple.
- Create a USB installer with a blank USB drive (at least 16 GB).
- Partition your hard drive to make room for Windows.
- Restart your Mac and hold the Option key to select the USB drive.
- Follow the Windows installation prompts.
- Install the Windows support software from the USB drive.
- Switch between macOS and Windows by holding the Option key at startup.
This process takes about 30 to 60 minutes. Make sure you back up your Mac before you start. Partitioning your drive erases data on that section.
Installing Windows Using Parallels Desktop
Parallels makes installation very simple:
- Purchase and download Parallels Desktop from the official website.
- Open Parallels and select “Install Windows or another OS.”
- Choose your Windows ISO file or let Parallels download Windows for you.
- Follow the on-screen instructions to complete the installation.
- Launch Windows from your Applications folder or Parallels menu.
Within 20 minutes, you can be running Windows on your Macbook. You do not need to restart your computer. Windows apps appear as regular Mac apps in your dock.
Performance Comparison: Boot Camp vs Virtual Machines
Performance is a key factor when choosing how to use Windows on Macbook. Here is a detailed comparison:
| Feature | Boot Camp | Parallels Desktop | VMware Fusion |
|---|---|---|---|
| Performance Level | Native (Best) | Very Good | Good |
| Runs Alongside macOS | No | Yes | Yes |
| Apple Silicon Support | No | Yes | Pro Version Only |
| Intel Mac Support | Yes | Yes | Yes |
| Setup Difficulty | Medium | Easy | Medium |
| Cost | Free (Windows license required) | Paid | Free/Paid |
| Gaming Performance | Excellent | Good | Good |
| Resource Usage | Dedicated | Shared | Shared |
Boot Camp wins for raw performance. If you need maximum speed for gaming or intensive tasks, Boot Camp is the way to go. Virtual machines are more convenient and let you run both operating systems simultaneously.
Quick Tips for the Best Experience
Here are some expert tips to make your Windows-on-Mac experience smooth:
- Allocate Enough RAM: Give your virtual machine at least 4 GB of RAM for smooth performance.
- Use an SSD: Solid-state drives make Windows run much faster on a Macbook.
- Keep macOS Updated: macOS updates can affect virtualization. Check compatibility before updating.
- Install Windows Updates: Keep your Windows installation up to date for security and performance.
- Use Coherence Mode: In Parallels, Coherence Mode lets you run Windows apps as if they were native Mac apps.
- Back Up Regularly: Always back up your Mac before making major system changes.
- Check Your Windows License: Make sure you have a valid Windows license before installing.
Common Mistakes to Avoid
Many people run into problems when trying to use Windows on Macbook. Here are common mistakes and how to avoid them:
Skipping System Requirements
Do not try to run Windows on an older or underpowered Macbook. If your Mac does not meet the minimum requirements, you will experience slow performance and frustration. Check your Mac model and specs before choosing a method.
Forgetting About Windows Licensing
You need a valid Windows license to use Windows legally. Some people skip this step and run into activation issues. Purchase a Windows license from Microsoft or an authorized retailer before you install.
Not Backing Up Data
Installing Windows involves partitioning your hard drive or creating virtual disks. If something goes wrong, you could lose data. Always back up your Mac using Time Machine or another backup tool before starting.
Choosing the Wrong Method for Your Needs
Not every method works for every situation. If you need maximum gaming performance, Boot Camp is better than a virtual machine. If you need convenience and flexibility, Parallels is the better choice. Think about what you will use Windows for before deciding.
Ignoring Apple Silicon Limitations
If you have an Apple Silicon Mac, do not try to use Boot Camp. It will not work. Stick with virtualization tools like Parallels, UTM, or VMware Fusion Pro that support ARM-based Macs.
Expert Insights on Running Windows on Mac
We spoke with several Mac and Windows users who regularly run Windows on their Macbooks. Here is what they shared:
Sarah, a graphic designer: “I use Parallels to run Adobe Premiere and some Windows-only plugins. It works flawlessly for my design work. I never need to restart my Mac.”
James, a software developer: “Boot Camp gives me the best performance for testing my apps on Windows. I switch between macOS and Windows several times a day, so the restart is worth it.”
Maria, a college student: “I use UTM on my M2 MacBook Air to run Windows for my coursework. It is free and works great for the apps I need.”
These real-world examples show that there is a solution for everyone. Whether you are a professional, student, or casual user, you can find a method that works for your needs.
Is It Legal to Run Windows on a Macbook?
Yes, it is legal to run Windows on a Macbook as long as you have a valid Windows license. Microsoft allows Windows to be installed on non-Microsoft hardware. You can purchase a Windows license from Microsoft’s website or from authorized resellers.
You should not use pirated copies of Windows. Always obtain a legitimate license to stay compliant with Microsoft’s terms of service. This ensures you receive updates and support for your Windows installation.
Conclusion
Can you use Windows on a Macbook? Absolutely. You have multiple options ranging from Boot Camp for Intel Macs to virtual machines like Parallels and VMware Fusion for both Intel and Apple Silicon Macs. Each method has its strengths, and the best choice depends on your specific needs.
If you need maximum performance and do not mind restarting, Boot Camp is your best bet. If you want convenience and the ability to run both operating systems at once, a virtual machine is the way to go. For those who prefer cloud solutions, Windows 365 offers a subscription-based alternative that requires no local installation.
Take the time to evaluate your needs, check your Macbook’s compatibility, and choose the method that works best for you. With the right setup, running Windows on your Macbook opens up new possibilities and makes your machine even more versatile. Start exploring your options today and unlock the full potential of your Macbook.
Frequently Asked Questions
Can I run Windows 11 on an Apple Silicon Macbook?
Yes, you can run Windows 11 on Apple Silicon Macbooks using virtualization software like Parallels Desktop or UTM. These tools support ARM versions of Windows 11, which are optimized for Apple Silicon chips. The performance is excellent for most everyday tasks and even some gaming.
Do I need a Windows license to run Windows on a Macbook?
Yes, you need a valid Windows license regardless of which method you use. You can purchase a license from Microsoft’s official website or from authorized retailers. Using an unlicensed copy of Windows is illegal and can expose you to security risks.
Is Boot Camp available on Apple Silicon Macbooks?
No, Boot Camp is not available on Apple Silicon Macbooks. Boot Camp only works on Intel-based Macs. If you have an M1, M2, M3, or M4 Macbook, you must use virtualization software like Parallels Desktop, UTM, or VMware Fusion Pro.
Can I play Windows games on a Macbook?
Yes, you can play many Windows games on a Macbook by running Windows through Boot Camp or a virtual machine. Boot Camp offers the best gaming performance on Intel Macs. On Apple Silicon Macs, Parallels and UTM support many games, though performance varies depending on the game and your Mac’s specs.
How much storage do I need to install Windows on a Macbook?
You need at least 64 GB of free storage for a Windows installation. However, 128 GB or more is recommended if you plan to install games or large applications. Solid-state drives provide the best performance for running Windows on a Macbook.
Which virtualization app is best for running Windows on a Macbook?
Parallels Desktop is widely considered the best option for most users. It is easy to set up, works on both Intel and Apple Silicon Macs, and offers excellent performance. VMware Fusion and UTM are great alternatives, especially if you prefer free or open-source solutions.
=== CONCLUSION ===
Using Windows on a Macbook is entirely possible and more accessible than ever. Whether you choose Boot Camp for native performance, Parallels for convenience, or a cloud solution for simplicity, there is a method that fits your needs. The key is to understand your Macbook’s hardware, choose the right installation method, and invest in a legitimate Windows license.
With the right setup, you get the best of both worlds: the sleek Mac experience and the vast Windows software library. Follow the tips in this guide, avoid common mistakes, and you will be running Windows on your Macbook in no time. Start your journey today and make the most of your Macbook’s capabilities.