Can You Set Up Att Wi Fi Yourself Without Any Help Today
Yes, you can absolutely set up ATT Wi-Fi yourself and save time and money. This guide walks you through every step of the ATT internet setup process, from unboxing your AT&T WiFi gateway to configuring your wireless network. Whether you are a tech beginner or a seasoned user, you will find clear instructions, practical tips, and AT&T WiFi troubleshooting advice to get your home network running smoothly.
Setting up your home internet does not have to be a stressful experience. If you have recently signed up for an AT&T internet plan or are switching providers, you might be wondering whether you need to hire a professional or wait for a technician visit. The good news is that you can set up ATT Wi-Fi yourself right from the comfort of your living room.
AT&T offers a self-installation option that gives you the freedom to get your network running on your own schedule. Whether you are a student moving into a new apartment, a remote worker setting up a home office, or simply someone who prefers DIY solutions, this guide covers everything you need to know. We will walk through each step, share practical tips, and address common questions so you feel confident throughout the process.
Many people assume that setting up a wireless network requires technical expertise. In reality, AT&T has designed its equipment and setup process to be user-friendly. With a few basic tools and about 30 minutes of your time, you can have your AT&T WiFi gateway connected, your network secured, and all your devices online. Let us dive in and show you exactly how it works.
Key Takeaways
- Self-installation is possible: You can set up ATT Wi-Fi yourself without calling a technician or waiting for an appointment.
- Basic equipment is all you need: An AT&T WiFi gateway, a power outlet, and your existing devices are enough to get started.
- The AT&T Smart Home Manager app simplifies setup: This app guides you through configuration and helps manage your network easily.
- Common issues are fixable at home: Most WiFi problems like slow speeds or connection drops can be resolved with simple steps.
- Security settings matter: Setting a strong WiFi password and enabling network encryption protects your home network from unauthorized access.
- AT&T customer support is available if needed: You can always reach out to AT&T for help, but self-installation is designed to be straightforward.
- Planning your router placement improves performance: A central location and proper positioning boost WiFi signal strength throughout your home.
📑 Table of Contents
- What You Need Before Starting Your ATT Wi-Fi Setup
- Step-by-Step Guide to Setting Up ATT Wi-Fi Yourself
- Common Mistakes to Avoid During ATT Wi-Fi Self-Installation
- Managing and Optimizing Your ATT Wi-Fi Network
- When to Call AT&T Customer Support
- Benefits of Setting Up ATT Wi-Fi Yourself
- Comparison: Self-Install vs. Professional Installation for ATT Wi-Fi
- Quick Tips for a Smooth ATT Wi-Fi Setup Experience
- AT&T WiFi Speed and Performance Expectations
- Frequently Asked Questions About Setting Up ATT Wi-Fi Yourself
- Conclusion
What You Need Before Starting Your ATT Wi-Fi Setup
Before you begin the ATT internet setup, gather everything you will need. Having all the items ready saves time and prevents frustration. Here is a simple checklist to follow:
- AT&T WiFi gateway or modem: This is the main device provided by AT&T. It combines a modem and a router into one unit, which is also called a gateway.
- Power cable and Ethernet cable: These cables usually come included in the box. The Ethernet cable connects your gateway to your computer during initial setup.
- A smartphone, tablet, or computer: You need a device to access the AT&T Smart Home Manager app or the AT&T router login page.
- Your AT&T account credentials: Have your AT&T account number, username, and password handy. You can find these in your welcome email or online account.
- A stable surface and power outlet: Choose a well-ventilated spot near a power source for your gateway placement.
Having these items within reach makes the self-install internet process smooth and efficient. If any cable or accessory is missing, contact AT&T customer service before you start. They can send replacements quickly so you do not get stuck mid-setup.
Step-by-Step Guide to Setting Up ATT Wi-Fi Yourself
Now that you have everything ready, let us walk through the actual setup. Follow these steps carefully, and you will have your wireless network up and running in no time.
Step 1: Choose the Right Location for Your Gateway
Placement matters a lot when it comes to WiFi performance. Pick a central spot in your home where the signal can spread evenly. Avoid placing the gateway in a closet, behind furniture, or near thick walls. These obstacles weaken the WiFi signal and reduce your internet speed.
Keep the gateway elevated, such as on a shelf or table. This helps the signal travel downward and outward. Also, stay away from microwaves, baby monitors, and other electronics that can cause interference. A good rule of thumb is to place the gateway in an open area where it is visible and not blocked by objects.
Step 2: Connect the Hardware
Start by plugging the power cable into your AT&T WiFi gateway and then into a wall outlet. Wait for the lights on the device to stabilize. This usually takes about one to two minutes.
Next, connect the Ethernet cable from your wall jack to the gateway’s Ethernet port. If you are using a phone line connection, make sure the DSL filter is attached correctly. The lights on the gateway will indicate when the connection is active. Look for a solid green light, which means the device has established a connection with AT&T’s network.
Step 3: Access the AT&T Smart Home Manager App
AT&T provides a free app called Smart Home Manager that makes configuration a breeze. Download the app on your smartphone or tablet from the App Store or Google Play. Once installed, open the app and sign in with your AT&T account credentials.
The app will detect your gateway automatically. It then walks you through setting up your AT&T WiFi password, network name, and other preferences. You can also use the app to check WiFi signal strength, manage connected devices, and run speed tests. This tool is incredibly helpful for anyone who wants to manage their wireless network setup without technical knowledge.
Step 4: Configure Your WiFi Network Name and Password
During the setup, you will be asked to create a network name (SSID) and password. Choose a name that is easy for you to recognize but does not reveal personal information. For example, “SmithFamilyWiFi” works better than your full home address.
For the password, use a combination of uppercase letters, lowercase letters, numbers, and symbols. A strong password keeps your network security settings tight and prevents unauthorized users from accessing your internet. Write the password down and store it somewhere safe. You will need it every time a new device connects to your network.
Step 5: Connect Your Devices
Now the fun part. Go to your phone, laptop, tablet, or smart TV and search for the WiFi network name you just created. Select it and enter the password you set. Within seconds, your device should connect to the internet.
Repeat this process for every device you want to connect. Most modern devices remember WiFi passwords, so you only need to enter it once per device. If a device has trouble connecting, restart it and try again. This simple step resolves most minor WiFi troubleshooting issues.
Step 6: Test Your Connection
After connecting your devices, run a speed test to make sure everything is working properly. You can use the Smart Home Manager app or visit a speed test website on your browser. Compare the results with the speeds promised in your ATT internet plan.
If the speeds are lower than expected, try moving closer to the gateway. Walls, floors, and distance can all affect WiFi performance. If speeds remain slow, check for interference from other devices or contact AT&T for further assistance.
Common Mistakes to Avoid During ATT Wi-Fi Self-Installation
Even with a straightforward setup process, mistakes can happen. Here are some common errors that people make during AT&T modem setup and how to avoid them:
- Placing the gateway in a poor location: Corners, basements, and behind walls block the signal. Always choose a central, open space for the best coverage.
- Skipping the firmware update: AT&T gateways sometimes need a firmware update during initial setup. Let the device complete any updates before connecting your devices. Skipping this can cause performance issues later.
- Using a weak WiFi password: Simple passwords like “123456” or “password” are easy targets for hackers. Always create a strong, unique password for your network.
- Forgetting to connect the Ethernet cable: Some users skip the wired connection during setup and rely solely on WiFi. The Ethernet connection ensures a stable link during the initial configuration process.
- Not restarting the gateway when needed: If your connection drops or slows down, a simple restart often fixes the problem. Unplug the gateway, wait 30 seconds, and plug it back in.
- Ignoring the Smart Home Manager app: Many people set up their network and then never use the app again. The app offers ongoing management tools that help you optimize your WiFi performance over time.
Avoiding these mistakes keeps your AT&T residential internet running smoothly and helps you get the most out of your equipment. A little attention to detail during setup goes a long way toward preventing headaches down the road.
Managing and Optimizing Your ATT Wi-Fi Network
Once your network is up and running, you might want to fine-tune it for better performance. AT&T offers several tools and features that help you manage your wireless network setup with ease.
Using the AT&T Smart Home Manager App
The Smart Home Manager app is more than just a setup tool. It lets you view all devices connected to your network, set parental controls, prioritize bandwidth for specific devices, and run diagnostics. You can also use the app to update your AT&T WiFi password or change your network name at any time.
The app provides a map of your home showing WiFi coverage areas. This feature helps you identify dead zones where the signal is weak. If you notice areas with poor coverage, you can adjust the gateway’s position or consider adding an AT&T WiFi extender to boost the signal.
Adding an AT&T WiFi Extender
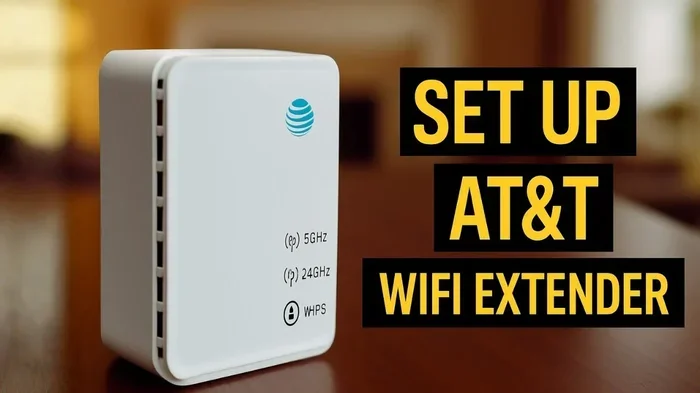
If your home is large or has multiple floors, a single gateway might not cover every room. AT&T offers WiFi extenders that plug directly into a wall outlet and amplify the existing signal. These devices are easy to set up and can significantly improve coverage in hard-to-reach areas.
To add an extender, simply plug it into an outlet halfway between your gateway and the area with weak signal. Use the Smart Home Manager app to pair the extender with your gateway. Within minutes, you should notice stronger WiFi in previously underserved rooms.
Securing Your Network
Network security should be a priority for every household. Change your default AT&T router login credentials to prevent unauthorized access to your settings. Enable WPA3 encryption if your gateway supports it, as it provides the strongest level of security available.
Regularly check the list of connected devices in the Smart Home Manager app. If you see any devices you do not recognize, change your WiFi password immediately. Keeping your network security settings updated protects your personal data and ensures your internet speed is not shared with strangers.
When to Call AT&T Customer Support
Self-installation works for most people, but there are situations where calling AT&T customer support makes sense. If you experience persistent connection issues, no internet access after setup, or equipment that does not power on, it is time to reach out for help. AT&T support can run remote diagnostics and, if needed, schedule a technician visit.
You can contact AT&T through their website, mobile app, or by phone. Have your account information ready when you call to speed up the process. Support representatives can guide you through advanced troubleshooting steps that go beyond the standard setup instructions.
Remember that calling for help is not a failure. Even with the best setup guide, some situations require professional assistance. AT&T’s support team is there to ensure your internet provider setup is successful, no matter what challenges arise.
Benefits of Setting Up ATT Wi-Fi Yourself
Choosing to self-install your AT&T WiFi comes with several advantages. First, you save time. You do not have to wait for a technician’s appointment or rearrange your schedule around their availability. Second, you save money. AT&T sometimes charges a fee for professional installation, while self-installation is free.
Third, self-installation gives you a better understanding of your network. You learn where your gateway works best, how your devices connect, and how to manage your settings. This knowledge helps you troubleshoot minor issues on your own in the future. Fourth, the process is straightforward and designed for people of all technical levels.
Finally, self-installation gives you immediate access to your internet. No waiting days for an appointment. You set it up today and get online right away. For many users, this convenience alone makes self-installation the preferred choice.
Comparison: Self-Install vs. Professional Installation for ATT Wi-Fi
To help you decide which option is right for you, here is a quick comparison of self-installation versus professional installation for AT&T internet setup.
| Feature | Self-Installation | Professional Installation |
|---|---|---|
| Cost | Free | May include a fee |
| Time Required | About 30 minutes | 1-2 hours including wait time |
| Convenience | Set up on your own schedule | Depends on technician availability |
| Technical Skill Needed | Basic, step-by-step guidance | None, handled by a professional |
| Equipment Provided | Same gateway and cables | Same gateway and cables |
| Ongoing Management | Use Smart Home Manager app | Technician handles initial setup |
| Best For | Tech-savvy users and DIY enthusiasts | Users who prefer hands-off setup |
Both options get your network running. The choice depends on your comfort level, budget, and schedule. Most users find that self-installation is more than sufficient for their needs.
Quick Tips for a Smooth ATT Wi-Fi Setup Experience
Here are some extra tips to make your ATT WiFi gateway setup as smooth as possible:
- Read the quick start guide included in the box. It provides a visual overview of the setup process and helps you avoid common pitfalls.
- Keep your devices charged. If you plan to use your phone or tablet during setup, make sure the battery is full or keep a charger nearby.
- Restart your devices after setup. A quick restart of your phone, laptop, or tablet after connecting to the new network ensures a clean connection.
- Update the Smart Home Manager app regularly. App updates include bug fixes and new features that improve your network management experience.
- Document your settings. Write down your WiFi name, password, and any custom settings you configure. This makes future troubleshooting much easier.
- Be patient during the initial connection. It can take a few minutes for the gateway to fully connect to AT&T’s network. Let the process complete before checking your internet.
These small tips can make a big difference in how smoothly your setup goes. They also help you maintain a strong, reliable network over the long term.
AT&T WiFi Speed and Performance Expectations
After completing your AT&T modem setup, you will want to know what kind of performance to expect. AT&T offers various internet plans with different speed tiers. Your actual WiFi speed depends on several factors, including your plan, gateway model, and home layout.
For light browsing and email, even basic speeds feel fast. Streaming HD video and video calls require more bandwidth, and online gaming benefits from the most stable connections. If you have multiple users and devices in your home, a higher-speed plan and proper gateway placement become even more important.
The Smart Home Manager app lets you run speed tests directly from your phone. Use this feature regularly to monitor your AT&T internet speed and identify any issues early. If speeds consistently fall below what your plan promises, contact AT&T support for further investigation.
Frequently Asked Questions About Setting Up ATT Wi-Fi Yourself
Can I set up ATT Wi-Fi without any technical knowledge?
Absolutely. AT&T designs its self-installation process for users of all skill levels. The Smart Home Manager app provides clear, step-by-step instructions that guide you through every stage. You do not need any technical background to complete the setup successfully.
How long does it take to set up ATT Wi-Fi by yourself?
Most users complete the entire setup process in about 20 to 30 minutes. The actual time depends on how quickly you gather your equipment and follow the instructions. Having everything ready before you start helps speed things up significantly.
What should I do if my ATT WiFi gateway does not connect?
First, check that all cables are securely connected. Then, restart the gateway by unplugging it for 30 seconds and plugging it back in. If the issue persists, open the Smart Home Manager app and run the built-in diagnostics. The app will walk you through additional troubleshooting steps.
Can I change my ATT WiFi password after the initial setup?
Yes, you can change your WiFi password at any time through the Smart Home Manager app. Simply navigate to the network settings, select your WiFi network, and choose the option to change the password. Remember to update the password on all your connected devices afterward.
Do I need any special equipment besides the AT&T gateway?
No special equipment is required. The AT&T gateway includes everything you need for a basic setup. You only need a power outlet, an Ethernet cable (included in the box), and a device like a phone or laptop to complete the configuration.
Is self-installation available for all AT&T internet plans?
Self-installation is available for most AT&T residential internet plans. However, some business plans or special promotions may require professional installation. Check your plan details or contact AT&T customer service to confirm your eligibility for self-installation.
Conclusion
Setting up ATT Wi-Fi yourself is not only possible but also straightforward and rewarding. With the right equipment, a few simple steps, and the help of the AT&T Smart Home Manager app, you can have a fully functional home network without any outside help. The entire process is designed to be intuitive, and most users complete it in under half an hour.
Remember to choose a central location for your gateway, create a strong WiFi password, and use the app to manage and optimize your network over time. Avoid common mistakes like poor placement and weak passwords, and you will enjoy reliable internet for years to come.
If you ever run into issues, AT&T customer support is just a phone call away. But for most people, the self-installation process handles everything they need. Can you set up ATT Wi-Fi yourself? Yes, you can, and now you have all the knowledge to do it with confidence. Get started today and enjoy the satisfaction of a job well done.