Can You Play Gamecube On Hdmi With These Simple Tips
Yes, you can play Gamecube on HDMI with the right adapter or cable. The original Gamecube uses AV cables, but modern HDMI adapters convert the signal for sharper, cleaner visuals on today’s TVs. This guide covers every option, setup step, and pro tip to get your Gamecube running on HDMI in minutes.
Have you ever plugged your Gamecube into a modern TV and felt disappointed by the fuzzy picture? You are not alone. The Nintendo Gamecube launched in 2001, and its original cables were built for CRT televisions. Today, most of us have flat-screen HD or 4K displays. The good news is that you can play Gamecube on HDMI with a few simple tools and tips.
This guide walks you through everything you need to know. We will cover adapters, setup steps, common problems, and expert tricks. Whether you are a casual player or a retro gaming collector, you will find practical advice here. Let us get your Gamecube looking its best on a modern screen.
Key Takeaways
- The Gamecube does not have native HDMI output: You need an adapter or custom cable to connect it to modern displays.
- Official and third-party adapters exist: Options range from the official Nintendo component cable to aftermarket HDMI converter boxes.
- HDMI gives you much better picture quality: You get sharper text, cleaner colors, and less signal interference compared to composite cables.
- Setup is simple and affordable: Most adapters plug in and play without needing extra software or technical skills.
- Check your TV input and console model: Not all Gamecube models and TV inputs work the same way, so compatibility matters.
- Audio and video both improve: HDMI carries both signals in one cable, reducing cable clutter and improving sound quality.
- Retro gaming benefits hugely from HDMI: Even older consoles like the Gamecube look amazing on modern HD screens with the right connection.
📑 Table of Contents
Why HDMI Matters for the Gamecube
The original Gamecube came with composite AV cables. These use red, white, and yellow RCA connectors. They work fine on old TVs, but they look blurry on modern screens. The signal is analog, which means it loses quality over distance and through conversions.
HDMI is different. It is a digital connection. It carries both audio and video in one cable. The result is a much sharper, cleaner picture. Colors pop. Text is easier to read. And you do not need a tangle of three or four cables behind your TV.
Many retro gamers upgrade their consoles specifically for this reason. If you have ever checked whether your TV supports WiFi 5 or WiFi 6 standards, you already know that modern displays support many newer standards. The same idea applies here. Old consoles need help to match modern display tech.
What the Original Gamecube Cables Look Like
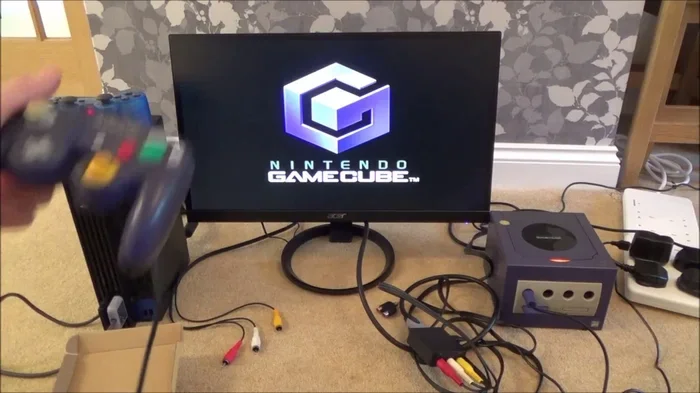
The stock Gamecube cable has three RCA plugs. The yellow plug carries video. The red and white plugs carry audio. This setup, called composite, was standard in the early 2000s. It was fine for tube TVs, but it does not hold up well on LCD or LED screens today.
When you plug composite cables into a modern TV, the TV has to convert the signal. This conversion often looks bad. You may see flickering, blurry text, or washed-out colors. This is where an HDMI upgrade makes a real difference.
Can You Play Gamecube On HDMI Directly?
The short answer is no. The Gamecube does not have an HDMI port. It was released before HDMI became standard. So you cannot just plug an HDMI cable straight into the console. But you can get very close with the right adapter.
There are two main paths to get Gamecube HDMI output. The first is an official Nintendo component cable. The second is a third-party HDMI converter box. Both work well. Each has its own pros and cons. Let us look at them in detail.
Option 1: The Official Nintendo Component Cable
Nintendo released a component cable for the Gamecube late in its life. This cable uses green, blue, and red video plugs plus red and white audio plugs. It is often called the GC video cable or the Nintendo component cable.
This cable does not output true HDMI. But it outputs a much better signal than composite. The picture is noticeably sharper. Colors are more vivid. Many gamers consider this the best official upgrade path.
The catch is that this cable is rare and expensive. Nintendo only made it for a limited time. If you can find one in good condition, it is a great investment. Search for “Nintendo Gamecube component cable” on retro gaming sites and auction platforms.
Option 2: Third-Party HDMI Converter Boxes
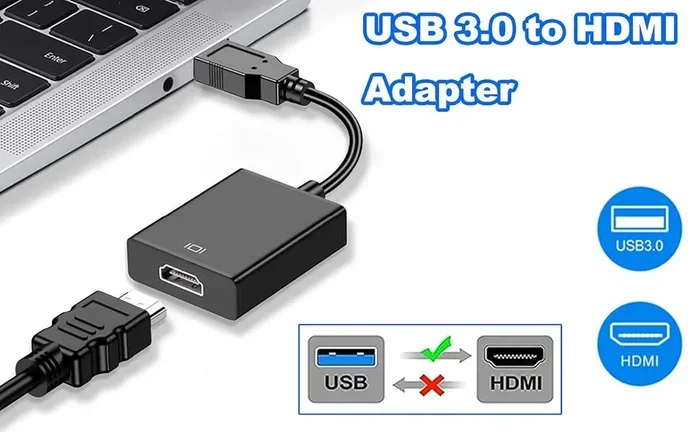
Several companies make HDMI converter boxes for the Gamecube. These devices take the original AV signal and convert it to HDMI output. You plug the Gamecube into the box with its stock cables. Then you run an HDMI cable from the box to your TV.
Popular options include the RetroTINK series and various generic HDMI upscaler boxes. Prices range from about 30 to 150 dollars. The more expensive ones offer better upscaling and fewer artifacts.
These boxes are easy to use. Most are plug-and-play. You do not need to open your console or install any software. They are a great choice for people who want a simple Gamecube HDMI adapter solution without technical hassle.
How to Set Up Gamecube HDMI Output
Setting up your Gamecube for HDMI output is straightforward. Follow these steps and you will be gaming in no time. The exact steps vary slightly depending on which option you choose.
Step 1: Gather your cables. You need your Gamecube power cable, AV cable (or component cable), and an HDMI cable. If you are using a converter box, you also need the box itself.
Step 2: Connect the Gamecube to the adapter. Plug the yellow, red, and white RCA cables into the back of your Gamecube. If you are using the official component cable, plug in the green, blue, red, and audio cables instead.
Step 3: Connect the adapter to the HDMI cable. If you are using a converter box, run an HDMI cable from the box output to your TV. If you are using a component cable, you may need a separate component-to-HDMI converter.
Step 4: Plug everything in and power on. Turn on your Gamecube and your TV. Switch your TV to the correct HDMI input. You should see the Gamecube menu on your screen.
Step 5: Adjust TV settings. Go into your TV picture settings. Set the aspect ratio to 4:3 for the authentic Gamecube look. Some TVs have a “just scan” or “1:1 pixel mapping” option. Turn that on for the sharpest image without black bars.
Quick Tips for the Best Picture
- Use a short HDMI cable to reduce signal loss.
- Set your TV to game mode for the lowest input lag.
- Avoid cheap no-name converter boxes. They often add noise to the picture.
- If you are using a CRT TV, stick with composite cables. CRT screens handle analog signals beautifully.
- Keep your Gamecube firmware updated if you are using any mod chips or custom firmware.
Comparing Connection Options for the Gamecube
Not all connections are created equal. Here is a quick look at how the different options stack up. This table compares the most common ways to connect a Gamecube to a modern display.
- Composite AV (Stock): Yellow, red, white RCA plugs. Lowest quality on modern TVs. Good for CRT displays. Easy to find and cheap.
- Component AV (Nintendo): Green, blue, red video plus audio. Much sharper than composite. Official Nintendo product. Hard to find and pricey.
- HDMI Converter Box: Converts AV signal to HDMI. Clean digital output. Requires extra box and power. Best overall quality for modern TVs.
- Mod Chip with HDMI: Internal console modification. Highest quality possible. Requires opening the console. Not recommended for casual users.
If you are setting up a full gaming setup with multiple retro consoles, a good HDMI converter box saves a lot of cable clutter. It keeps your entertainment center clean and your games looking great.
Which Option Should You Choose?
If you just want the best picture without opening your console, go with an HDMI converter box. It is the easiest path to great Gamecube HDMI output. If you are on a tight budget and have a CRT TV, the stock composite cable is fine.
If you want the official Nintendo experience and have the budget, hunt down the component cable. It is a collectible item as much as it is a functional upgrade.
Some advanced users install mod chips that output directly to HDMI. This gives the best possible picture quality. But it requires technical skill and voids your warranty. Stick with the converter box if you are not comfortable opening your console.
Common Problems and How to Fix Them
Even with the right setup, you might run into issues. Here are the most common problems and their solutions.
No Signal on the TV
If your TV shows no signal, check the HDMI cable first. Try a different HDMI port on your TV. Make sure the converter box is powered on if it needs external power. Some boxes need a USB cable connected to a power source.
Also, try powering on the Gamecube while the TV is already set to the correct input. Some converter boxes do not initialize properly if the TV input is changed after the console is on.
Fuzzy or Blurry Picture
A blurry picture often means the TV is set to the wrong resolution or aspect ratio. Switch your TV to 4:3 mode. Look for a “just scan” or “overscan” setting and turn it off. This tells the TV to display every pixel without stretching or cropping.
If you are using a cheap converter box, the fuzziness might be built into the hardware. Upgrading to a better quality box can make a huge difference in display quality.
No Audio or Poor Sound
Check that your red and white audio cables are firmly connected. On some TVs, the HDMI audio settings need to be adjusted. Go into your TV sound settings and make sure HDMI audio is enabled and set to the correct format.
If you are using a converter box with separate audio outputs, make sure you are plugged into the right ones. Some boxes output audio through HDMI and others through separate RCA or 3.5mm jacks.
Screen Tearing or Glitches
Screen tearing happens when the TV and the Gamecube are not in sync. This is more common with converter boxes. Try enabling VSync if your box has that option. You can also try a different HDMI cable or a different HDMI port on your TV.
Some tearing is normal with analog-to-digital conversion. A higher-quality converter box reduces this significantly. If the tearing is bad, the box may be defective or incompatible with your specific Gamecube model.
Expert Tips for the Best Retro Gaming Experience
Here are some pro tips that make a real difference in your Gamecube HDMI setup. These come from years of experience in the retro gaming community.
- Buy a converter box with upscaling: Upscaling improves the image without extra effort. Look for boxes that support 480p or higher output.
- Label your cables: It sounds simple, but labeling cables saves time when troubleshooting. Use small tape tags or colored cable ties.
- Keep your cables organized: Use cable ties or a cable management box. A clean setup looks better and reduces the chance of loose connections.
- Test with multiple games: Some games look better on certain displays. Test a few titles before committing to a permanent setup.
- Store your Gamecube properly: Dust and heat damage the console over time. Keep it in a ventilated case when not in use.
- Consider your whole setup: If you are also using modern devices, check that your phone setup is optimized too. For example, some people use their phones for tracking game collections, and knowing how to add prefixes to numbers on iPhone can help organize contacts or inventory lists.
The retro gaming community is full of helpful advice. Join online forums, watch setup videos, and do not be afraid to ask questions. The community is welcoming to newcomers and seasoned collectors alike.
Is It Worth Upgrading to HDMI?
For most people, the answer is yes. The improvement in picture quality is dramatic. A fuzzy, blurry composite image transforms into a clean, sharp picture. Text becomes readable. Colors look vibrant again.
The cost is also reasonable. A decent converter box costs between 30 and 80 dollars. The official Nintendo component cable runs 20 to 50 dollars on the used market. Compared to the cost of a new TV or console, these are small investments for a big upgrade.
There is something special about playing classic Gamecube games on a modern display. The games themselves are timeless. Super Smash Bros Melee, The Legend of Zelda: The Wind Waker, and Metroid Prime all hold up beautifully. HDMI just lets you see them the way they were meant to look.
If you care about retro gaming and want the best possible experience, HDMI is the way to go. It is one of the simplest and most impactful upgrades you can make to your Gamecube setup.
Final Thoughts
Can you play Gamecube on HDMI? Absolutely. With the right adapter, cable, or converter box, your Gamecube can look fantastic on a modern TV. The setup is simple, affordable, and makes a huge difference in picture quality.
Start with the option that fits your budget and skill level. A converter box is the easiest path. The official component cable is a great collector upgrade. And a mod chip is for the advanced users who want the absolute best.
Whatever route you choose, you are investing in better retro gaming. Your Gamecube games deserve to look their best. Follow the tips in this guide, troubleshoot any issues that come up, and enjoy your favorite classics on a crisp, modern display.
The world of retro gaming is full of surprises. A simple HDMI upgrade can breathe new life into a console you already own. Grab your Gamecube, pick your adapter, and start playing. You will not regret it.
Frequently Asked Questions
Do I need a special Gamecube HDMI adapter to play on modern TVs?
Yes, the Gamecube does not have an HDMI port. You need either an official Nintendo component cable or a third-party HDMI converter box. Both options are widely available online and easy to set up without any technical skills.
Can I plug an HDMI cable directly into the Gamecube console?
No, the Gamecube was released before HDMI existed. It only has the original AV port for composite or component cables. You must use an external adapter or converter box to get HDMI output to your TV.
What is the best Gamecube HDMI converter box?
The RetroTINK series is widely regarded as one of the best options. It offers clean upscaling and low input lag. Other reputable brands include RetroAmp and various well-reviewed generic HDMI upscaler boxes. Avoid the cheapest no-name options as they often produce poor picture quality.
Will HDMI improve the sound quality of my Gamecube?
Yes, HDMI carries both audio and video digitally. You will get cleaner sound compared to the analog white and red RCA audio cables. The improvement is subtle but noticeable, especially with games that have voice acting and atmospheric music.
Can I use a Gamecube HDMI adapter with a projector?
Yes, most HDMI converter boxes work with projectors just as well as they work with TVs. Make sure your projector has an HDMI input and supports the resolution output by the converter box. The setup process is the same as connecting to a TV.
Is it hard to set up Gamecube HDMI output for the first time?
Not at all. Most converter boxes are plug-and-play. You connect your Gamecube to the box with the stock AV cables, run an HDMI cable from the box to your TV, and switch your TV to the right input. The whole process takes about five to ten minutes.
=== META TITLE ===
Can You Play Gamecube On Hdmi With These Simple Tips?
=== URL SLUG ===
can-you-play-gamecube-on-hdmi
=== SEO TITLE ===
Can You Play Gamecube On Hdmi With These Simple Tips