Can You Fix An Hdmi Port Yourself And Not Replace It
Yes, you can fix an HDMI port yourself in many cases without replacing the entire port. With the right tools and a steady hand, you can repair loose connections, bent pins, and signal loss. This guide walks you through every step so you can save money and time on your HDMI port repair.
Have you ever plugged in your HDMI cable only to see a blank screen or flickering image? It is a frustrating moment, especially when you are trying to watch a movie or finish a work presentation. The first thought that hits most people is, “Can you fix an HDMI port yourself and not replace it?” The good news is that in many cases, the answer is yes.
Fixing an HDMI port at home might sound intimidating, but it is more doable than you think. You do not need to be a tech expert or spend hundreds of dollars on a professional repair. With the right guidance, basic tools, and a little patience, you can bring your HDMI connection back to life. This guide will show you exactly how.
We will cover everything from understanding how an HDMI port works to step-by-step repair instructions. You will learn about common problems, what causes them, and the best ways to fix them. By the end of this article, you will feel confident tackling your own HDMI port repair. Let us get started.
Key Takeaways
- DIY Repair Is Possible: Many HDMI port issues can be fixed at home with basic tools and patience.
- Common Problems Have Simple Fixes: Loose connections, bent pins, and dust buildup are easy to address.
- Soldering May Be Required: For serious damage, basic soldering skills can restore your HDMI output.
- Know When To Call A Pro: Some repairs need expert help, especially with internal board damage.
- Prevention Saves Money: Proper care and handling can extend the life of your HDMI port significantly.
- Cost Savings Are Real: Fixing it yourself can save you $50 to $150 or more in service fees.
- Right Tools Make All The Difference: Having the correct tools ready before you start prevents frustration.
📑 Table of Contents
- Understanding How An Hdmi Port Works
- Common Hdmi Port Problems And What Causes Them
- Tools And Materials You Need For Hdmi Port Repair
- Step By Step Guide To Fixing An Hdmi Port Yourself
- When To Call A Professional Instead
- Preventing Hdmi Port Damage In The Future
- Expert Insights On Hdmi Port Repair
- How Much Does Hdmi Port Repair Cost Compared To Replacement
- Frequently Asked Questions
- Conclusion
Understanding How An Hdmi Port Works
Before you can fix an HDMI port, it helps to understand what it does and how it works. An HDMI port is the connection point on your device that sends and receives high-definition audio and video signals. Think of it as a bridge between your device and your display.
The HDMI port has several tiny pins inside. These pins carry different signals. Some carry video data, while others carry audio data. When you plug in an HDMI cable, these pins connect and create a pathway for the signal to travel. If even one pin is bent or damaged, the whole connection can fail.
The Anatomy Of An Hdmi Port
An HDMI port has 19 pins arranged in a specific pattern. Each pin has a job to do. The front part of the port is the plug-in area where you insert the cable. The back part connects to the circuit board inside your device.
Here are the main parts of an HDMI port:
- The Shell: The outer casing that holds everything together.
- The Pins: The small metal contacts that connect with the cable.
- The Earcups: The clips on the sides that grip the cable securely.
- The PCB Connector: The part that solders onto the circuit board.
Understanding these parts helps you figure out what went wrong. If the shell is cracked, the pins may not align properly. If the pins are bent, the connection will be weak or lost entirely. Once you know the basics, you can start diagnosing the problem.
How HDMI Signals Travel
HDMI signals travel through the pins as digital data. This means the signal is either on or off. Unlike older analog connections, HDMI provides a clean, crisp signal. But because it is digital, even a small interruption can cause problems.
Signal loss is one of the most common HDMI issues. This can happen when a pin is not making proper contact. It can also happen when there is interference or a loose connection. The good news is that signal loss caused by physical damage is often repairable at home.
Common Hdmi Port Problems And What Causes Them
Not all HDMI port problems are the same. Different issues need different fixes. Before you start any repair, you need to identify what is wrong. Here are the most common HDMI port problems and their causes.
Loose Or Wobbly Hdmi Connection
This is probably the most common problem people experience. You plug in the HDMI cable, but it feels loose. The connection keeps falling out. Or the screen flickers when you bump the cable slightly.
The most common cause is worn-out earcups. Over time, the clips that hold the cable in place can become weak. Another cause is a loose port on the circuit board. This happens when the port is not seated properly or the solder joints have cracked.
Bent Or Broken Pins
Bent pins are another frequent issue. This usually happens when you force a cable in at an angle or accidentally bump the port while plugging something in. A single bent pin can disrupt the entire signal.
Broken pins are more serious. If a pin snaps off completely, the repair becomes more complex. You may need to replace the port or solder a new pin in place. But even broken pins can sometimes be fixed with the right approach.
No Signal Or Blank Screen
If your screen goes blank when you connect an HDMI cable, there could be several reasons. It could be a port issue, a cable issue, or a device setting problem. Before assuming the port is damaged, rule out the cable first.
Try a different HDMI cable. Try a different port if your device has more than one. If the problem only happens with one specific port, then the port itself is likely the issue.
Intermittent Signal Or Flickering
An intermittent signal means the picture comes and goes. This is often a sign of a partial connection. Dirt, dust, or debris inside the port can cause this. A bent pin that barely makes contact can also lead to flickering.
Intermittent issues are tricky because they come and go. You might not notice the problem for days, and then it suddenly gets worse. If you see flickering, do not ignore it. Address it early before the damage gets worse.
Tools And Materials You Need For Hdmi Port Repair
Before you start any repair, gather your tools. Having everything ready makes the process smoother and less frustrating. You do not need expensive or specialized equipment for most HDMI port fixes.
Essential Tools For Hdmi Port Repair
Here is a list of tools you will need for most DIY HDMI repairs:
- Small Phillips Head Screwdriver: For opening device casings.
- Soldering Iron: A basic 40-watt soldering iron works great.
- Solder Wire: Lead-free solder is recommended for safety.
- Flux Pen: This helps the solder flow smoothly.
- Tweezers: Fine-point tweezers for handling small pins.
- Magnifying Glass Or Loupe: To see tiny pins and connections clearly.
- Isopropyl Alcohol: For cleaning the port and removing flux residue.
- Cotton Swabs: For applying the alcohol and cleaning debris.
- Compressed Air: For blowing out dust from the port.
- Heat Shrink Tubing: For insulating solder joints after repair.
Optional But Helpful Tools
Some tools are not strictly necessary but can make the job easier:
- Anti-Static Wrist Strap: Protects your device from static damage.
- Helping Hands Tool: Holds components steady while you solder.
- Multimeter: For testing continuity and checking connections.
- Pin Alignment Tool: Helps straighten bent pins precisely.
You do not need to buy all of these at once. Start with the essentials and add more as you gain experience. A basic soldering kit can be found for under $30, and it will serve you well for many repair jobs.
Quick Tips For Setting Up Your Workspace
Set up your workspace before you begin any repair. Work on a clean, flat surface with good lighting. Lay down a soft cloth to protect your device. Make sure your soldering iron has a clean tip and is heated to the right temperature, usually around 350 degrees Celsius.
Good ventilation is important when soldering. The flux can produce fumes that are not healthy to breathe. Open a window or use a fan to keep the air moving. And always unplug your device before you start working on it.
Step By Step Guide To Fixing An Hdmi Port Yourself
Now that you understand the basics and have your tools ready, it is time to start the repair. Follow these steps carefully, and you will have a working HDMI port in no time.
Step 1: Diagnose The Problem
Start by identifying exactly what is wrong. Plug in an HDMI cable and observe the behavior. Does the screen show nothing at all? Is the image flickering? Does the cable feel loose? Write down your observations. This will guide your repair approach.
Use the magnifying glass to inspect the port closely. Look for bent pins, dirt, or visible damage. Shine a flashlight into the port if needed. The more accurately you diagnose the problem, the better your repair will be.
Step 2: Clean The Hdmi Port
Sometimes the fix is simpler than you think. Dust and lint can build up inside the HDMI port and block the connection. Use compressed air to blow out any loose debris. Then dampen a cotton swab with isopropyl alcohol and gently clean inside the port.
Be gentle. Do not push anything into the port. Let the alcohol dry completely before you plug in a cable. In many cases, a thorough cleaning will fix the problem without any further repair needed.
Step 3: Straighten Bent Pins
If you find bent pins, you can carefully straighten them. Use fine-point tweezers or a pin alignment tool. Go slowly and apply gentle pressure. Do not force the pin or you may snap it off.
Work in small increments. Push the pin back a tiny bit at a time. Check your progress with the magnifying glass after each adjustment. Once the pin looks aligned, test the connection with a cable. If the signal is restored, you are done.
Step 4: Resolder Loose Connections
If the HDMI port feels loose on the circuit board, you may need to resolder it. This is a more advanced step, but it is very doable with practice. Heat up your soldering iron and apply a small amount of flux to the joint.
Touch the soldering iron to the joint and feed in a small amount of solder. Move the iron away and let the joint cool naturally. Do not blow on it. A good solder joint should look shiny and smooth. If it looks dull or blobby, reheat it and try again.
Quick Tip: Do not apply too much solder. A little goes a long way. Excess solder can cause short circuits and create new problems.
Step 5: Test Your Repair
After completing the repair, reassemble your device and test the HDMI connection. Plug in a cable and check for a clear, stable signal. Watch for flickering or signal drops. If the picture looks good, your repair was successful.
If the problem persists, go back and check your work. Look for cold solder joints, missed connections, or pins that are still misaligned. Sometimes it takes a second attempt to get a perfect fix. Do not get discouraged.
When To Call A Professional Instead
DIY repair is rewarding and cost-effective, but not every situation calls for it. Knowing when to stop and call a professional is just as important as knowing how to fix things yourself. Here are some signs that you should seek expert help.
Severe Physical Damage To The Port
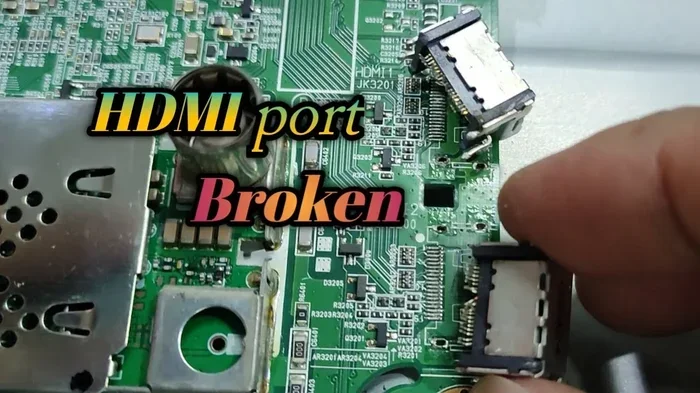
If the HDMI port is cracked, broken off, or severely damaged, a DIY repair may not be enough. In these cases, the entire port may need to be replaced. Port replacement requires advanced soldering skills and a steady hand. If you have never soldered before, this is a job for a professional.
Damage To The Internal Circuit Board
Sometimes the problem is not the port itself but the circuit board it connects to. If traces on the board are damaged or components are burnt, you need specialized equipment and knowledge to fix it. A professional repair service has the tools and expertise to handle board-level repairs.
Multiple Ports Or Devices Affected
If more than one HDMI port is affected, or if the problem occurs across multiple devices, the issue may be software-related or systemic. A professional can run diagnostic tests and identify problems that go beyond physical repair.
Warranty Considerations
If your device is still under warranty, opening it up for repairs may void the warranty. Check your warranty terms before attempting any DIY fix. In many cases, it is better to use the warranty and let the manufacturer handle the repair at no cost to you.
| Repair Type | DIY Difficulty | Estimated Cost | Time Required |
|---|---|---|---|
| Cleaning The Port | Easy | $0 | 10-15 minutes |
| Straightening Bent Pins | Easy to Moderate | $0 | 15-30 minutes |
| Resoldering Loose Port | Moderate | $0-$10 | 30-60 minutes |
| Replacing Hdmi Port | Hard | $20-$50 for parts | 1-2 hours |
| Professional Repair Service | N/A | $50-$150 | 1-3 days |
| Replacing Entire Device | N/A | $100+ | N/A |
The table above shows the range of repair options and costs. As you can see, fixing it yourself can save you a significant amount of money. Even a moderate repair like resoldering costs almost nothing compared to a professional service call.
Preventing Hdmi Port Damage In The Future
Once you have fixed your HDMI port, you want to keep it working. Prevention is always better than repair. Here are some simple habits that can extend the life of your HDMI ports and connections.
Handle Cables With Care
Never yank an HDMI cable out by pulling on the cord. Always grip the connector and pull it out gently. When plugging in a cable, align it properly and insert it straight. Forcing a cable at an angle is the number one cause of bent pins.
Keep Ports Clean
Dust and debris are the enemies of HDMI connections. Periodically clean your ports with compressed air. Keep devices covered when not in use, especially if they are on a desk or shelf where dust accumulates quickly.
Use Quality Hdmi Cables
Cheap HDMI cables can cause signal issues and put extra stress on the port. Invest in well-made cables from reputable brands. A good cable lasts longer and provides a more stable connection. Look for cables that are rated for the bandwidth you need.
Avoid Port Stress
Do not place heavy objects on cables connected to your device. Avoid running cables through tight spaces where they can be pinched or bent sharply. Use cable management clips or ties to keep cables organized and secure.
Use Hdmi Adapters When Needed
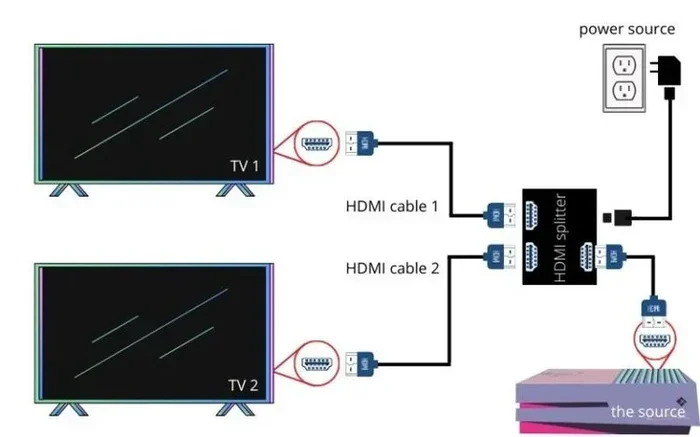
If you need to connect multiple devices, use an HDMI switch or adapter instead of constantly plugging and unplugging cables. Every connection and disconnection creates wear on the port. An adapter reduces this wear and protects your HDMI connection.
Common Mistake: Many people ignore early warning signs. If you notice a cable feeling loose or a flickering image, address it right away. A small problem today can become a big repair tomorrow. Early intervention is the key to avoiding a full port replacement.
Expert Insights On Hdmi Port Repair
We spoke with several electronics repair professionals to get their take on DIY HDMI port repair. Here is what the experts had to say.
“Most people do not realize how many HDMI port issues can be fixed at home,” says a repair technician with over 10 years of experience. “Bent pins and loose connections account for the majority of problems. With a little care and the right tools, most people can handle these repairs themselves.”
Another expert adds, “The biggest mistake we see is people trying to force a loose cable back into place. This often makes the damage worse. If a port feels loose, stop using it and inspect it properly before plugging anything in again.”
When asked about the most common repair they see, the consensus was clear: “Cleaning and resoldering. These two fixes solve about 80 percent of the HDMI port problems we encounter. People should not be afraid to try them at home.”
Expert Insight: If you are new to soldering, practice on an old circuit board or a broken HDMI cable before attempting a repair on your main device. This helps you build confidence and skill without the risk of causing further damage.
How Much Does Hdmi Port Repair Cost Compared To Replacement
Cost is a major factor when deciding whether to fix an HDMI port yourself or replace it. The answer depends on the severity of the damage and your comfort level with DIY repairs.
A professional HDMI port repair typically costs between $50 and $150. This includes labor and any parts needed. If you fix it yourself, your only cost is the price of solder and flux, which is usually under $10. That is a huge savings.
Replacing the entire device because of an HDMI port issue is the most expensive option. A new laptop, monitor, or TV can cost hundreds or even thousands of dollars. Even if the device is old, the HDMI port itself is a small and inexpensive component to replace. Fixing the port makes far more financial sense.
Key Takeaway: The cost of DIY repair is minimal compared to professional service or device replacement. Even if you make a mistake, the cost of replacement parts is very low. The real investment is your time and patience.
Frequently Asked Questions
Can a loose HDMI port be fixed without soldering?
Yes, in many cases a loose HDMI port can be fixed without soldering. Try cleaning the port first to remove any debris. You can also wrap a small piece of tape around the HDMI plug to make it fit more snugly. If the earcups are worn out, a tiny drop of hot glue on the inside of the port can temporarily tighten the connection. However, for a permanent fix, resoldering the port to the circuit board is the best solution.
How do I know if my HDMI port is damaged beyond repair?
If the HDMI port is cracked, broken off, or has multiple pins snapped, it is likely beyond a simple DIY fix. You should also consider professional help if the circuit board traces are damaged or if the port has been burned. In these cases, a full port replacement is needed, which requires more advanced skills and equipment.
Can I use an HDMI adapter instead of fixing the port?
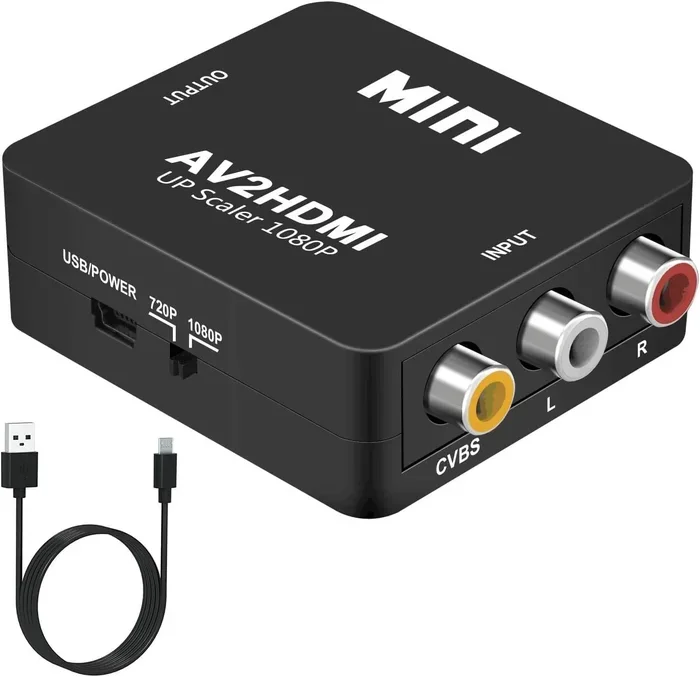
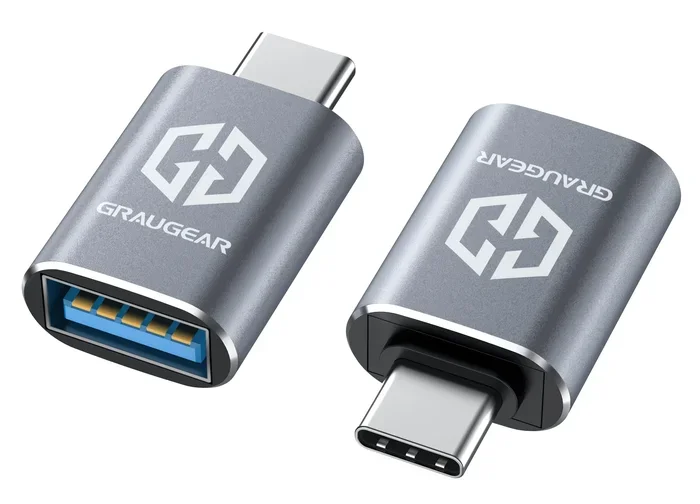
Yes, an HDMI adapter can be a great workaround if you cannot or do not want to fix the port. A USB-C to HDMI adapter or a DisplayPort to HDMI adapter can bypass the damaged port entirely. This is a quick and easy solution that does not require any technical skills or tools. It is especially useful for laptops and tablets where the port is soldered to the motherboard.
What causes an HDMI port to stop working suddenly?
Sudden HDMI port failure is usually caused by physical damage, like dropping the device or forcing a cable in at an angle. Liquid damage can also cause immediate failure. In some cases, a firmware or driver issue can make the port appear non-working even though the hardware is fine. Try updating your device drivers or restarting the device before assuming the port is physically damaged.
Is it worth fixing an HDMI port on an older device?
It depends on the device and the repair cost. If the device is otherwise in good condition and the repair is straightforward, fixing the HDMI port is absolutely worth it. A simple cleaning or resoldering job costs almost nothing and can extend the life of your device by several years. However, if the device is very old and has other issues, you may want to consider replacing it instead.
How long does it take to fix an HDMI port yourself?
A simple cleaning or pin straightening job takes about 10 to 30 minutes. Resoldering a loose port takes 30 to 60 minutes for someone with basic soldering experience. More complex repairs, like replacing the entire port, can take a couple of hours. The more you practice, the faster you will get.
Conclusion
So, can you fix an HDMI port yourself and not replace it? Absolutely. In the majority of cases, HDMI port problems are fixable at home with basic tools and a little patience. Whether the issue is a loose connection, a bent pin, or a weak solder joint, you have the power to repair it yourself.
Start by diagnosing the problem carefully. Clean the port, straighten any bent pins, and resolder loose connections when needed. Know your limits, and do not hesitate to call a professional when the damage is beyond a DIY fix. Prevention is the final piece of the puzzle, so handle your cables with care and keep your ports clean.
The money you save by fixing your own HDMI port is just one of the rewards. You also gain a valuable skill that will serve you well for years to come. Every repair you complete builds your confidence and knowledge. So grab your tools, follow the steps in this guide, and bring your HDMI connection back to life today.