Can You Burn Cds With An External Cd Drive Step By Step
Yes, you can absolutely burn CDs with an external CD drive, and it is much easier than most people think. Whether you have a laptop without a built-in optical drive or just need a portable burning solution, an external USB CD drive makes it simple. This guide walks you through every step, from choosing the right disc to finishing your burn. You will learn about the best software, common mistakes to avoid, and expert tips for perfect results. By the end, you will feel confident creating your own data discs, music CDs, and backups at home.
Have you ever wanted to burn a CD but realized your computer does not have a built-in disc drive? You are not alone. Many modern laptops and desktops have dropped the CD drive entirely. The good news is that you can still burn CDs with an external CD drive. It is a simple, affordable solution that works with almost any computer. In this guide, we will walk you through every single step so you can start burning discs right away.
Whether you want to create a mix CD for the car, back up important files, or share photos with family, an external CD drive makes it all possible. These drives plug right into your USB port and work instantly. No complicated setup. No extra hardware. Just connect, insert a disc, and start burning. This article covers everything you need to know, from picking the right drive to troubleshooting common problems.
Key Takeaways
- External CD drives work great for burning: They connect via USB and are compatible with most modern laptops and desktops.
- You need the right supplies: A USB external drive, blank CD-R or CD-RW discs, and reliable burning software.
- The process is simple and fast: Just install software, insert a disc, add your files, and hit burn.
- Software choice matters a lot: Free options like ImgBurn and CDBurnerXP work well, while paid tools offer more features.
- Avoid common mistakes: Using the wrong disc type, skipping the finalize step, and burning at maximum speed cause errors.
- External drives are portable and affordable: You can find reliable models for under $30.
- Burning CDs is still useful today: Music sharing, data backup, and creating mixed discs remain popular tasks.
📑 Table of Contents
- What Is an External CD Drive and Why Do You Need One
- Things You Need Before You Start Burning CDs
- Step-by-Step Guide to Burning CDs With an External Drive
- Best CD Burning Software for External Drives
- Common Problems When Burning CDs With an External Drive and How to Fix Them
- Tips for Better CD Burning Results
- Why Burning CDs Still Matters in the Digital Age
- Conclusion
What Is an External CD Drive and Why Do You Need One
An external CD drive is a portable optical drive that connects to your computer through a USB cable. It looks like a small box, usually about the size of a paperback book. You plug it into any available USB port, and your computer recognizes it right away. These drives can read and write CDs and sometimes DVDs too.
So why would you need one? Many newer computers simply do not come with a built-in optical drive anymore. Apple removed them from most MacBooks years ago, and many Windows laptops followed suit. If you still have CDs you want to listen to, files you want to burn, or old discs you need to copy, an external drive is your best option. It is also great for people who work with physical media and need a portable solution.
The beauty of these drives is their simplicity. You do not need to open your computer or install anything inside. Just unpack the drive, connect it to a USB port, and you are ready to go. Most external CD drives draw power directly from the USB connection, so you do not even need a separate power cable. This makes them perfect for travel, office use, or just keeping in a drawer when you are not using them.
How External CD Drives Connect to Your Computer
Almost all external CD drives use a standard USB connection. USB-A and USB-C are the two most common types. USB-C drives are newer and offer faster data transfer, but USB-A drives work with virtually every computer made in the last 15 years. Some drives come with both connector types or include an adapter in the box.
Once plugged in, your operating system should recognize the drive automatically. Windows and macOS both support most external optical drives without needing extra drivers. If your computer does not recognize the drive, try a different USB port or cable. Sometimes a loose connection is all it takes to fix the problem.
Things You Need Before You Start Burning CDs
Before you begin the burning process, make sure you have everything ready. Having the right supplies saves time and prevents frustration. Here is a simple checklist of what you need:
- An external CD drive: A USB-connected optical drive that supports disc burning. Most modern drives handle both CD and DVD formats.
- Blank CD-R discs: These are write-once discs. Once you burn data to them, you cannot erase or rewrite. They are the most popular choice for most users.
- Blank CD-RW discs (optional): These are rewritable discs. You can erase and reuse them multiple times. They cost a bit more but are handy for testing.
- CD burning software: Your computer may already have built-in software, but dedicated programs give you more control and better results.
- Files to burn: Music files, documents, photos, or any other data you want to put on the disc.
Take a moment to gather all of these items before you start. It makes the whole process smoother and faster. You do not want to pause halfway through just because you are missing a blank disc or the right cable.
Choosing the Right Blank Discs
Not all blank CDs are the same. CD-R discs are the standard choice for most people. They are affordable and work in almost any CD player, car stereo, or computer. CD-RW discs are rewritable, which means you can erase them and use them again. However, many older CD players cannot read CD-RW discs, so CD-R is usually the safer bet.
When buying blank discs, stick with well-known brands like Verbatim, Sony, or Maxell. Cheap, no-name discs sometimes have higher error rates and may not last as long. Spending a few extra dollars on quality discs saves you from wasted burns and corrupted files.
Step-by-Step Guide to Burning CDs With an External Drive
This is the core of the whole process. Follow these steps carefully, and you will have a perfectly burned CD in no time. Each step is simple and straightforward.
Step 1: Connect Your External CD Drive
Plug your external CD drive into an available USB port on your computer. If you are using a USB-C drive, make sure your computer has a compatible port or use an adapter. Once connected, wait a few seconds for your computer to recognize the device. You should see a notification or a new drive icon appear on your screen.
On Windows, the drive will show up in File Explorer under “This PC.” On macOS, it will appear on your desktop and in the Finder sidebar. If nothing happens, try unplugging the drive and plugging it into a different USB port. Sometimes the first port you try does not supply enough power.
Step 2: Install or Open CD Burning Software
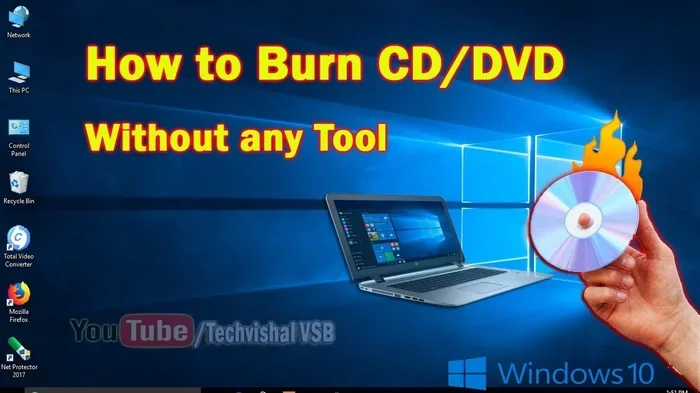
Your computer might already have basic disc burning software built in. Windows users can use Windows Media Player or File Explorer’s built-in burn feature. Mac users can use the built-in Disk Utility or iTunes for audio CDs. However, dedicated burning software gives you much more control and better results.
Some popular free options include ImgBurn, CDBurnerXP, and Ashampoo Burning Studio Free. These programs are easy to use and offer features like disc-at-once burning, track naming, and error correction. Download your preferred software, install it, and open it before you insert your blank disc.
Step 3: Insert a Blank Disc
Place a blank CD-R or CD-RW disc into the external drive’s tray. Push the tray gently until it clicks into place. The drive will spin the disc for a moment as it reads the disc type. Your burning software should detect the disc automatically and prompt you to choose a burning mode.
If the software does not recognize the disc, try ejecting it and reinserting. Sometimes the drive needs a moment to initialize the disc. Make sure the disc label side is facing up when you insert it, as this is the side the laser reads from.
Step 4: Add Your Files to the Burning Queue
Now comes the fun part. Drag and drop your files into the burning software’s queue. You can add music tracks, documents, photos, or any other files you want to put on the disc. Most burning software lets you arrange the order of files, so you can organize your tracks or documents however you like.
Keep an eye on the total file size. A standard CD holds about 700 megabytes of data. If you go over that limit, the burn will fail. If you are adding music files, a typical audio CD holds about 80 minutes of music. Some software lets you compress files slightly to fit more content, but this can affect quality.
Step 5: Choose Your Burning Settings
Before you start the actual burn, take a moment to review the settings. Most burning software lets you choose the recording speed. A slower speed, like 4x or 8x, produces more reliable burns with fewer errors. Faster speeds like 24x or 40x burn quicker but have a higher chance of errors, especially with older discs or drives.
You should also choose whether to finalize the disc after burning. Finalizing closes the disc so no more files can be added later. This is important if you want the disc to play in other devices like car stereos or DVD players. If you skip finalizing, the disc will not be readable by most standard CD players.
Step 6: Start the Burn and Wait
Click the burn or start button in your software. The drive will begin spinning the disc, and the laser will write your data to the disc surface. Depending on the size of your files and the burning speed, this process can take anywhere from a few minutes to half an hour.
Do not remove the disc or unplug the drive while the burn is in progress. Interrupting the process can ruin both the disc and the drive. Once the burn is complete, most software will notify you with a success message. Eject the disc carefully and test it in another device to make sure everything works correctly.
Best CD Burning Software for External Drives
Choosing the right software makes a big difference in your burning experience. Not all programs are created equal, and some are much easier to use than others. Here are some of the best options available today:
ImgBurn: This is a lightweight, free program that has been a favorite among disc burning enthusiasts for years. It supports data discs, audio CDs, and image files. The interface is simple but packed with advanced features for power users.
CDBurnerXP: Another excellent free option. CDBurnerXP is straightforward and works well for beginners. It supports burning data CDs, audio CDs, and even DVDs. The software is ad-supported but does not install any unwanted extras.
Ashampoo Burning Studio Free: This free version offers a polished interface and solid burning performance. It handles data discs, music CDs, and video DVDs with ease. The free version has some limitations compared to the paid version, but it is more than enough for most users.
Nero Burning ROM: Nero is the most well-known burning software in the world. It is a paid program, but it offers the most features and the best compatibility with all types of discs and drives. If you burn discs frequently, Nero is worth the investment.
| Software | Price | Best For | Ease of Use |
|---|---|---|---|
| ImgBurn | Free | Advanced users and image files | Moderate |
| CDBurnerXP | Free | Beginners and data discs | Very Easy |
| Ashampoo Free | Free | General burning tasks | Easy |
| Nero Burning ROM | Paid | Professional and frequent burners | Easy |
Common Problems When Burning CDs With an External Drive and How to Fix Them
Even with the right equipment and software, you might run into some issues. These problems are common and usually easy to fix. Here are the most frequent ones and their solutions.
The drive is not recognized by your computer: This is the most common issue. Try a different USB port first. If that does not work, restart your computer and reconnect the drive. On Windows, you can check Device Manager to see if there is a driver problem. On macOS, try resetting the USB bus by restarting with all USB devices disconnected.
The burn fails halfway through: This usually happens because of a dirty disc or a scratched disc. Clean the disc with a soft, lint-free cloth before burning. Also, make sure your files are not corrupted by checking them before adding them to the burn queue. Reducing the burning speed can also help prevent failures.
The burned disc does not play in my CD player: This is often caused by not finalizing the disc. Always finalize your disc if you plan to play it in a standalone CD player or car stereo. Also, make sure you are using CD-R discs, not CD-RW, since many older players cannot read rewritable discs.
The files on the disc are corrupted or unreadable: This can happen if the disc was burned at too high a speed or if the disc is low quality. Try burning at a slower speed and using a different brand of blank disc. Always finalize the disc after burning to ensure the files are properly saved.
Quick Tips to Avoid Burning Errors
- Always use name-brand blank discs from reputable manufacturers.
- Burn at 4x to 8x speed for the most reliable results.
- Never finalize a disc you might need to add more files to later.
- Keep your external drive clean and free of dust.
- Update your burning software regularly for the latest bug fixes.
- Test your burned discs on multiple devices before relying on them.
Tips for Better CD Burning Results
Once you get comfortable with the basic process, you can improve your results with a few simple tips. These small changes make a big difference in the quality and reliability of your burned discs.
First, always keep your external CD drive clean. Dust and fingerprints on the lens can cause read and write errors. Use a lens cleaning disc occasionally to keep the drive in top shape. Second, organize your files before burning. Having all your files in one folder makes the process smoother and helps you avoid missing files.
Third, label your discs right after burning. Use a permanent marker or a disc labeling kit to write the contents and date on the disc. This saves you time later when you are looking for a specific disc. Fourth, store your burned discs properly. Keep them in a cool, dry place away from direct sunlight. CDs can degrade over time if stored improperly, especially in hot cars or humid environments.
Finally, consider making backup copies of important discs. If you burn a disc with irreplaceable files, make a second copy and store it in a different location. This simple habit can save you from data loss if one disc gets scratched or damaged.
Can You Burn DVDs With an External CD Drive?
Many external CD drives also support DVD burning, but not all of them do. Check the specifications of your drive before assuming it can burn DVDs. DVD drives usually have “DVD” or “DVD±RW” listed in their model name. Burning DVDs follows the same basic process as burning CDs, but DVDs hold much more data, typically 4.7 gigabytes per disc. This makes them ideal for larger files like videos and photo collections.
Why Burning CDs Still Matters in the Digital Age
You might wonder why anyone still burns CDs in an age of cloud storage and streaming. The truth is, physical media still has real value. CDs do not require an internet connection to access your files. They work in cars, older stereos, and devices that do not have internet capability. For people who collect music or want a permanent backup of their files, CDs remain a reliable and affordable option.
CDs are also great for sharing large files with people who do not have reliable internet access. You can burn a disc with photos, documents, or music and hand it to someone directly. No uploading, no downloading, no waiting. In many parts of the world, physical media is still the most practical way to share and store data.
There is also something satisfying about creating a physical mix CD for a friend or family member. It is a personal touch that a streaming playlist cannot match. Putting together a collection of songs, adding handwritten liner notes, and handing someone a disc they can hold in their hands creates a connection that digital files simply cannot replicate.
The Difference Between CD-R and CD-RW Discs
Understanding the difference between these two disc types helps you choose the right one for each project. CD-R discs are write-once. You can record data to them once, and after that, the data is permanent. These discs are compatible with virtually every CD player ever made. They are the best choice for music CDs, important backups, and sharing files with others.
CD-RW discs are rewritable. You can erase them and record new data multiple times, usually up to 1,000 times. However, many older CD players and car stereos cannot read CD-RW discs. Use CD-RW discs for testing your burns or for temporary storage where you need to update the contents frequently.
Conclusion
So, can you burn CDs with an external CD drive? Absolutely yes. The process is straightforward, affordable, and works with almost any computer. You just need an external drive, blank discs, and burning software. Follow the steps outlined in this guide, and you will be creating your own CDs in no time. Whether you are making music mixes, backing up important files, or sharing photos with loved ones, an external CD drive gives you all the tools you need.
Remember to take your time, use quality discs, and choose the right burning speed for the best results. Avoid common mistakes like skipping the finalize step or using scratched discs. With a little practice, you will be burning CDs like a pro. The satisfaction of creating a physical disc that you can hold, share, and play on any device is something that digital files simply cannot replace. So grab your external drive, gather your files, and start burning today.
Frequently Asked Questions
Do I need special software to burn CDs with an external drive?
Not necessarily. Windows and macOS both have built-in burning features. However, dedicated software like ImgBurn or CDBurnerXP gives you more control and better results. Free options work great for most users and are easy to install.
Can I burn music CDs with an external CD drive?
Yes, you can. Just make sure you use CD-R discs and your burning software is set to create an audio CD. Most burning programs have a specific audio CD mode that ensures your music plays in car stereos and regular CD players.
Why does my burned CD skip or not play in some players?
This usually happens when the disc is not finalized after burning. Always finalize your disc if you want it to work in standalone CD players. Also, some older players cannot read CD-RW discs, so stick with CD-R for maximum compatibility.
How long does it take to burn a CD with an external drive?
It depends on the file size and burning speed. A full 700MB data disc at 8x speed takes about 10 to 15 minutes. Music CDs with 80 minutes of audio take a similar amount of time. Burning at slower speeds is more reliable but takes a bit longer.
Can I use any external CD drive to burn discs?
Most external CD drives support burning, but always check the specifications before buying. Look for “CD-RW” or “DVD±RW” in the model name. Drives that only say “CD-ROM” can read discs but cannot write or burn new ones.
Are burned CDs a good way to back up important files?
They are a decent backup option for small amounts of data. CDs are not as durable as external hard drives or cloud storage, and they can degrade over time. For important files, make at least two copies and store them in different locations. CDs work best for sharing files rather than long-term archival storage.
=== CONCLUSION ===
Burning CDs with an external CD drive is simple, affordable, and incredibly useful. Whether you are a music lover creating the perfect mix, a professional backing up important files, or someone sharing photos with family, this guide has everything you need. The process is easy to learn, and with the right tools and a little patience, you can produce professional-quality discs at home. Start with the basics, follow the steps carefully, and soon you will be burning CDs with confidence. Do not let the lack of a built-in CD drive stop you from enjoying the benefits of physical media. Get yourself an external drive, grab some blank discs, and start creating today.