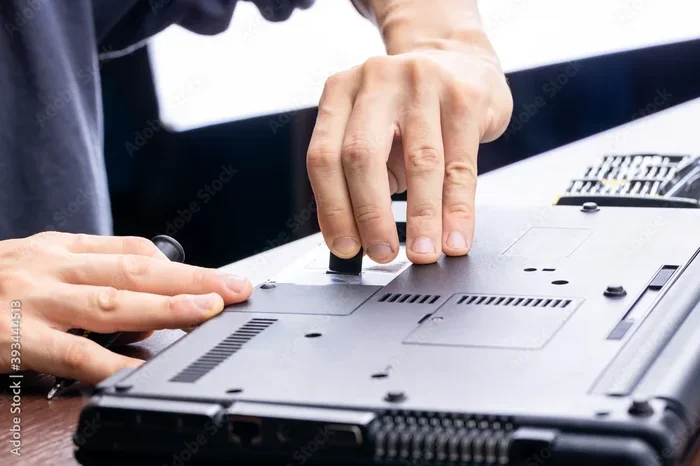
Can I Upgrade My Laptop By Myself Heres What You Need
Yes, you absolutely can upgrade your laptop by yourself with the right tools, a bit of patience, and this beginner-friendly guide. We will walk you through every step of the DIY laptop upgrade process, from boosting your laptop RAM and swapping in a faster SSD upgrade to replacing your battery and even tackling laptop hardware upgrades like cooling solutions. Whether you want to improve laptop speed or learn laptop parts replacement, this guide has you covered.
Key Takeaways
- Most laptops are upgradeable: You can boost performance by upgrading RAM, storage, battery, and cooling components on your own.
- Gather the right tools first: A screwdriver set, anti-static wrist strap, and clean workspace are essential before starting any DIY laptop repair.
- Know your laptop model: Checking your model number and compatibility ensures you buy the correct parts and avoid costly mistakes.
- Back up your data: Always save your files before performing any laptop upgrade to prevent data loss during the process.
- Some upgrades are easier than others: RAM and SSD swaps are beginner-friendly, while processor upgrades require advanced skills and compatibility checks.
- Avoid common pitfalls: Applying too much force, skipping grounding, and ignoring cable connections are frequent errors in self-service laptop repair.
- Professionals are sometimes better: Complex upgrades or warranty-covered laptops may be safer handled by an expert technician.
📑 Table of Contents
- Why Upgrade Your Laptop Yourself?
- What You Can Upgrade on Your Laptop
- Tools and Preparations You Will Need
- Step-by-Step Guide to Upgrading Your Laptop
- Common Mistakes to Avoid When Upgrading
- When Should You Take Your Laptop to a Professional?
- Real-World Results and Success Stories
- How to Maintain Your Upgraded Laptop
- Final Thoughts
Why Upgrade Your Laptop Yourself?
Your laptop has been with you for months or maybe years. It handles your daily tasks, stores your memories, and keeps you connected. But over time, things slow down. Pages load slower. Apps lag. Battery life shrinks. You start wondering if it is time for a new machine.
Before you spend hundreds or thousands on a brand-new device, consider this: can I upgrade my laptop by myself? The answer is very often yes. A few simple DIY laptop upgrades can breathe new life into an aging device. You save money. You learn something new. And you get a faster, more responsive machine without the hassle of migrating everything to a fresh system.
Upgrading your laptop yourself also gives you full control. You pick the parts. You choose the quality. You decide the budget. There is no paying a premium for someone else doing the same work. Plus, you build real skills that help you in the long run.
The Cost Savings Are Real
Think about it. A new laptop costs anywhere from 500 to 1500 or more. A laptop SSD upgrade might cost 40 to 80. Adding laptop RAM could run you 30 to 60 per stick. A replacement battery might be 40 to 70. These are tiny prices compared to buying new. And the performance boost you feel is massive.
Learning Something New
Every time you open up your laptop and tinker with components, you gain confidence. You start understanding how machines work. This knowledge helps you troubleshoot future problems, spot when something truly needs professional help, and even help out friends and family. Self-service laptop repair is a genuinely useful life skill.
What You Can Upgrade on Your Laptop
Not every laptop allows every upgrade. But most modern machines give you several options. Let us break down the most common laptop hardware upgrades you can tackle at home.
Upgrade Laptop RAM
Random Access Memory, or RAM, is your laptop short-term memory. More RAM means smoother multitasking. If you constantly have too many browser tabs open or run heavy software, adding RAM can make a huge difference. Upgrade laptop RAM is one of the easiest and most impactful changes you can make.
Most laptops have one or two RAM slots. If your machine currently has 4GB or 8GB, bumping it to 16GB can feel like getting a new computer. The process usually involves removing a bottom panel, popping out the old stick, and sliding in a new one. It takes less than ten minutes on many models.
SSD Upgrade for Faster Storage
If your laptop still uses an old spinning hard drive, a laptop SSD upgrade is the single biggest speed improvement you can make. Solid State Drives are faster, quieter, and more durable than traditional HDDs. Boot times drop from minutes to seconds. Apps launch almost instantly.
Replacing your hard drive with an SSD involves cloning your existing drive or doing a fresh install. The physical swap is straightforward. Most laptops have an easily accessible drive bay or an M.2 slot for modern NVMe drives.
Replace Laptop Battery
Battery degradation is natural. After a few years, you might only get an hour or two of use per charge. Replace laptop battery is a very common DIY task. Many laptops have a removable battery on the bottom. Others require removing a few screws and gently disconnecting the old cell.
Just make sure you buy the correct replacement. Check your laptop model and battery part number carefully. Using the wrong battery can damage your machine or even pose a safety risk.
Upgrade Laptop Processor or Graphics
These are more advanced upgrades. Some laptops allow upgrade laptop processor swaps, but compatibility is very limited. You need to match the socket type, chipset support, and BIOS compatibility. Dedicated graphics upgrades are even rarer in laptops. Many machines have soldered GPUs that cannot be replaced.
For most users, improving your current setup through RAM and storage upgrades delivers better real-world results than trying to swap the CPU or GPU. These upgrades are best left to experienced builders or professionals.
Improve Laptop Cooling
Overheating causes throttling. Throttling causes slowness. Upgrading your laptop cooling system can help. You can replace dried-out thermal paste, add a cooling pad, or even swap the internal fan on some models. These changes keep your laptop running cooler and quieter under load.
Tools and Preparations You Will Need
Before you start any DIY laptop upgrade, gather your supplies. Having everything ready prevents frustrating mid-project delays.
Essential Tools
- Phillips and Torx screwdriver set: Most laptops use small Phillips or Torx screws. A precision set is essential.
- Anti-static wrist strap: This protects your components from static discharge. A small zap can fry sensitive chips.
- Prying tools or plastic spudgers: These help you open clips and panels without scratching your laptop.
- Soft cloth or microfiber towel: Keep your workspace clean and wipe down surfaces gently.
- Good lighting: You need to see tiny screws, connectors, and labels clearly.
Pre-Upgrade Checklist
Follow these steps before touching any hardware:
- Back up all your data. Use an external drive or cloud storage. Upgrading storage or RAM should not cause data loss, but accidents happen.
- Charge your battery to at least 50 percent. This prevents unexpected shutdowns during the process.
- Turn off your laptop completely. Do not just sleep it. Full shutdown is required.
- Unplug all peripherals. Remove USB drives, external monitors, docking stations, and chargers.
- Find your laptop model number. This helps you look up exact specs and compatible parts.
Quick Tips
- Take photos of cable connections before disconnecting anything. This makes reassembly much easier.
- Place screws in a small container or magnetic mat. Losing a tiny screw inside your laptop is a nightmare.
- Work on a flat, clean surface. Avoid beds or couches where fabric can interfere.
- Go slow and gentle. If something resists, stop and double-check before forcing it.
Step-by-Step Guide to Upgrading Your Laptop
Now let us walk through the actual upgrade process. We will cover the two most popular DIY projects: upgrade laptop RAM and laptop SSD upgrade. These are beginner-friendly and deliver outstanding results.
How to Upgrade Laptop RAM
Follow these steps carefully:
- Power off and unplug. Shut down your laptop and disconnect the charger.
- Ground yourself. Wear your anti-static wrist strap or touch a metal surface to discharge static.
- Locate the RAM panel. Check your laptop manual or search online for your model. The RAM cover is usually marked with a small memory icon on the bottom.
- Remove the screws. Use the correct screwdriver. These are tiny screws, so keep them safe.
- Open the panel. Gently pry it off with a plastic tool if it is clipped in place.
- Release the old RAM. Push the metal clips on both sides outward. The stick will pop up at an angle.
- Remove the old stick. Pull it straight out gently.
- Insert the new RAM. Align the notch on the stick with the slot. Push it in at about 30 degrees until it clicks.
- Press it down flat. The clips should snap back into place automatically.
- Replace the panel and screws. Secure everything back in position.
- Power on and verify. Check your system settings to confirm the new RAM is recognized.
How to Perform a Laptop SSD Upgrade
An SSD upgrade follows a similar physical process but requires a bit more planning with your data:
- Back up your entire drive. Use cloning software like Macrium Reflect or Clonezilla to copy everything to your new SSD beforehand.
- Prepare the new SSD. Make sure it is the correct form factor. Most modern laptops use 2.5-inch SATA or M.2 NVMe drives.
- Follow steps 1 through 5 from the RAM guide above. Open your bottom panel and ground yourself.
- Locate the drive bay or M.2 slot. Some laptops have a separate cover for storage. Others require removing more internal panels.
- Disconnect the old drive. Pull out any mounting bracket or connector, then slide the old SSD out.
- Install the new SSD. Slide it in at the correct angle and secure it with screws or a bracket.
- Reassemble your laptop. Put all panels and screws back in place.
- Boot up and check. If you cloned your drive, everything should appear exactly as before but much faster. If you installed fresh, go ahead and reinstall your operating system.
Expert Insight
Many users worry about voiding their warranty by opening the laptop. In most cases, consumer laptops allow user-replaceable parts without voiding coverage. However, always check your manufacturer policy before opening anything. Some ultra-thin or gaming laptops have screws marked with a seal that explicitly voids warranty if removed. When in doubt, check the fine print first.
Common Mistakes to Avoid When Upgrading
Even with clear instructions, beginners make predictable errors. Knowing these common mistakes ahead of time saves you frustration and protects your gear.
Forcing Parts Into Wrong Slots
Memory sticks and SSDs fit in only one orientation. If it does not slide in easily, stop. You are likely holding it upside down or at the wrong angle. Forcing it can bend pins or crack the board. Take a breath, look at the notch alignment, and try again.
Skipping the Grounding Step
Static electricity is invisible but powerful. A shock you barely feel can destroy a memory chip or motherboard trace. Always use an anti-static strap or regularly touch a grounded metal object. This is one of the easiest mistakes to prevent and the most damaging to ignore.
Forgetting to Back Up Data
You might think storage upgrades are risk-free for your files. And usually they are. But what if you accidentally disconnect a cable that holds data? Or what if the cloning process has an error? Back up everything. Every time. No exceptions.
Mixing Up Screw Positions
Laptop screws come in different lengths. A screw meant for the outer case can protrude too far inside and short-circuit a component. Use a labeled container or take photos during disassembly. Many guides even recommend numbering each screw group.
Ignoring Compatibility
Not all RAM or SSDs work with all laptops. Always verify:
- Maximum supported RAM capacity for your model
- DDR generation (DDR4, DDR5, etc.)
- SSD interface (SATA, NVMe, M.2 2230, M.2 2280)
- Battery model and voltage for replacement cells
When Should You Take Your Laptop to a Professional?
DIY upgrades are rewarding and practical. But some situations call for expert help. Knowing when to hand off the job protects your laptop and your peace of mind.
Warranty-Related Concerns
If your laptop is still under manufacturer warranty and the screws show tampering seals, consider professional service. A repair shop can perform upgrades while preserving your warranty coverage. The small fee is often worth the protection.
Complex Motherboard Work
Any upgrade involving soldering, chip-level soldering, or motherboard replacement goes beyond DIY territory. If your laptop has a failed component on the board itself, a professional has the tools and training to diagnose and fix it properly.
When You Are Uncomfortable
This is completely valid. Not everyone enjoys working on small electronics. If you feel anxious about opening your laptop, there is no shame in seeking help. Professional technicians handle these tasks daily. Paying 30 to 60 for installation is a fair price for peace of mind and assurance the job is done right.
Comparison: DIY vs Professional Upgrade
| Factor | DIY Upgrade | Professional Upgrade |
|---|---|---|
| Cost | Lower (just parts) | Higher (parts plus labor) |
| Speed | Depends on skill level | Usually faster turnaround |
| Risk | Higher for beginners | Lower with trained experts |
| Warranty | May be affected | Usually preserved |
| Learning | High skill gain | No hands-on learning |
| Flexibility | Work at your own pace | Schedule-dependent |
Both paths have value. Choose the one that fits your comfort level, budget, and timeline. There is no single right answer here.
Real-World Results and Success Stories
Nothing beats hearing how real people transformed their old laptops with simple upgrades. Here are a few common scenarios:
Scenario 1: The College Student. A student had a 4-year-old laptop with 8GB RAM and a spinning hard drive. She added a 500GB SSD and a second 8GB RAM stick. Total cost was under 100. Her laptop went from booting in two minutes to launching in under 15 seconds. She was thrilled and extended its life through graduation.
Scenario 2: The Remote Worker. A freelancer noticed his laptop battery barely lasted an hour. He ordered a replacement battery online, watched a YouTube tutorial for his specific model, and swapped it in under 20 minutes. Battery life returned to five hours. He avoided buying a whole new machine for work.
Scenario 3: The Casual Gamer. A gamer with an older machine upgraded his cooling system, replaced dried thermal paste, and added a cooling pad. His frame rates improved by 20 percent because the GPU was no longer throttling from heat. This was a creative laptop performance boost that did not involve replacing major components.
Key Takeaways
These stories share common themes. The upgrades were affordable. The instructions were easy to follow online. And the results exceeded expectations. You do not need a computer science degree to improve your device. You just need guidance, patience, and the willingness to try.
How to Maintain Your Upgraded Laptop
Once you have invested time and money into your laptop upgrade, you want it to last. A few maintenance habits go a long way.
Keep It Clean
Dust buildup causes overheating. Use compressed air to blow out vents every few months. Wipe the keyboard and screen regularly. A clean laptop runs cooler and lasts longer.
Monitor Your Health
Use free tools like HWMonitor or CrystalDiskInfo to track temperatures, drive health, and battery status. Catching problems early prevents bigger failures down the line.
Update Your Software
Driver updates especially matter after hardware changes. When you install new RAM or a faster SSD, make sure your system drivers are current. This ensures your new components run at peak performance.
Handle with Care
Avoid eating or drinking near your laptop. Transport it in a padded bag. Do not close the lid on USB drives or cables sticking out. These small habits protect both the exterior and interior of your machine.
Expert Insight
Technicians often say the best upgrade is the one you take care of after installing. A brand-new SSD means nothing if you immediately fill it with disorganized files and never maintain the system. Treat your upgraded laptop well and it will reward you with years of reliable service.
Final Thoughts
So, can I upgrade my laptop by myself? Absolutely. Whether you are adding more memory, swapping in a faster solid-state drive, replacing a tired battery, or improving your cooling setup, these projects are within reach for most people. The key is preparation. Know your model. Get the right tools. Back up your files. And follow trusted guides step by step.
Can I upgrade my laptop by myself is a question with a very encouraging answer. The world of DIY laptop upgrade is open to anyone willing to learn. You save money. You gain skills. And you give your trusty machine a second life. Start with a simple RAM or storage upgrade. You will be amazed at the difference. Then, as your confidence grows, explore bigger projects. Your laptop, your rules, your upgrade.
Frequently Asked Questions
Can I upgrade my laptop by myself even if I have no tech experience?
Yes, absolutely. Most DIY laptop upgrades like adding RAM or swapping in an SSD are designed to be beginner-friendly. You just need a basic screwdriver set, a short tutorial video or guide, and a little patience. Thousands of people with zero technical background complete these upgrades successfully every single day.
What is the easiest laptop upgrade I can do by myself?
The easiest upgrade is adding more RAM or replacing your hard drive with an SSD. Both require only a screwdriver and about 10 to 20 minutes. Your laptop manual or a quick online search for your specific model will give you exact step-by-step instructions. These upgrades deliver noticeable performance improvements immediately.
Will upgrading my laptop void the warranty?
It depends on the manufacturer and model. Many consumer laptops allow user-replaceable parts like RAM, SSDs, and batteries without voiding the warranty. However, some premium or ultra-thin laptops use warranty seals on screws that explicitly void coverage if removed. Always check your warranty terms before opening the case. When uncertain, contact the manufacturer directly.
How do I know which RAM or SSD is compatible with my laptop?
Check your laptop model number, which is usually printed on the bottom or found in your system settings. Then visit the manufacturer website or use a free tool like Crucial’s Scanner or Kingston’s Memory Advisor. These tools identify your supported DDR generation, maximum capacity, and SSD interface type. Buying parts from reputable brands also ensures better compatibility and reliability.
Is it safe to upgrade my laptop battery at home?
Yes, replacing a laptop battery is generally safe if you follow basic precautions. Make sure you purchase the correct replacement battery for your exact model. Work on a flat surface, avoid water, and do not puncture or bend the battery. Lithium-ion batteries can be sensitive, so handle them gently. If the battery is glued in and requires significant force, consider professional help instead.
How much does it cost to upgrade a laptop yourself?
Most DIY laptop upgrades cost between 30 and 100 total for parts. A laptop SSD upgrade typically runs 40 to 80. Adding RAM costs 30 to 60 per stick. A replacement battery is usually 40 to 70. You can also find multi-packs of screwdrivers and tools for about 10 to 15. Overall, upgrading your laptop yourself is far cheaper than buying a brand-new machine.