Can I Add A Wireless Printer To My Ipad Step By Step
Yes, you can add a wireless printer to your iPad easily using Apple AirPrint or a third-party app. This guide walks you through every step, from checking compatibility to fixing common connection issues. You will learn how to set up your wireless printer, troubleshoot problems, and print documents and photos like a pro.
Can I add a wireless printer to my iPad? The short answer is absolutely yes. Whether you need to print a work document, a school assignment, or a favorite photo, your iPad can connect to a wireless printer in just a few minutes. This guide gives you a complete step by step walkthrough that anyone can follow.
Printing from an iPad has become incredibly simple thanks to Apple AirPrint. You no longer need a computer or complicated cables. Just make sure your printer and iPad are on the same Wi-Fi network, and you are good to go. Let us dive into everything you need to know about wireless printing from your iPad.
Many people think they need special equipment or technical skills to set up a wireless printer with an iPad. That is simply not true. The process is designed to be user-friendly, and most modern printers come with built-in wireless capabilities. By the end of this article, you will feel confident setting up your printer and printing from your iPad without any hassle.
Key Takeaways
- AirPrint Makes It Easy: Most modern wireless printers support Apple AirPrint, letting you print directly from your iPad without extra software.
- Check Compatibility First: Not all printers work with iPad. Make sure your printer supports wireless connectivity and AirPrint before you start.
- Step-by-Step Setup Is Simple: Connecting your printer takes just a few minutes using the iPad settings or a printer app.
- Troubleshooting Is Common: If your printer won’t connect, try restarting devices, checking Wi-Fi, or updating software.
- Third-Party Apps Expand Options: Apps like HP Smart or Canon Print unlock extra features for printers that don’t support AirPrint.
- Both Documents and Photos Print Well: You can print everything from emails and PDFs to high-quality photos right from your iPad.
- Keep Your Devices Updated: Regular software updates on both your iPad and printer prevent most connection problems.
📑 Table of Contents
- Understanding Wireless Printing on iPad
- What You Need Before You Start
- Step by Step Guide to Adding a Wireless Printer to Your iPad
- Using Third-Party Printer Apps for iPad
- Common Printing Problems and How to Fix Them
- Tips for the Best Wireless Printing Experience
- Quick Tips for iPad and iPhone Users
- Can I Add A Wireless Printer To My Ipad: Final Thoughts
Understanding Wireless Printing on iPad
Before you start the setup process, it helps to understand how wireless printing works with an iPad. Apple built a feature called AirPrint into iOS, which is the operating system that runs on iPads. AirPrint lets your iPad communicate with a compatible printer over your Wi-Fi network.
What Is Apple AirPrint?
Apple AirPrint is a built-in technology that allows your iPad to find and connect to wireless printers without installing any drivers. Think of it as a universal language your iPad and printer both understand. When you tap the share button in any app and select Print, AirPrint searches for available printers on your network.
Most major printer brands support AirPrint. Brands like HP, Canon, Epson, and Brother all offer printers with AirPrint compatibility. If your printer was made in the last several years, there is a good chance it already supports this feature. You can usually find AirPrint branding on the printer box or in the product specifications online.
How Wireless Connectivity Works Between iPad and Printer
For wireless printing to work, both your iPad and your printer need to be connected to the same Wi-Fi network. This is the most important requirement. When both devices are on the same network, they can see each other and exchange print commands.
Here is what happens behind the scenes when you send a print job:
- Your iPad sends a signal over the Wi-Fi network to the printer.
- The printer receives the document or photo data.
- The printer processes the data and begins printing.
This entire process happens in seconds. You do not need cables, USB drives, or a computer. The wireless connectivity between your iPad and printer makes everything fast and convenient.
What You Need Before You Start
Setting up a wireless printer with your iPad is straightforward, but you do need a few things ready before you begin. Gathering everything ahead of time saves you frustration later.
Checklist of Requirements
- A wireless printer: It must support Wi-Fi and ideally Apple AirPrint. Check your printer manual or the manufacturer website to confirm.
- An active Wi-Fi network: Both your iPad and printer must connect to the same Wi-Fi network.
- An iPad with updated software: Make sure your iPad is running the latest version of iPadOS. Go to Settings, then General, then Software Update to check.
- Your Wi-Fi password: You will need this if you have to manually connect the printer to your network.
- A printer app (optional): Some printers work better with their own dedicated apps, which you can download from the App Store.
Once you have these items ready, you are all set to move on to the setup process. Taking five minutes to gather everything makes the rest of the setup go smoothly.
Step by Step Guide to Adding a Wireless Printer to Your iPad
Now that you have everything ready, let us walk through the actual setup. Follow these steps carefully, and your iPad will be connected to your printer in no time.
Step 1: Turn On Your Printer and Connect It to Wi-Fi
First, make sure your printer is powered on. Most wireless printers have a Wi-Fi button or a setup wizard that walks you through connecting to your home network. If you are not sure how to do this, check the printer manual or visit the manufacturer website for instructions.
You want to see a Wi-Fi icon lit up on your printer display. This confirms the printer is connected to your wireless network. Some printers also have a touchscreen that shows the network name they are connected to.
Step 2: Make Sure Your iPad Is on the Same Wi-Fi Network
This is a step many people skip, and it causes most connection problems. Open the Settings app on your iPad and tap Wi-Fi. Look at the network name listed at the top. It must match the network your printer is connected to.
If your iPad is connected to a different network, tap the correct one and enter the password. Once both devices are on the same network, they can communicate with each other.
Step 3: Find Your Printer on Your iPad
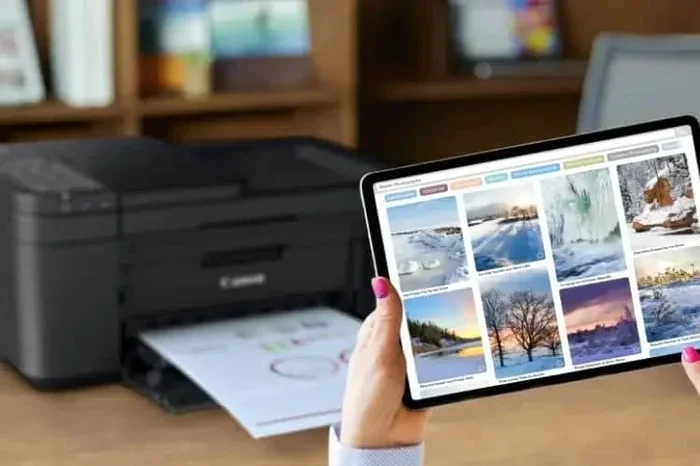
Now it is time to see if your iPad can detect the printer. Open any app that supports printing, such as Files, Safari, or Photos. Tap the share button, which looks like a square with an arrow pointing up. Then tap the Print option.
A printer picker will appear on your screen. It shows all available printers on your network. Your printer should appear in the list. Tap on it to select it.
If your printer does not appear, do not worry. This is a common issue, and we will cover troubleshooting in a later section. But first, let us finish the setup steps.
Step 4: Adjust Print Settings and Send a Test Print
Once you have selected your printer, you can adjust the print settings. You can choose how many copies you want, which pages to print, and whether you want color or black and white printing.
Tap Print in the top right corner to send the job. Your printer should start printing within a few seconds. If it does, congratulations, you have successfully added your wireless printer to your iPad!
Step 5: Save Your Printer for Future Use
Once your iPad finds the printer, it remembers the connection. You do not need to repeat the setup every time. The printer will appear in your print list whenever you need it, as long as both devices stay on the same Wi-Fi network.
If you ever change your Wi-Fi password or set up a new network, you may need to reconnect the printer to the new network. But for everyday use, the connection stays saved automatically.
Using Third-Party Printer Apps for iPad
While AirPrint works great for most people, some printers do not support it. In those cases, a third-party printer app comes to the rescue. These apps act as a bridge between your iPad and the printer, giving you more control and options.
Popular Printer Apps for iPad
- HP Smart: Great for HP printers. It lets you print, scan, and manage your printer from one app.
- Canon Print: Works well with Canon printers and offers extra features like scanning and ink level checks.
- Epson iPrint: A solid choice for Epson printer users with a clean and simple interface.
- Brother iPrint and Scan: Supports Brother printers and allows printing from cloud services too.
To use these apps, simply download them from the App Store, follow the on-screen setup instructions, and connect your printer. Most apps guide you through the process step by step. You can also add a printer by its IP address if the automatic setup does not work.
When to Use a Printer App Instead of AirPrint
You should consider using a printer app if your printer does not show up in the AirPrint printer picker. Also, some apps offer features that AirPrint does not, such as scanning directly to your iPad, checking ink levels, or ordering replacement cartridges. These extras can make your printing experience much better.
Common Printing Problems and How to Fix Them
Even with a simple setup, you might run into issues now and then. Wireless printing can sometimes be finicky, but most problems have easy fixes. Here are the most common issues and how to solve them.
Printer Not Showing Up on iPad
This is the number one issue people face. If your printer does not appear in the print list, try these steps:
- Make sure both devices are on the same Wi-Fi network.
- Restart your printer by turning it off and back on.
- Restart your iPad by holding down the power button and sliding to power off.
- Check that your printer is not in airplane mode or sleep mode.
- Make sure your router is working properly and other devices can connect to the network.
Sometimes simply restarting both devices solves the problem. This refreshes the network connections and clears any temporary glitches.
Print Jobs Stuck in the Queue
If your print job seems to hang and never prints, open the print queue on your iPad. Go to Settings, then Printers and Scanners, and tap on your printer. You can cancel stuck jobs from there. Then try sending the print job again.
Another common cause is a weak Wi-Fi signal. If your printer is far from your router, the signal might be too weak for smooth printing. Moving closer to the router or using a Wi-Fi extender can help.
Poor Print Quality
If your prints come out faded or blurry, check a few things first. Make sure you are using the right paper type in your printer settings. Check the ink or toner levels and replace cartridges if needed. You can also try cleaning the print heads through your printer’s maintenance menu.
Tips for the Best Wireless Printing Experience
Once you have your wireless printer connected to your iPad, a few simple tips can keep everything running smoothly. These small habits make a big difference over time.
Keep Your Devices Updated
Apple regularly releases iPadOS updates that improve compatibility with printers. Similarly, printer manufacturers push firmware updates that fix bugs and add features. Check for updates on both your iPad and printer every few weeks. This keeps everything running at its best.
Place Your Printer Close to Your Router
Wireless signals weaken with distance. Placing your printer near your Wi-Fi router ensures a strong and stable connection. If you cannot move the printer closer, consider getting a Wi-Fi range extender. These affordable devices boost your wireless signal to hard-to-reach areas.
Use the Right Paper and Settings
For the best results, match your print settings to the type of paper you are using. Glossy photo paper needs different settings than plain office paper. Taking an extra few seconds to adjust settings can dramatically improve your print quality.
Organize Your Printer Accessories
Keeping your printer area organized helps too. Use a small shelf or tray for extra paper, ink cartridges, and cables. A clutter-free workspace makes printing more enjoyable and helps you spot problems faster. If you are looking for more ways to simplify your tech setup, check out 10 gadgets that make life easier for ideas that work in any home.
Quick Tips for iPad and iPhone Users
Your iPhone and iPad share many features, including printing capabilities. If you already know how to print from your iPhone, the process is very similar on your iPad. Both devices use AirPrint and connect to printers the same way.
One small difference between iPhone and iPad is how you handle certain settings. For example, if you need to add prefixes to phone numbers on your iPhone, you can do that in the Contacts app, and the same method applies to iPad. You can find detailed guides on adjusting these settings on your iPhone, which also applies to your iPad setup.
Another tip is to use your iPad as a printing hub in your home. Place it in a central location, and family members can come to it to print documents, homework, or photos. This works especially well in households where not everyone has their own printer.
Can I Add A Wireless Printer To My Ipad: Final Thoughts
Adding a wireless printer to your iPad is one of the most rewarding upgrades you can make to your home or office setup. The process is simple, fast, and does not require any technical expertise. Whether you use AirPrint or a third-party app, you can print documents, emails, and photos directly from your iPad within minutes.
Remember to keep both your iPad and printer updated, make sure they are on the same Wi-Fi network, and restart devices if you run into trouble. These basic habits prevent most printing problems before they start.
Now that you know exactly how to set up your wireless printer with your iPad, you can enjoy the freedom of mobile printing from anywhere in your home. No more running to a computer or searching for a cable. Your iPad puts the power of printing right at your fingertips.
If you are exploring other iPad features, you might also be interested in learning more about what else you can do with your device. For example, did you know you can even add Windows Movie Maker to certain setups for video editing? The possibilities with your iPad are truly endless when you take the time to explore them.
Frequently Asked Questions
Can any wireless printer work with an iPad?
Most modern wireless printers support Apple AirPrint and work with iPads. However, very old or niche printers may not be compatible. Check the printer specifications online or look for AirPrint branding on the box to confirm compatibility before you buy.
Do I need to install software to print from my iPad?
No, you do not need to install software if your printer supports AirPrint. AirPrint is built into iPadOS and works automatically. However, if your printer does not support AirPrint, you will need to download the manufacturer’s printer app from the App Store.
Why can my iPad not find my wireless printer?
The most common reason is that your iPad and printer are not on the same Wi-Fi network. Make sure both devices are connected to the same network. You can also try restarting both devices, which usually fixes the connection issue.
Can I print photos from my iPad to a wireless printer?
Yes, absolutely. You can print photos directly from your Photos app. Just open the photo, tap the share button, and select Print. Make sure your printer supports photo printing and use the right paper type for the best results.
How do I remove a printer from my iPad?
Go to Settings, then Printers and Scanners. Tap on the printer you want to remove and select Remove Printer. This clears the saved connection, and you can add it again later if needed.
Can I print from multiple apps on my iPad?
Yes, you can print from virtually any app that supports the share function. This includes Safari, Files, Photos, Mail, and many third-party apps. Just tap the share button and look for the Print option to get started.
=== CONCLUSION ===
Can I add a wireless printer to my iPad? Yes, and it is easier than you think. With Apple AirPrint and a few simple steps, you can connect your wireless printer to your iPad and start printing from any app. The entire setup takes less than ten minutes, and once it is done, printing becomes second nature.
Remember the key steps: connect your printer to Wi-Fi, make sure your iPad is on the same network, find the printer in the print menu, and send a test print. If you run into issues, the troubleshooting tips in this guide will help you get back on track quickly.
Wireless printing from your iPad gives you incredible convenience and flexibility. Whether you are at home, in the office, or on the go, your iPad puts printing power right at your fingertips. Start setting up your wireless printer today and enjoy the freedom of mobile printing from your iPad.