Can I Make My Own Laptop Skin Yes And Here Is How You Do It
Yes, you can make your own laptop skin, and it is easier than you think. With a few simple materials, free design tools, and a little patience, you can create a custom laptop decal that makes your device look brand new. This guide walks you through every step from design to application so you can skin your laptop with confidence.
Have you ever looked at your laptop and thought it looks boring? Maybe it is the same old matte black or plain silver that everyone else has. You are not alone. Millions of people want to make their own laptop skin but do not know where to start. The good news is that you absolutely can. And the process is way simpler than you might think.
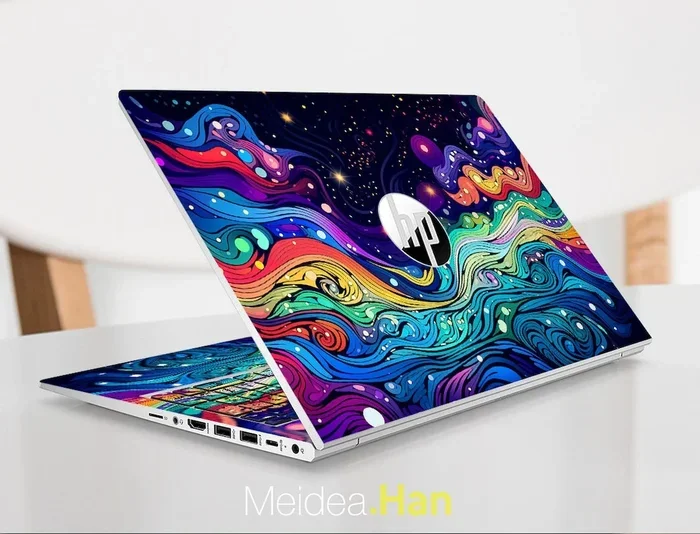
Creating a custom laptop skin lets you express your personality. It also protects your laptop from scratches and everyday wear. Whether you love nature photography, abstract art, or bold geometric patterns, a DIY approach gives you total control. You choose the image, the material, and the fit. No more settling for generic designs that everyone else has.
In this guide, we will walk you through everything you need to know. We cover the materials, the design process, and the application steps. By the end, you will feel confident enough to create your very own laptop vinyl wrap at home. Let us get into it.
Key Takeaways
- Making your own laptop skin is affordable and fun: You can create a unique custom laptop decal for a fraction of the cost of buying one.
- You only need a few basic materials: Vinyl wrap, a printer, and free design software are all you need to get started.
- Measuring your laptop correctly is crucial: A proper laptop skin template ensures a perfect fit every time.
- Application技巧 makes all the difference: Using a squeegee and taking your time prevents bubbles and wrinkles.
- DIY laptop skins protect and personalize: They add a layer of scratch protection while letting you express your style.
- Mistakes are fixable: Most removable laptop skin materials allow you to peel off and redo if something goes wrong.
📑 Table of Contents
- What Is a Laptop Skin and Why Make Your Own?
- Can I Make My Own Laptop Skin? Absolutely Yes
- How to Design Your Custom Laptop Skin
- Step-by-Step Guide to Applying Your Laptop Skin
- Best Materials for DIY Laptop Skins
- Common Mistakes to Avoid When Making Laptop Skins
- Expert Tips for a Perfect Laptop Skin Finish
- Benefits of Having a Custom Laptop Skin
- How Often Should You Replace Your Laptop Skin?
- Where to Find Inspiration for Your Laptop Skin Design
- Conclusion
What Is a Laptop Skin and Why Make Your Own?
A laptop skin is a thin decorative cover that wraps around the exterior of your laptop. It is different from a laptop sleeve or case. A skin fits tightly against the surface. It does not add bulk. Think of it like a large sticker or decal that transforms the look of your device.
People choose to skin their laptop for many reasons. Some want to protect the original finish from scratches. Others want to stand out. A custom design lets you show off your interests, your brand, or your art. And when you make it yourself, the possibilities are truly endless.
Why Go DIY Instead of Buying One?
Store-bought laptop skins can be expensive. A single custom design from a brand can cost anywhere from 20 to 60 dollars or more. Plus, you are limited to what they offer. When you make your own, you save money and get exactly what you want.
Here are some great reasons to try DIY laptop skin creation:
- Cost savings: Materials cost much less than pre-made options.
- Total customization: You pick the image, colors, and layout.
- Perfect fit: You measure your specific laptop model.
- Fun project: It is a creative outlet that anyone can enjoy.
- Easy to replace: You can change your design whenever you want.
Can I Make My Own Laptop Skin? Absolutely Yes
The short answer is a resounding yes. Can I make my own laptop skin? Absolutely. You do not need special skills or expensive equipment. With basic supplies and a little creativity, anyone can create a stunning custom laptop decal at home. The process has become so accessible that even beginners can achieve professional-looking results.
The key is knowing what materials to use and how to prepare your workspace. Let us break down everything you need to get started.
Materials You Will Need
Before you begin, gather these essential items. You likely already have some of them at home:
- Vinyl wrap or adhesive vinyl sheet: This is the main material. Look for a matte or glossy finish depending on your preference.
- A printer: Any inkjet or laser printer works for printing your design onto the vinyl.
- Scissors or a craft knife: You need these for cutting out your design precisely.
- A ruler and measuring tape: Accurate measurements are critical for a clean fit.
- A squeegee or credit card: This helps smooth out bubbles during application.
- Lint roller or microfiber cloth: You will use this to clean your laptop surface before applying the skin.
- Design software: Free tools like Canva or GIMP work great for creating your layout.
Design Tools You Can Use for Free
You do not need expensive software to create a beautiful laptop skin design. Several free tools make the process easy and fun:
- Canva: A beginner-friendly online tool with templates and drag-and-drop features.
- GIMP: A free, open-source image editor with powerful features.
- Inkscape: Great for creating vector graphics that scale without losing quality.
- Microsoft Word or Google Slides: Surprisingly useful for simple layouts and text overlays.
Pick the tool that feels most comfortable to you. The goal is to create a design that fits your laptop dimensions perfectly.
How to Design Your Custom Laptop Skin
Designing your laptop skin is the most exciting part. This is where your creativity shines. But before you dive into design, you need to get the measurements right. A poorly measured template will lead to a bad fit, and nobody wants that.
Measuring Your Laptop for the Perfect Fit
Grab your ruler and measuring tape. You need to measure the top lid and the bottom of your laptop. Here is how to do it:
- Measure the top lid: Measure from edge to edge, including any raised edges or hinges.
- Measure the bottom panel: Do the same for the bottom of the laptop.
- Measure the sides: If you want the skin to wrap around the edges, measure the height of each side.
- Subtract 1 to 2 millimeters: This gives you a small margin for easy application.
Write down all measurements carefully. These numbers will be the blueprint for your laptop skin template. Accuracy here makes everything else easier.
Creating Your Design Layout
Now comes the fun part. Open your chosen design tool and create a new document. Set the dimensions to match your laptop measurements exactly. Here are some tips to keep in mind:
- Use high-resolution images: Low-quality photos will look blurry when printed large.
- Add bleed space: Extend your design slightly beyond the cut line to avoid white edges.
- Consider the layout: Think about where the logo, trackpad, and vents will be on the skin.
- Test print on regular paper first: This lets you check the fit before committing to vinyl.
Take your time with this step. A well-planned design leads to a professional-looking result. You can add your favorite photos, artwork, patterns, or even text. The sky is the limit when you personalize your laptop this way.
Step-by-Step Guide to Applying Your Laptop Skin
Once your design is ready and printed, it is time for the most important part: application. This step determines how your laptop vinyl wrap looks and feels. Take your time and follow each step carefully.
Preparing Your Laptop Surface
Before you apply anything, your laptop surface must be clean. Any dust or oils will cause the skin to stick poorly. Here is what to do:
- Power off your laptop: Make sure it is completely shut down and unplugged.
- Wipe the surface: Use a microfiber cloth to remove dust and fingerprints.
- Use a lint roller: This picks up any tiny particles that a cloth might miss.
- Let it dry completely: Do not apply the skin to a damp surface.
A clean surface is the foundation of a flawless application. Do not skip this step.
Applying the Skin Without Bubbles
This is where patience pays off. Follow these steps for a smooth, bubble-free finish:
- Peel a small section of the backing: Start with one corner of your printed skin.
- Align it carefully: Place the exposed adhesive side onto the laptop lid, starting from one edge.
- Smooth it down gradually: Use your squeegee or credit card to press the skin flat as you peel off more backing.
- Work from one side to the other: This technique prevents air pockets from forming.
- Press out any bubbles: If a bubble appears, gently lift the skin and smooth it again.
- Trim excess material: Use a craft knife to clean up any overhanging edges.
Go slowly and be gentle. Rushing through this process is the number one reason people get wrinkles or bubbles. Take your time and enjoy the process.
Best Materials for DIY Laptop Skins
Choosing the right material is one of the most important decisions you will make. Not all materials are created equal. Some last longer, some look better, and some are easier to apply. Let us look at the most popular options for DIY laptop skin projects.
Vinyl Wrap vs. Paper vs. Adhesive Vinyl
Each material has its strengths and weaknesses. Here is a closer look at the most common options:
- Adhesive vinyl: This is the most popular choice. It is durable, water-resistant, and easy to apply. It also removes cleanly without leaving residue.
- Vinyl wrap: Similar to adhesive vinyl but often thicker. It provides better scratch protection and a more premium feel.
- Paper-based skins: These are the cheapest option but least durable. They can tear easily and are not water-resistant.
- Cast vinyl: A high-quality option that conforms well to curved surfaces. It is more expensive but lasts longer.
Comparing Materials at a Glance
Here is a quick comparison to help you choose the right material for your custom skin design:
- Durability: Cast vinyl lasts the longest. Standard adhesive vinyl is a solid middle ground.
- Ease of application: Both adhesive vinyl and vinyl wrap are beginner-friendly.
- Finish options: Matte, glossy, and satin finishes are available across most materials.
- Removability: Look for removable adhesive if you plan to change your design often.
- Cost: Paper is cheapest, while cast vinyl costs more but offers the best value over time.
For most people, adhesive vinyl strikes the perfect balance between quality, ease, and price. It is the go-to choice for laptop skin DIY projects around the world.
Common Mistakes to Avoid When Making Laptop Skins
Even with the best intentions, mistakes happen. But most common errors are easy to avoid if you know what to watch out for. Here are the pitfalls that trip up most beginners.
Skipping the Test Print
One of the biggest mistakes is printing directly onto vinyl without testing first. Always print your design on regular paper and hold it up to your laptop. This lets you check the size, alignment, and overall look before you waste expensive vinyl.
Rushing the Application
Applying the skin too quickly almost always leads to bubbles and misalignment. Take your time. Work in small sections. Use the squeegee to press firmly but gently. Remember, this is a laptop skin application that should look clean and professional.
Ignoring Ventilation Holes
Laptops have vents, speakers, and ports that need to remain uncovered. Before you apply the skin, mark these areas on your template. Cutting them out ensures your laptop can breathe and function properly without the skin getting in the way.
Using Low-Resolution Images
A blurry image looks terrible when printed large. Always use images that are at least 300 DPI. If you are downloading free images, make sure they are high quality. Low resolution is one of the fastest ways to ruin an otherwise great custom laptop decal.
Expert Tips for a Perfect Laptop Skin Finish
Want your DIY laptop skin to look like it came from a professional? These expert tips will help you achieve a polished, long-lasting finish.
- Use a hair dryer on low heat: Warming the vinyl slightly makes it more flexible and easier to conform to edges.
- Apply in a dust-free room: Close windows and turn off fans. Dust particles are the enemy of a clean application.
- Let the skin settle for 24 hours: Avoid using your laptop heavily right after application. The adhesive needs time to bond fully.
- Keep a reference image: Save your design file so you can reprint it later if the skin wears out.
- Use transfer tape for complex designs: Transfer tape helps you apply intricate designs without them folding or sticking to themselves.
- Label your laptop: Add a small label on the inside of the lid with your name or contact info. This helps if you ever lose it.
These small extra steps make a big difference. They separate a good-looking skin from a great-looking one. Your laptop finish will thank you.
Benefits of Having a Custom Laptop Skin
Beyond the obvious visual appeal, a custom laptop skin offers several practical benefits that many people overlook.
Protection: A skin adds a thin layer of defense against scratches, minor scuffs, and everyday wear. It keeps your laptop looking fresh longer. While it does not protect against heavy impacts, it handles the small stuff really well.
Resale value: A well-maintained laptop with a clean finish holds its value better. When you eventually upgrade, a laptop that has been protected with a skin looks more appealing to buyers or trade-in programs.
Identity and expression: Your laptop is a personal item. It goes everywhere with you. A custom design reflects who you are. It starts conversations and makes your device instantly recognizable. Whether it is your favorite artwork, a photo of your pet, or a bold pattern, your laptop skin design tells a story about you.
Cost-effective transformation: Instead of buying a whole new laptop to get a fresh look, a skin gives you a brand-new appearance for just a few dollars. It is one of the most affordable ways to refresh your tech setup.
How Often Should You Replace Your Laptop Skin?
The lifespan of a laptop vinyl wrap depends on the material and how you use your laptop. On average, a quality adhesive vinyl skin lasts between one and three years. If you use your laptop heavily every day, you might notice peeling or fading sooner.
The good news is that replacing a skin is quick and easy. You simply peel off the old one and apply a new one. This makes DIY laptop skins a sustainable and repeatable way to keep your device looking its best. You can change your design with the seasons, for holidays, or whenever you feel like a refresh.
Where to Find Inspiration for Your Laptop Skin Design
Not sure what design to create? Inspiration is everywhere. Here are some great places to find ideas for your laptop decal ideas:
- Pinterest: Search for “custom laptop skin” or “laptop vinyl wrap” to see thousands of examples.
- Instagram: Browse hashtags like #laptopskin and #customdecal for trending designs.
- Nature: A beautiful landscape photo can make a stunning and calming skin design.
- Abstract art: Geometric patterns and gradient designs are popular and timeless.
- Your own photos: A favorite travel photo or family picture adds a personal touch that no store-bought design can match.
Save the designs you love and think about what elements you want to incorporate into your own custom skin design. Mix and match ideas to create something truly unique.
Conclusion
So, can I make my own laptop skin? Yes, without a doubt. You now have all the information you need to design, create, and apply a custom laptop decal that is uniquely yours. From choosing the right laptop skin material to mastering the application technique, every step is within your reach.
The process is affordable, fun, and incredibly rewarding. You get a personalized device that reflects your style and protects your investment. Whether you are a complete beginner or a creative enthusiast, making your own laptop skin is a project worth trying.
Grab your materials, follow the steps in this guide, and start creating today. Your laptop is waiting for a makeover. And the best part is, you can change it anytime you want. So go ahead, skin your laptop, and show the world what you are made of.
Frequently Asked Questions
What materials do I need to make my own laptop skin?
You need adhesive vinyl or vinyl wrap, a printer, scissors or a craft knife, a ruler, a squeegee or credit card, and design software like Canva or GIMP. These are all affordable and easy to find at any craft store or online.
Is it hard to apply a DIY laptop skin?
Not at all. The application process is straightforward and beginner-friendly. You just need to clean the surface, align the skin carefully, and smooth it out with a squeegee. Taking your time is the key to a bubble-free finish.
Can I remove a laptop skin without damaging my laptop?
Yes, most adhesive vinyl skins are designed to be removable. They peel off cleanly without leaving residue or damaging the laptop finish. Just pull slowly at a low angle and the skin should come off easily.
How long does a custom laptop skin last?
A quality adhesive vinyl skin typically lasts between one and three years. The lifespan depends on how often you use your laptop and the material quality. Cast vinyl tends to last longer than standard adhesive options.
Do I need special software to design a laptop skin?
No special software is needed. Free tools like Canva, GIMP, and Inkscape work perfectly for creating your laptop skin template. Even Microsoft Word or Google Slides can handle simple designs effectively.
Can I reuse a laptop skin if I remove it?
It depends on the material. Removable adhesive vinyl can often be peeled off and reapplied once or twice. However, standard adhesive vinyl loses its stickiness after removal. For best results, apply carefully the first time.