Can I Connect A Sata Drive Via Usb For External Storage
Yes, you can connect a SATA drive via USB and turn it into external storage with the right adapter or enclosure. This guide covers SATA to USB adapters, drive enclosures, power requirements, and step-by-step setup. Whether you have a 2.5-inch or 3.5-inch SATA drive, you will find clear instructions to get your storage working fast.
Have you ever found an old SATA drive sitting in a drawer and wondered if you could use it as external storage? The good news is that you absolutely can. Connecting a SATA drive via USB is one of the easiest and most affordable ways to breathe new life into an old hard drive or solid-state drive. Whether you want extra portable storage, a backup solution, or a way to recover data, this guide has you covered.
In this article, we will walk through every method, tool, and tip you need to know. You will learn about SATA to USB adapters, drive enclosures, power requirements, and how to set everything up in minutes. By the end, you will feel confident connecting any SATA drive to your computer using a simple USB cable.
Key Takeaways
- SATA drives work with USB: You can connect any SATA drive to your computer using a SATA to USB adapter or an external enclosure.
- Two main methods exist: Direct adapters offer simplicity, while enclosures provide protection and a cleaner setup for portable storage.
- Power matters: 3.5-inch drives need extra power, while 2.5-inch drives usually draw power from the USB port alone.
- USB 3.0 or higher is best: It delivers faster data transfer speeds and better performance for large files.
- Formatting is essential: You may need to format the drive for your operating system before it works properly.
- Common issues are fixable: Most problems like drive not showing up or slow speeds have simple solutions.
📑 Table of Contents
- What Is a SATA Drive and Why Connect It via USB?
- How to Connect a SATA Drive via USB
- SATA to USB Adapter vs. Enclosure: Which Is Better?
- Power Requirements for SATA Drives
- Setting Up Your SATA Drive for External Use
- Common Mistakes to Avoid
- Expert Tips for Best Performance
- Frequently Asked Questions
What Is a SATA Drive and Why Connect It via USB?
A SATA drive uses a Serial ATA interface to store and retrieve data. These drives come in two common sizes: 2.5-inch drives (typically used in laptops) and 3.5-inch drives (commonly found in desktop computers). Both types can be connected to a USB port for external use.
The main reason people connect a SATA drive via USB is convenience. You get plug-and-play external storage without opening your computer case. It also lets you repurpose older drives that still work perfectly but are no longer needed inside a PC. This saves money and reduces electronic waste.
Types of SATA Drives You Can Connect
Not all SATA drives are the same. Here are the types you may encounter:
- 2.5-inch SATA SSD: Small, fast, and common in laptops. These drives usually do not need extra power when connected via USB.
- 2.5-inch SATA HDD: A traditional spinning hard drive in a laptop-sized form factor. It draws power from the USB port in most cases.
- 3.5-inch SATA HDD: The larger desktop hard drive. It requires external power because it draws more electricity than a USB port can supply alone.
- SATA optical drives: CD/DVD drives that also use the SATA interface and can be connected externally via USB.
Each type works with a USB connection, but the power requirements differ. Keep this in mind when choosing your setup method.
How to Connect a SATA Drive via USB
There are two primary ways to connect a SATA drive via USB. Each method has its own advantages depending on your needs and budget.
Method 1: Using a SATA to USB Adapter
A SATA to USB adapter is the simplest and most affordable option. It is a small cable or device that plugs directly into the SATA connector on your drive and connects to your computer through a USB port. These adapters typically cost between $10 and $25.
Here is how to use one:
- Plug the SATA end of the adapter into your SATA drive.
- Connect the USB end to your computer or laptop.
- If you are using a 3.5-inch drive, plug in the power cable that comes with the adapter.
- Wait for your operating system to recognize the drive.
Most modern adapters support USB 3.0 or USB 3.1, which delivers fast data transfer speeds. Some adapters also include a switch for SATA power and data in a single cable, making the setup even simpler.
One thing to watch out for: if your drive does not show up, check that the connection is secure. Sometimes a loose cable can cause the SATA drive to disconnect. You can also check your disk management tool to see if the drive is listed but not assigned a letter.
For troubleshooting help with drive recognition issues, you may find our guide on A Line Wont Delete In Microsoft Excel useful for understanding how to manage connected devices and resolve display issues in your workflow.
Method 2: Using a SATA Hard Drive Enclosure
A hard drive enclosure is a protective case that houses your SATA drive and connects to your computer via USB. The drive slides into the enclosure, and the enclosure connects to your PC with a USB cable. This method looks cleaner and protects your drive from dust and damage.
Here is what you need to do:
- Open the enclosure by removing the screws or sliding off the cover.
- Place your SATA drive inside, aligning the connectors properly.
- Secure the drive with the screws or clips provided.
- Close the enclosure and connect the USB cable to your computer.
- If the enclosure needs external power, plug in the power adapter.
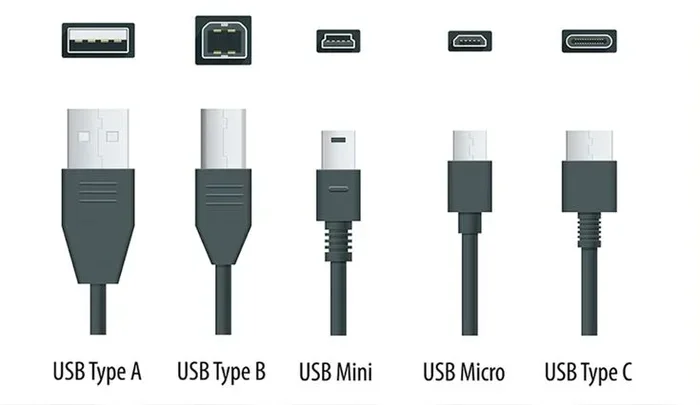
Enclosures come in different sizes to fit 2.5-inch and 3.5-inch drives. They also support various USB standards like USB 3.0, USB 3.1, and USB-C. A good enclosure can significantly boost your data transfer speed compared to a basic adapter.
When choosing an enclosure, look for one that supports USB 3.0 or higher. This ensures you get the best possible speeds for your SATA drive. Enclosures with aluminum bodies also help dissipate heat, which is important for long data transfer sessions.
Again, for tips on managing connected devices and resolving display or recognition issues, consider checking out our article on A Line Wont Delete In Microsoft Excel for general troubleshooting insights.
SATA to USB Adapter vs. Enclosure: Which Is Better?
Both methods get the job done, but they serve different needs. Here is a quick comparison to help you decide.
| Feature | SATA to USB Adapter | Hard Drive Enclosure |
|---|---|---|
| Cost | $10 to $25 | $15 to $40 |
| Setup Time | Under 1 minute | 2 to 5 minutes |
| Drive Protection | None | Full enclosure protection |
| Portability | Very portable | Moderately portable |
| Heat Management | Poor (no housing) | Good (enclosed design) |
| Reusability | Works with any SATA drive | Specific to one drive size |
| Aesthetics | Basic cable setup | Clean, finished look |
If you need a quick, temporary solution, go with a SATA to USB adapter. If you plan to use the drive regularly or want to protect it, invest in a quality hard drive enclosure. Both methods support external storage and work with all major operating systems.
Power Requirements for SATA Drives
Power is one of the most common issues people face when connecting a SATA drive via USB. Understanding power needs helps you avoid frustration.
2.5-Inch SATA Drives
2.5-inch drives are low-power devices. They typically draw enough power from a standard USB 3.0 port to operate without any external power source. This makes them perfect for portable external storage. Simply plug in the adapter or enclosure, and you are good to go.
However, some older or larger 2.5-inch HDDs may still need more power than a single USB port provides. In such cases, a Y-shaped USB cable that draws power from two USB ports can solve the problem.
3.5-Inch SATA Drives
3.5-inch drives require more electricity. A standard USB port cannot supply enough power on its own. You will need to use an adapter or enclosure that comes with a power adapter or power cable.
Never try to run a 3.5-inch SATA drive without proper power. Insufficient power can cause the drive to disconnect, corrupt data, or fail to spin up at all. Always use the power supply that comes with your adapter or enclosure.
If you are using your SATA drive as a backup solution, make sure the power setup is stable. An unexpected power loss during a data transfer can damage files or even the drive itself.
Setting Up Your SATA Drive for External Use
Once you have your SATA drive connected via USB, you need to prepare it for use. This process is straightforward but important.
Step 1: Check If the Drive Is Recognized
After connecting the drive, go to your operating system’s disk management tool. On Windows, right-click the Start button and select Disk Management. On macOS, open Disk Utility. You should see your SATA drive listed there.
If the drive does not appear, try a different USB port or a different cable. Sometimes a faulty cable is the culprit. Also, make sure your SATA to USB adapter is properly connected.
Step 2: Format the Drive
New or repurposed drives often need formatting before you can store files on them. Formatting prepares the drive with a file system that your operating system can read.
- Windows: Use NTFS for Windows-only use. Use exFAT if you need the drive to work with both Windows and macOS.
- macOS: Use APFS for macOS-only use. Use exFAT for cross-platform compatibility.
- Linux: Use ext4 for Linux systems. Use exFAT for sharing with other operating systems.
Be careful when formatting. This process erases all existing data on the drive. Make sure you have backed up any important files before you begin.
Formatting also affects how your SATA drive performs. The right file system ensures smooth data transfer and reliable external storage operation.
Step 3: Assign a Drive Letter (Windows)
On Windows, you may need to assign a drive letter so the drive appears in File Explorer. Go to Disk Management, right-click the drive, and select Change Drive Letter and Paths. Pick a letter and confirm. Your drive will now show up in File Explorer just like any other storage device.
For more complex file management tasks, you might encounter situations where connected devices behave unexpectedly. Our guide on A Line Wont Delete In Microsoft Excel covers troubleshooting steps that can help when managing files across connected drives and applications.
Common Mistakes to Avoid
Connecting a SATA drive via USB is simple, but a few common mistakes can cause problems. Here is what to watch out for.
- Using a USB 2.0 port: USB 2.0 is much slower than USB 3.0 or USB 3.1. Your data transfer speeds will suffer significantly. Always use a USB 3.0 port or higher for the best performance.
- Skipping the power supply: For 3.5-inch drives, never skip the external power source. This can lead to data corruption or drive failure.
- Forgetting to eject the drive: Always safely eject the SATA drive before disconnecting it. Pulling the cable out without ejecting can damage files.
- Using a cheap adapter: Low-quality SATA to USB adapters may not provide a stable connection. Invest in a reputable brand for reliable portable storage.
- Not formatting the drive: An unformatted drive will not work properly. Always format the drive with the correct file system for your needs.
Avoiding these mistakes ensures your SATA drive works reliably as external storage for years to come.
Expert Tips for Best Performance
Want to get the most out of your SATA drive connected via USB? Follow these expert tips.
- Use USB 3.0 or USB 3.1: These standards offer speeds up to 5 Gbps or 10 Gbps, which is perfect for large data transfer tasks.
- Choose an enclosure with a fan: If you use your drive for long periods, a cooling fan prevents overheating and extends the drive’s lifespan.
- Keep your cables short: Longer cables can weaken the signal and reduce data transfer speeds. Use the shortest cable that works for your setup.
- Update your drivers: Make sure your USB drivers are up to date for the best compatibility with your SATA drive.
- Use the drive regularly: Hard drives that sit unused for months can develop issues. Periodically connect and use your drive to keep it healthy.
These small steps make a big difference in the longevity and performance of your SATA drive used as external storage.
Frequently Asked Questions
Can I Connect Any SATA Drive via USB?
Yes, you can connect virtually any SATA drive via USB using an adapter or enclosure. Both 2.5-inch and 3.5-inch SATA drives work with this method. Just make sure you have the right adapter or enclosure for your drive size and that you meet the power requirements.
Do I Need Special Software to Use a SATA Drive via USB?
No special software is needed. Your operating system recognizes the drive as a standard external storage device. You can access it through File Explorer on Windows or Finder on macOS. Formatting tools built into your OS are all you need to prepare the drive for use.
Is It Safe to Leave a SATA Drive Connected via USB All the Time?
It is generally safe, but not recommended for extended periods. Leaving a drive connected increases wear and the risk of accidental damage. For backup solutions, connect the drive when needed and disconnect it when done. This keeps your data safe and extends the drive’s life.
What USB Port Do I Need for the Best Speed?
Use a USB 3.0 port or higher for the best data transfer speeds. USB 3.0 offers speeds up to 5 Gbps, while USB 3.1 and USB 3.2 go even faster. Avoid USB 2.0 ports, as they are significantly slower and will bottleneck your SATA drive performance.
Can I Use a SATA Drive Enclosure with an SSD?
Absolutely. SATA SSDs work perfectly with drive enclosures. In fact, using an enclosure with an SSD gives you fast portable storage in a protective case. Just make sure the enclosure supports the drive size and interface of your SSD.
Why Is My SATA Drive Not Showing Up When Connected via USB?
This is usually caused by a loose connection, missing driver, or incorrect file system. Try a different USB port or cable first. If that does not work, check Disk Management (Windows) or Disk Utility (macOS) to see if the drive is listed. You may need to format the drive or update your USB drivers.