Can Vertical Lines On Your Laptop Be Fixed Right Now
Can vertical lines on laptop be fixed? Yes, in most cases you can resolve this frustrating issue yourself. Whether the cause is a loose cable, outdated driver, or damaged panel, there are clear steps you can take right now. This guide walks you through every possible fix from simple software tweaks to full screen replacement. You will learn how to diagnose the problem fast and save money on repairs.
Nothing is more annoying than sitting down to work and seeing vertical lines on laptop screen staring back at you. Whether they are thin, thick, colorful, or black, those lines can make your laptop almost unusable. The good news is that can vertical lines on laptop be fixed is a question with a hopeful answer. In most cases, the fix is simpler and cheaper than you think.
This guide covers every possible reason for vertical lines on a laptop display. You will learn how to diagnose the problem, try software fixes, handle hardware solutions, and decide when replacement is the right move. Let us get your screen looking clean again.
Key Takeaways
- Software fixes often work: A simple driver update or display setting change can remove vertical lines.
- Loose cables are the #1 culprit: The display ribbon cable is a common and easy fix.
- Hardware damage needs professional help: A cracked LCD panel usually requires a full screen replacement.
- Test with an external monitor first: This quick check tells you if the problem is your screen or your GPU.
- DIY repair saves hundreds: Replacing a cable or panel yourself costs a fraction of a repair shop visit.
- Prevention is simple: Gentle handling and proper ventilation keep your laptop display healthy.
📑 Table of Contents
What Causes Vertical Lines on a Laptop Screen
Before you can fix the problem, you need to understand what caused it. Vertical lines on a laptop screen can come from several different sources. Some are easy to fix. Others require a bit more effort. Let us break them down.
Loose or Damaged Display Cable
The most common cause of vertical lines is a loose or damaged display cable. This ribbon cable connects your laptop screen to the motherboard. Over time, it can become unseated or worn out. When the connection is weak, the signal from your graphics card to the screen gets interrupted. The result is those annoying vertical lines.
This problem often happens after dropping your laptop or opening and closing the lid too aggressively. The cable runs through the hinge area, so repeated stress wears it down fast. If your lines appear or disappear when you open and close the screen, a loose cable is very likely the cause.
GPU or Graphics Card Problems
Your laptop’s graphics processing unit handles all the visual output. When the GPU starts to fail or overheats, it can send a corrupted signal to the display. This often shows up as vertical lines, flickering, or strange colors on the screen.
GPU problems can be software-related or hardware-related. Outdated drivers, overheating, or a failing graphics chip can all trigger vertical lines. If your laptop is older or has been subjected to heavy use, GPU degradation is a real possibility.
LCD Panel Damage
The LCD panel is the actual screen itself. Physical damage like pressure, impact, or liquid spills can harm the panel internally. When the LCD panel is damaged, it often shows vertical or horizontal lines across the display. This type of damage usually cannot be repaired. You will need a full screen replacement.
Panel damage is different from cable issues because the lines stay in the same place regardless of what you do. They do not flicker or change when you move the screen. If your lines are permanent and consistent, the panel is likely the problem.
Backlight or Inverter Board Failure
Some people confuse backlight issues with vertical lines. The backlight illuminates your screen from behind. When it fails, parts of the screen may go dark or show unusual lines. The inverter board powers the backlight. If either component fails, you can see strange visual artifacts including vertical lines.
Software and Driver Issues
Not all vertical lines are caused by hardware. Sometimes the problem is purely software-based. A corrupted graphics driver, a bad Windows update, or a conflicting application can all cause display glitches. These software-related lines often go away after a restart or a driver update.
Software issues are the easiest to fix. They do not require any parts replacement or technical skill. If you recently updated your operating system or installed new software, a driver conflict could be behind those lines.
How to Diagnose the Problem
Before jumping into fixes, you should figure out what is causing the lines. A proper diagnosis saves you time and money. Here is how to narrow down the cause.
Step 1: Connect an External Monitor
This is the single best diagnostic step you can take. Plug your laptop into an external monitor or TV using HDMI or USB-C. If the external display shows a clean image, the problem is with your laptop screen, not your graphics card. If the external monitor also shows lines, your GPU or driver is likely the issue.
Step 2: Open and Close the Screen Gently
Watch the lines carefully while you open and close the lid. If the lines change, disappear, or reappear, the display cable is probably loose or damaged. This simple test takes seconds and gives you a strong clue about the cause.
Step 3: Boot Into Safe Mode
Safe Mode loads only the essential drivers and software. If you boot into Safe Mode and the lines disappear, a software conflict or bad driver is to blame. If the lines stay, you are likely dealing with a hardware issue.
Step 4: Check for Recent Changes
Think about what happened before the lines appeared. Did you drop your laptop? Install new software? Run a Windows update? Heat exposure can also cause sudden display problems. Any of these events can point you toward the right diagnosis.
Software Fixes You Can Try at Home
If your diagnosis points to a software issue, you are in luck. These fixes are free and easy to do. Try them in order before moving to hardware solutions.
Update Your Graphics Driver
Outdated or corrupted graphics drivers are a leading cause of display problems. Updating your driver often resolves vertical lines immediately.
- Right-click on the Start button and select Device Manager.
- Expand the Display adapters section.
- Right-click your graphics card and select Update driver.
- Choose Search automatically for drivers.
- Restart your laptop after the update completes.
If Windows does not find a new driver, visit your laptop manufacturer’s website or the GPU manufacturer’s site (NVIDIA, AMD, or Intel) to download the latest driver manually.
Roll Back a Recent Driver Update
Sometimes a new driver update causes the problem instead of fixing it. If you recently updated your graphics driver and lines appeared right after, rolling back can help.
Go to Device Manager, right-click your display adapter, select Properties, then click the Roll Back Driver button. This reverses the update to the previous version.
Uninstall Conflicting Software
Some applications interfere with your display settings. Screen recorders, overlay software, and third-party display tools are common culprits. Try uninstalling any recent software installations and see if the lines disappear.
Run Windows Display Troubleshooter
Windows has a built-in troubleshooter for display problems. It can automatically detect and fix some issues.
Go to Settings, then System, then Display. Scroll down and click Advanced display settings, then Display troubleshooting. Follow the on-screen prompts and let Windows do its thing.
Check Your Display Settings
Incorrect display resolution or refresh rate can sometimes cause visual artifacts. Make sure your settings match your screen’s native specifications.
Go to Settings, then System, then Display. Under Display resolution, select the recommended (native) resolution. Under Refresh rate, choose the highest available option for your panel.
Hardware Solutions for Vertical Lines
If software fixes did not work, the problem is likely hardware-related. Here are the hardware solutions you can try, ranging from simple to more involved.
Reseat the Display Cable
This is the easiest hardware fix and it works surprisingly often. The display ribbon cable can become loose over time, especially if you open your laptop frequently or drop it.
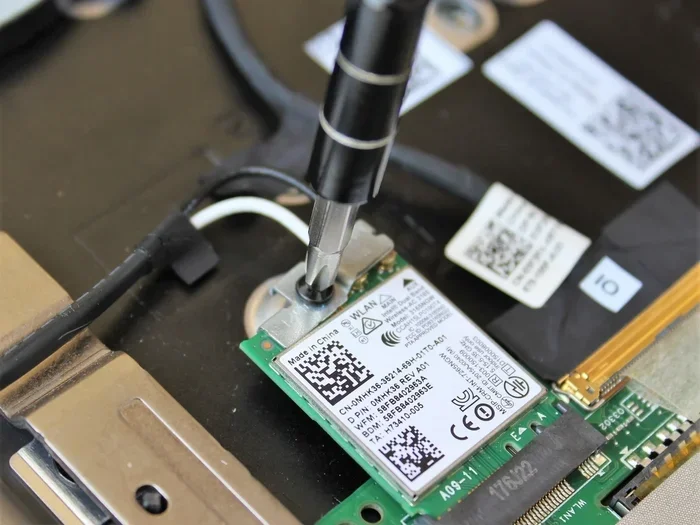
To reseat the cable, you need to open your laptop and access the hinge area where the cable connects to the motherboard. This process varies by laptop model, so check your manufacturer’s service manual or a YouTube teardown video for your specific model.
Quick Tips:
- Power off your laptop completely before opening it.
- Disconnect the battery if possible.
- Handle the cable gently. Do not bend it sharply.
- Reconnect it firmly and test before closing the laptop.
Replace the Display Cable
If reseating the cable does not help, the cable itself may be damaged. Replacement cables are inexpensive and widely available online. You can find the correct cable by searching for your laptop model number plus display cable or ribbon cable.
Replacing the cable requires opening the laptop and carefully routing the new cable through the hinge. It is a manageable DIY project if you are comfortable with basic electronics. The cost of a replacement cable is usually between $10 and $30.
Replace the LCD Panel
If the panel itself is damaged, you will need a full LCD panel replacement. This is a more involved repair but still doable at home with the right tools and patience.
Search for your laptop model plus LCD panel or display assembly to find the correct replacement part. Panels typically cost between $50 and $200 depending on your laptop model and screen specifications.
Quick Tips:
- Match the panel size, resolution, and connector type exactly.
- Take photos during disassembly to help with reassembly.
- Work on a clean, flat surface with anti-static precautions.
- Take your time. Rushing can damage other components.
Repair or Replace the GPU
If your external monitor test showed lines too, the GPU itself may be failing. GPU repair is complex and usually requires professional help. In some cases, a motherboard replacement is needed. This is the most expensive fix on this list.
Before going this route, try cleaning your laptop’s vents and fans. Overheating can cause GPU artifacts that look like vertical lines. Improving cooling might temporarily resolve the issue if heat is the root cause.
Fix the Inverter Board
If your laptop uses an older CCFL backlight (rather than LED), the inverter board could be the problem. Replacing the inverter board is relatively simple and affordable. However, most modern laptops use LED backlights and do not have a separate inverter board.
When to Replace Your Laptop Screen
Knowing when to replace the screen versus when to keep troubleshooting is important. Here are clear signs that a screen replacement is the right move.
- The lines are permanent and do not change with screen movement.
- The screen has visible cracks or pressure marks.
- Software fixes and cable reseating did not resolve the issue.
- The external monitor test confirms the laptop’s GPU is working fine.
- The cost of repair exceeds half the value of your laptop.
If you decide to replace the screen, you have two options: do it yourself or pay for professional repair. DIY replacement saves a lot of money but requires some technical comfort. Professional repair typically costs between $100 and $300 for labor plus the part cost.
Cost Comparison: DIY vs Professional Repair
Here is a quick comparison to help you decide.
- DIY screen replacement: Cost of the panel only ($50-$200). You save on labor but invest time and effort.
- Professional repair: Panel cost plus labor ($150-$500 total). Faster and less risky if you are not comfortable with repairs.
- Warranty claim: Free if your laptop is still under warranty. Contact the manufacturer first before paying for anything.
Always check your warranty status before paying for any repair. Many laptop manufacturers cover screen defects for the first year or two. Even accidental damage protection plans may cover screen replacement.
How to Prevent Vertical Lines in the Future
Once you fix the problem, you want to make sure it does not come back. Prevention is straightforward and mostly comes down to good habits.
Handle Your Laptop Gently
The display cable runs through the hinge. Opening and closing your laptop roughly puts stress on this cable over time. Be gentle with the lid. Do not press on the center of the screen when closing it.
Keep Your Laptop Cool
Overheating damages components over time, including the GPU and display electronics. Use your laptop on hard, flat surfaces. Consider a cooling pad if you use it on your lap for extended periods. Clean the vents regularly to prevent dust buildup.
Update Drivers Regularly
Keeping your graphics drivers up to date prevents many display issues. Set a reminder to check for driver updates once a month or enable automatic updates if your manufacturer offers that option.
Use a Protective Case
A padded laptop sleeve or case absorbs shocks during transport. This simple accessory reduces the risk of internal damage that can lead to display problems.
Avoid Pressure on the Screen
Do not place heavy objects on your closed laptop. Avoid pressing on the screen with your fingers or cleaning it too aggressively. Pressure on the LCD panel can cause permanent damage and vertical lines.
Expert Insights on Laptop Display Repair
Professional repair technicians often see the same mistakes from customers trying to fix vertical lines on their own. Here are some expert tips to keep in mind.
Always test with an external monitor first. This single step eliminates half the possible causes and tells you exactly where to focus your efforts. Many people skip this step and end up replacing a perfectly good screen when the real issue was a software driver.
Do not ignore the warranty. If your laptop is still under warranty, contact the manufacturer before attempting any repair. Opening the laptop yourself may void the warranty. A quick call or visit to the manufacturer’s support site can save you significant money.
Buy replacement parts from reputable sellers. Cheap aftermarket cables and panels can be low quality. Stick with well-reviewed sellers and OEM or high-quality compatible parts. A $15 cable that fails after a week is not a savings.
Document everything. When you open your laptop, take photos at every step. This makes reassembly much easier and helps you remember where each screw goes. It also creates a reference if you need to seek help from online forums or repair communities.
Key Takeaways
- Vertical lines on a laptop screen can usually be fixed. The cause determines the solution, but most fixes are affordable and doable.
- Start with software fixes. Driver updates, display setting adjustments, and Safe Mode testing cost nothing and often resolve the issue.
- Check the display cable first for hardware problems. Reseating or replacing the ribbon cable is the most common hardware fix.
- Use the external monitor test to isolate the problem. This quick check tells you if the issue is your screen or your GPU.
- Replace the LCD panel only when necessary. If the panel is physically damaged, replacement is the only real option.
- Prevent future issues with gentle handling and regular maintenance. Good habits go a long way in protecting your laptop display.
The answer to can vertical lines on laptop be fixed is almost always yes. Whether it is a simple driver update, a cable reseating, or a full panel replacement, there is a path forward. The key is to diagnose the problem correctly and then apply the right fix for your specific situation.
Do not panic when you see those lines. Work through the steps in this guide methodically. Start with the easiest fixes and work your way toward more involved solutions. In most cases, you will have a clear, clean screen again without spending a dime on professional repairs.
Your laptop screen is one of the most important components you interact with every day. Taking care of it and addressing problems quickly keeps your device working well for years. Now you have the knowledge to tackle those vertical lines with confidence.
Frequently Asked Questions
Can vertical lines on laptop be fixed without replacing the screen?
Yes, in many cases vertical lines can be fixed without replacing the screen. Loose display cables, outdated drivers, and software conflicts are common causes that do not require any screen replacement. Try reseating the cable and updating your graphics driver first before considering a new panel.
How much does it cost to fix vertical lines on a laptop screen?
The cost depends on the cause. Software fixes are free. Reseating or replacing a display cable costs $10 to $30 for the part. LCD panel replacement ranges from $50 to $200 for the part alone. Professional repair adds labor costs, bringing the total to $150 to $500 in most cases.
Are vertical lines on a laptop screen a sign of permanent damage?
Not always. Vertical lines caused by software issues, loose cables, or driver problems are usually temporary and fixable. However, if the LCD panel itself is physically cracked or damaged, the lines are permanent and require a screen replacement to resolve.
Can a bad graphics card cause vertical lines on a laptop screen?
Yes, a failing or overheating GPU can cause vertical lines on your screen. If the lines also appear on an external monitor, the graphics card is likely the source. Try updating your GPU drivers and improving your laptop’s cooling before assuming the card needs replacement.
Is it safe to open my laptop and reseat the display cable?
It is generally safe if you follow basic precautions. Power off your laptop, disconnect the battery, and work on a clean surface. Watch a teardown video for your specific model before starting. If you are not comfortable, a professional repair shop can reseat the cable for a small fee.
How can I tell if the problem is my screen or my graphics card?
The easiest way is to connect your laptop to an external monitor. If the external display shows a clean image, your graphics card is fine and the problem is with your laptop screen or its cable. If the external monitor also shows lines, your GPU or its driver is likely the issue.
=== CONCLUSION ===
Can vertical lines on laptop be fixed? Absolutely. You now have a complete roadmap to diagnose and resolve this common laptop problem. Start with the simple software fixes like driver updates and display setting checks. Move to hardware solutions like reseating or replacing the display cable if the software steps do not work. And if the LCD panel itself is damaged, you know exactly what to expect and how to handle it.
Most importantly, do not ignore the problem. Vertical lines on a laptop screen will not go away on their own, but they also will not destroy your laptop. Address the issue promptly using the steps in this guide, and you will likely save yourself both time and money. Your laptop screen deserves a second chance, and now you have the tools to give it one.