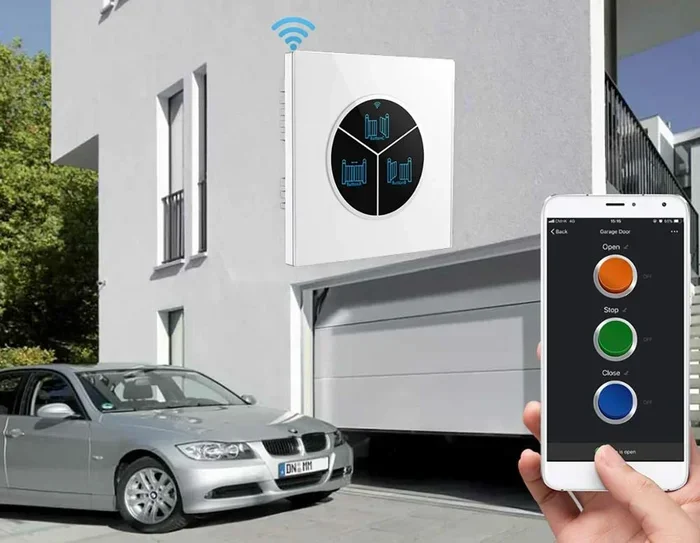
Can I Make My Garage Door Wireless Without Calling a Pro
Yes, you can make your garage door wireless without hiring a professional. A wireless garage door conversion kit lets you upgrade your existing opener in just a few hours. You will save money, boost convenience, and gain modern garage door automation features right from your own driveway.
Have you ever stood in your driveway, fumbling for a garage door remote, only to realize it is nowhere to be found? It happens to the best of us. And when it does, you might wonder, can I make my garage door wireless?
The good news is a resounding yes. You do not need to call a technician or spend hundreds of dollars on a full replacement. A wireless garage door conversion kit can transform your old wired opener into a modern, wireless system in just a few hours.
This guide walks you through everything you need to know. We cover how wireless kits work, what tools you need, step-by-step installation, costs, and common mistakes to avoid. By the end, you will feel confident enough to tackle this DIY garage door upgrade yourself.
Making your garage door wireless is more than just a convenience. It is part of the growing trend toward smart home automation. And honestly, once you experience the ease of controlling your door from your phone or car, you will wonder why you did not do it sooner.
Key Takeaways
- Wireless conversion is possible: You can retrofit most existing garage door openers with a wireless kit.
- No pro needed: The process is straightforward and doable with basic tools and a little patience.
- Cost-effective: DIY wireless kits range from $50 to $200, saving you hundreds compared to professional installation.
- Smart features included: Many kits offer app control, keypad entry, and sensor integration for full home automation.
- Safety first: Always follow manufacturer instructions and test sensors after installation.
- Check compatibility: Not all openers support wireless kits, so verify your model before buying.
- Quick setup: Most conversions take 2-4 hours, making it a perfect weekend project.
📑 Table of Contents
- What Does It Mean to Make a Garage Door Wireless?
- Why Go Wireless? The Benefits Explained
- Can Any Garage Door Be Made Wireless?
- How to Make Your Garage Door Wireless: Step-by-Step
- How Much Does a Wireless Conversion Cost?
- Common Mistakes to Avoid
- Expert Tips for a Smooth Wireless Conversion
- Frequently Asked Questions
- Final Thoughts
What Does It Mean to Make a Garage Door Wireless?
A traditional garage door opener uses a wired connection between the wall button, the motor unit, and the handheld remote. When you go wireless, you replace or bypass those wired components with wireless signals. This means your door responds to remotes, keypads, smartphone apps, and even voice commands.
A wireless garage door opener uses radio frequency signals to communicate between the controller and the motor. Most modern systems operate on frequencies like 315 MHz or 390 MHz. The signal travels securely from your remote to the garage door motor, triggering the open or close command.
Here is what a wireless setup typically includes:
- Wireless remote controls: Handheld devices that send signals to the motor unit.
- Keypad entry systems: Outside keypads that let you enter a code to open the door.
- Smartphone app control: Connect your opener to Wi-Fi and control it from anywhere.
- Wireless sensors: Safety sensors that detect obstacles without running wires across your floor.
- MyQ or similar modules: Small adapters that connect your opener to the internet for remote access.
Converting to a wireless system does not mean you throw away your entire opener. Most of the time, you keep the motor and just add wireless components. This is why a wireless garage door conversion is so popular among homeowners who want an upgrade without a full overhaul.
Why Go Wireless? The Benefits Explained
You might be thinking, why bother going wireless? Your current system works fine, right? Well, there are some real advantages that go beyond just not losing your remote.
Convenience at Your Fingertips
With a wireless garage door control, you can open or close your door from anywhere. Heading home in the rain? Open the door before you pull in. Forgot you left it open? Close it from your couch. This level of garage door convenience changes your daily routine in small but meaningful ways.
Many wireless systems also integrate with smart home platforms. You can connect your garage door to Alexa, Google Home, or Apple HomeKit. Imagine saying, “Hey Google, close the garage door,” and it just works.
Improved Security
Older wired systems often use fixed codes that can be copied by signal grabbers. Modern wireless systems use rolling codes that change every time you use the remote. This makes it much harder for someone to clone your signal and gain access to your garage.
Some systems also send instant notifications to your phone when the door opens or closes. You always know what is happening with your garage, even when you are away from home.
No More Wires to Trip Over
Wired garage door systems often have cables running along the floor or walls. These can be a tripping hazard, especially for kids and pets. Going wireless eliminates those wires entirely, giving you a cleaner, safer garage space.
Making your garage wireless also pairs well with other gadgets to make life easier, like smart lights and motion sensors. If you want more ideas for upgrading your home, check out our guide on 10 Gadgets To Make Moms Life Easier for inspiration on smart home upgrades that simplify daily routines.
Can Any Garage Door Be Made Wireless?
This is one of the most common questions homeowners ask. The short answer is: most garage doors can be converted. But there are some important exceptions.
Check Your Opener Model
Not every garage door opener supports wireless conversion. If your opener is more than 15 years old, it might not have the wiring or compatibility needed for a wireless kit. Before buying anything, check the model number on your motor unit and look up its specifications online.
Most openers manufactured after 2005 should work fine with a wireless retrofit kit. Brands like Chamberlain, LiftMaster, Craftsman, and Genie all offer compatible wireless options.
Assess Your Current Wiring
Take a look at your current setup. Do you have wires running from the wall button to the motor? Do you have wired safety sensors across the floor? If so, a wireless kit can replace all of these. You simply disconnect the wired components and connect the wireless equivalents.
However, if your motor unit itself is very old and malfunctioning, a wireless kit might not solve the underlying problem. In that case, you might need a full opener replacement instead of just a conversion.
Power Supply Matters
Your garage door motor needs a reliable power source. Wireless kits do not change the power requirements of your opener. Make sure your electrical outlet near the motor is working properly before starting any conversion project.
If you are unsure about your opener’s compatibility, many kit manufacturers offer customer support lines to help you verify before purchasing. This small step can save you time and money down the road.
How to Make Your Garage Door Wireless: Step-by-Step
Now for the part you have been waiting for. Here is a detailed walkthrough of how to convert your garage door to wireless. You do not need advanced electrical skills. A basic understanding of your opener and a couple of tools are all you need.
Step 1: Gather Your Tools and Materials
Before you start, make sure you have everything ready. Here is a typical list:
- A wireless garage door conversion kit (or individual wireless components)
- A screwdriver set (Phillips and flathead)
- A ladder
- A power drill (optional but helpful)
- Wire strippers (if you need to disconnect wired sensors)
- Your smartphone for app setup
Most wireless kits come with everything you need, including the wireless sensors, remote controls, and mounting hardware. You just need the basic tools listed above.
Step 2: Disconnect Power to the Opener
Safety first. Unplug your garage door opener from the electrical outlet before you start working. Never attempt to wire or connect anything while the opener is powered on. This is a simple step that prevents electric shock and damage to your motor.
Step 3: Remove Wired Safety Sensors
Most garage doors have two safety sensors mounted on either side of the door frame, near the floor. These are connected by a wire that runs along the wall or ceiling. To go wireless, you will remove these sensors and replace them with wireless versions.
Unscrew the sensors from their mounts. Disconnect the wires from the motor unit. Note which wire goes where, or take a photo before disconnecting. This makes reassembly much easier.
Step 4: Install the Wireless Sensors
Mount the new wireless sensors in the same positions as the old ones. Use the screws and brackets that came with your kit. Most wireless sensors are battery-powered, so you do not need to run any wires across your garage floor.
Once mounted, sync the sensors to the motor unit following the kit instructions. This usually involves pressing a “learn” button on the motor and then on each sensor. The process takes about 30 seconds per sensor.
Step 5: Install the Wireless Wall Button
If you want to replace your wired wall button with a wireless one, now is the time. Wireless wall buttons are battery-powered and mount right next to your existing button location. They communicate with the motor unit using radio signals, just like your handheld remotes.
Remove the old wall button and disconnect the wires. Mount the new wireless button and install the batteries. Sync it to the motor unit using the learn button method.
Step 6: Set Up Remote Controls and App
Your wireless kit should include at least one or two remote controls. Install the batteries and sync each remote to the motor unit. Again, this is usually done by pressing the learn button and then the remote button within a few seconds.
If your kit includes a Wi-Fi module or smart app support, download the app and follow the pairing instructions. This step lets you control your door from your phone and set up notifications.
Step 7: Test Everything
This is the most important step. Plug your opener back in and test every component:
- Press the wireless wall button and confirm the door opens and closes.
- Use each remote control from different distances.
- Test the wireless sensors by placing an object in the door’s path and confirming it reverses.
- If you have app control, open and close the door from your phone.
If everything works smoothly, you are done. You have successfully made your garage door wireless without calling a single professional.
How Much Does a Wireless Conversion Cost?
One of the biggest advantages of a DIY wireless conversion is the cost savings. Hiring a professional to upgrade or replace your garage door opener can cost anywhere from $300 to $800 or more, depending on the system you choose.
A wireless conversion kit, on the other hand, typically costs between $50 and $200. The price depends on the brand, features, and number of remotes included. Here is a quick breakdown:
| Component | Estimated Cost |
|---|---|
| Basic wireless kit (sensors + remotes) | $50 – $100 |
| Mid-range kit with Wi-Fi module | $100 – $150 |
| Premium smart kit with app and voice control | $150 – $200 |
| Professional installation (for comparison) | $300 – $800+ |
As you can see, the DIY route saves you a significant amount of money. And the satisfaction of completing the project yourself is an added bonus.
Keep in mind that some kits are opener-specific, while others are universal. Universal kits tend to be more affordable and work with most major brands. Brand-specific kits may offer tighter integration and additional features but often come at a higher price point.
Common Mistakes to Avoid
Even a straightforward DIY project can go wrong if you are not careful. Here are some common mistakes homeowners make when converting their garage door to wireless:
Skipping the Compatibility Check
This is the number one mistake. Not every wireless kit works with every opener. Buying a kit without checking compatibility can leave you with useless equipment and a wasted weekend. Always verify that your opener model is supported before you purchase.
Ignoring Signal Interference
Wireless signals can sometimes interfere with other devices in your home. If your garage is attached to your house, walls and metal structures can weaken the signal. Place your wireless module in a central location and test the signal strength from all areas of your property.
Forgetting to Test Safety Sensors
Wireless safety sensors are just as important as wired ones. Never skip testing them. Place an object like a rolled-up towel in the door’s path and confirm the door reverses immediately. This is a critical safety feature that protects people and pets from injury.
Not Reading the Full Manual
It is tempting to just start installing, but reading the manual first can save you a lot of frustration. Each kit has specific steps and requirements. Taking 10 minutes to read through the instructions can prevent hours of troubleshooting later.
Using Cheap or Incompatible Batteries
Wireless remotes and sensors run on batteries. Using low-quality or incompatible batteries can cause intermittent operation or premature failure. Stick with name-brand batteries and replace them annually for reliable performance.
Expert Tips for a Smooth Wireless Conversion
Want to make your project go even more smoothly? Here are some expert insights from seasoned DIYers and garage door professionals:
- Label your wires before disconnecting. Use small pieces of tape or a marker to note which wire connects to which terminal. This makes reconnection foolproof.
- Keep your old wired components. If you ever want to switch back or troubleshoot, having the original parts is a lifesaver.
- Update your opener firmware. If your kit includes a smart module, check for firmware updates right after setup. Manufacturers often release improvements for performance and security.
- Consider adding a wireless keypad. A wireless keypad mounted outside gives family members a code-based entry option. No more lost remotes!
- Pair your garage door with your smart home routine. Set up automations so your door opens when you pull into the driveway or closes at bedtime.
These small tips can make a big difference in how smoothly your wireless system runs day to day. And they take almost no extra time to implement during your initial setup.
Frequently Asked Questions
Can I convert my garage door to wireless myself?
Absolutely. Most wireless conversion kits are designed for DIY installation. The process typically takes two to four hours and requires only basic tools. As long as your opener is compatible, you can complete the conversion without any professional help.
Is it safe to make my garage door wireless?
Yes, it is very safe. Modern wireless systems use encrypted rolling codes that are difficult to intercept. Wireless safety sensors also meet the same safety standards as wired sensors. Just make sure to test them regularly and follow all manufacturer guidelines during installation.
How long does a wireless garage door conversion take?
Most homeowners complete the conversion in two to four hours. The exact time depends on your opener model, the kit you choose, and your comfort level with basic DIY tasks. If you run into any issues, give yourself extra time to troubleshoot.
Do I need any special tools for a wireless conversion?
Not really. A screwdriver, a ladder, and a power drill (optional) are all you need. The wireless kit includes all the necessary mounting hardware and components. No electrical wiring skills are required for most kits.
Will a wireless kit work with my old garage door opener?
It depends on the age and model of your opener. Openers made after 2005 are generally compatible with most wireless kits. If your opener is older than 15 years, check the specifications or contact the kit manufacturer to confirm compatibility before purchasing.
Can I control my wireless garage door from my phone?
Yes, if your wireless kit includes a Wi-Fi module or smart app support. These modules connect your opener to your home network and let you control the door through a smartphone app. You can open, close, and monitor your garage door from anywhere with an internet connection.
Final Thoughts
So, can you make your garage door wireless without calling a pro? The answer is a clear and confident yes. With the right wireless garage door conversion kit, a basic set of tools, and a little weekend time, you can upgrade your garage door to a modern wireless system.
The benefits are real. You get more convenience, better security, and a cleaner garage space without the wires. Plus, you save a significant amount of money compared to hiring a professional for the same upgrade.
Remember to check your opener compatibility before buying a kit. Follow the installation steps carefully. Test every component thoroughly. And do not skip the safety sensor tests, because those sensors protect your family every single day.
Making your garage door wireless is one of those home upgrades that pays for itself in convenience and peace of mind. Once you experience the ease of controlling your door from your phone or car, you will wonder why you waited so long.
Start your project this weekend. Grab a kit, gather your tools, and join the growing number of homeowners who have made their garage doors wireless on their own terms. You have got this.