Can I Copy Files From Iso To Usb With These Simple Steps
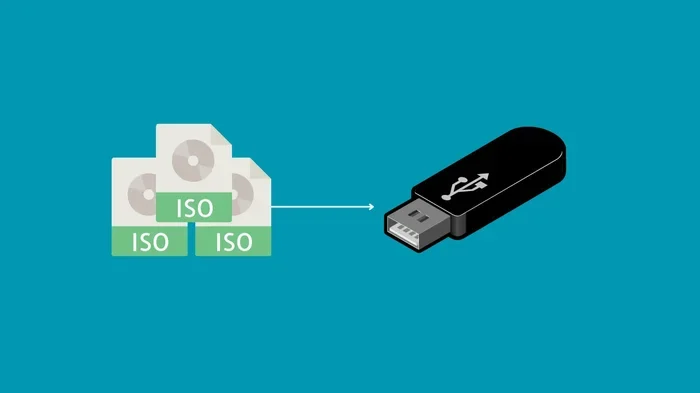
Yes, you can copy files from an ISO to a USB drive using a few straightforward methods. Whether you want to create a bootable USB for installing an operating system or simply transfer ISO contents for portable use, the process is easier than most people think. This guide walks you through every method with clear, step-by-step instructions so you can get it done quickly and correctly.
Have you ever downloaded a large ISO file and wondered how to get it onto a USB drive? Maybe you want to install a new operating system on your laptop, or perhaps you need to create a bootable installer for troubleshooting. Whatever your reason, copying files from an ISO to a USB drive is a skill that comes in handy more often than you might think.
The good news is that this process is surprisingly simple. You do not need to be a tech expert to get it done. With the right tools and a little patience, you can have your bootable USB ready in minutes. In this guide, we will walk you through every method, explain what works best for different situations, and help you avoid common mistakes along the way.
Key Takeaways
- Multiple Methods Available: You can use free tools like Rufus, the built-in Windows USB/DVD Download Tool, or manual extraction to copy ISO files to USB.
- Bootable USB Is Key: Creating a bootable USB lets you install operating systems on computers without a CD drive or internet connection.
- USB Formatting Matters: Always format your USB drive correctly (FAT32 or NTFS) before copying ISO files to avoid errors.
- Data Safety First: Copying an ISO to USB will erase all existing data on the drive, so back up important files first.
- Works Across Devices: These methods work on Windows, Mac, and Linux systems, making them universally useful.
- Quick Process: Most ISO-to-USB transfers take less than 15 minutes once you have the right tool.
📑 Table of Contents
- What Is an ISO File and Why Copy It to USB?
- Things You Need Before You Start
- Method 1: Using Rufus (Best for Windows Users)
- Method 2: Using the Built-In Windows Tool
- Method 3: Manual Copy (For Non-Bootable Needs)
- Method 4: Using Third-Party Software on Mac and Linux
- Comparing the Different Methods
- Common Mistakes to Avoid
- How to Verify Your Bootable USB Works
- Tips for Faster and Safer ISO Transfers
- Frequently Asked Questions About Copying ISO Files to USB
- Final Thoughts on Copying ISO Files to USB
What Is an ISO File and Why Copy It to USB?
An ISO file is essentially a complete copy of a disk. Think of it as a digital image of a CD, DVD, or Blu-ray disc. When you download software, an operating system, or a game, the ISO file contains everything that would be on the original disc. This includes all the files, folders, and even the file system structure.
People copy ISO files to USB drives for several reasons:
- Installing operating systems: Many modern computers no longer come with CD drives. A bootable USB lets you install Windows, Linux, or macOS without needing a physical disc.
- Portable software: Some programs are distributed as ISO files. Copying them to a USB drive lets you carry your favorite tools wherever you go.
- Data backup and recovery: ISO files often contain recovery tools that can help you fix a broken computer.
- Sharing large files: A USB drive is a reliable way to share ISO contents with others who may not have fast internet access.
When you transfer ISO contents to a USB drive, you are essentially creating a portable version of a disc. This makes the ISO file much more practical for everyday use. For those who also want to keep their devices organized, checking out our article on 10 Gadgets To Make Moms Life Easier can offer great ideas for staying tech-savvy while keeping life simple.
Things You Need Before You Start
Before you dive into the process, make sure you have everything ready. Preparation saves time and prevents frustrating errors later on.
Required Items
- A USB flash drive: Ideally 8 GB or larger. The size depends on the ISO file you are working with.
- A computer: Any Windows, Mac, or Linux machine will work.
- The ISO file: Make sure it is fully downloaded and not corrupted.
- A reliable USB port: Use a USB 3.0 port if possible for faster transfer speeds.
Important Precautions
Here is something many people overlook. Copying an ISO file to a USB drive will erase all existing data on that drive. If you have any important files stored on the USB, back them up to your computer first. Also, make sure your USB storage device is in good working condition. A faulty drive can corrupt the ISO file, which would make it unusable.
Quick Tip: If you are unsure whether your USB drive is healthy, run a quick diagnostic test before starting. Most operating systems have built-in tools for checking drive health.
Method 1: Using Rufus (Best for Windows Users)
Rufus is one of the most popular and reliable ISO to USB tools available. It is free, lightweight, and works with almost every ISO file you will encounter. Whether you are creating a bootable USB for Windows installation or Linux setup, Rufus handles the job with ease.
Step-by-Step Guide
- Download Rufus: Visit the official Rufus website and download the latest version. It is a small file, so the download takes only a few seconds.
- Insert your USB drive: Plug the USB flash drive into your computer. Make sure it is empty or that you have backed up any data on it.
- Open Rufus: Launch the application. You will see a simple, clean interface with a few options.
- Select your USB drive: Under the “Device” dropdown, choose your USB drive from the list.
- Click “SELECT”: This button lets you browse your computer and locate the ISO file you want to copy.
- Choose the partition scheme: For most modern computers, select “GPT” for UEFI systems or “MBR” for older BIOS systems.
- Click “START”: Rufus will begin the process. This usually takes between 5 and 15 minutes depending on the size of the ISO file.
- Wait for completion: Once Rufus shows a “READY” message, your bootable USB is ready to use.
Why Rufus Stands Out
Rufus is free to use and does not require installation. You can run it directly from a USB drive if you want. It supports a wide range of ISO formats, including Windows ISO files, Linux distributions, and even some game discs. The tool is regularly updated, which means it stays compatible with the latest operating systems.
Method 2: Using the Built-In Windows Tool
If you prefer not to download third-party software, Windows offers a built-in option. The Windows USB/DVD Download Tool was designed by Microsoft specifically for this purpose. While it has been discontinued in some regions, it still works well for many users.
How to Use It
- Download the tool: Search for “Windows USB/DVD Download Tool” and install it on your computer.
- Open the tool and select your ISO file: Click “Browse” and locate the ISO file you want to copy.
- Choose “USB device”: Select this option instead of burning to a DVD.
- Select your USB drive: Pick the correct drive from the list.
- Click “Begin copying”: The tool will format the USB and copy the ISO contents automatically.
This method is straightforward and requires no technical knowledge. However, it only works with certain Windows ISO files and may not support all Linux distributions.
Method 3: Manual Copy (For Non-Bootable Needs)
Sometimes you do not need a bootable USB. Maybe you just want to access the files inside an ISO for portable use or for sharing. In these cases, you can extract ISO contents manually without any special software.
How to Extract ISO Files Manually
- Mount the ISO file: On Windows 10 or 11, simply right-click the ISO file and select “Mount.” This creates a virtual drive that you can open like a regular folder.
- Open the virtual drive: You will see all the files and folders inside the ISO, just like you would on a physical disc.
- Copy the files to USB: Select everything inside the virtual drive, right-click, and choose “Copy.” Then paste the files onto your USB drive.
- Eject safely: Once the copy is complete, safely eject the USB drive from your computer.
This method works great for file transfer and data sharing. However, the resulting USB drive will not be bootable. If you need to install an operating system from the USB, use one of the other methods described above.
Method 4: Using Third-Party Software on Mac and Linux
Mac and Linux users have excellent options too. For Mac users, BalenaEtcher is a top choice. It is free, open-source, and works on macOS, Windows, and Linux. For Linux users, the dd command in the terminal is a powerful and reliable option.
Using BalenaEtcher
- Download BalenaEtcher: Visit the official website and download the version for your operating system.
- Flash your ISO: Open Etcher, select your ISO file, choose your USB drive, and click “Flash!”
- Wait for completion: Etcher handles the entire process automatically and safely.
Using the dd Command on Linux
Open your terminal and type the following command (replace the paths with your actual file and device names):
sudo dd if=/path/to/your.iso of=/dev/sdX bs=4M status=progress
This command writes the ISO directly to the USB drive. Be very careful with the “of=” parameter. Typing the wrong device name can overwrite the wrong drive.
Comparing the Different Methods
Not sure which method is right for you? Here is a quick comparison to help you decide.
| Method | Best For | Difficulty | Bootable USB? | Platform |
|---|---|---|---|---|
| Rufus | Windows users, bootable USB | Easy | Yes | Windows |
| Windows USB/DVD Tool | Simple Windows ISO copying | Very Easy | Yes | Windows |
| Manual Extraction | Accessing ISO files, data sharing | Easy | No | Windows, Mac, Linux |
| BalenaEtcher | Mac and Linux users | Easy | Yes | Mac, Linux, Windows |
| dd Command | Linux power users | Intermediate | Yes | Linux |
As you can see, each method has its strengths. If you want the fastest and most reliable way to create a bootable installer, Rufus is your best bet. For simple file access, manual extraction works perfectly. Choose the method that fits your needs.
Common Mistakes to Avoid
Even though copying an ISO to USB is straightforward, some mistakes can cause problems. Here are the most common ones and how to avoid them.
- Using the wrong USB drive: Always double-check that you select the correct USB drive in your tool. Formatting the wrong drive can delete important data.
- Skipping the backup step: Never start the process without backing up your USB drive first. Once the ISO is written, the old data is gone forever.
- Using a corrupted ISO file: If your ISO file did not download completely, the USB drive will not work properly. Always verify your download before starting.
- Ignoring partition scheme settings: Using the wrong partition scheme (MBR vs. GPT) can make your USB drive unbootable on newer computers.
- Removing the USB too early: Wait until the tool confirms the process is complete before pulling out the drive.
Expert Insight: According to tech professionals, the single biggest mistake people make is not verifying the ISO file integrity before starting. A simple checksum comparison can save you hours of troubleshooting later. Always download ISO files from official sources to ensure they are authentic and uncorrupted.
For those who like to stay organized with their tech setup, you might also enjoy our guide on adding prefixes to numbers on iPhone, which covers useful file management tips for keeping your device data in order.
How to Verify Your Bootable USB Works
After you finish copying the ISO to your USB drive, you should verify that everything works correctly. A bootable USB that does not boot can be very frustrating, especially when you need it most.
Quick Verification Steps
- Check the USB drive size: The drive should now show the same size as the original ISO file. If it looks empty, something went wrong.
- Restart your computer: Enter the boot menu (usually by pressing F12, F2, or Del during startup) and select your USB drive.
- Watch for the installer: If the boot process starts and you see the operating system installer, your USB is working perfectly.
- Test on another computer: If possible, try the USB on a different machine to confirm it is fully functional.
These verification steps take only a couple of minutes but can save you a lot of trouble when you actually need to use the USB drive for an installation or recovery task.
Tips for Faster and Safer ISO Transfers
A few small adjustments can make your ISO-to-USB experience much smoother. Here are some expert-backed tips that experienced users swear by.
- Use USB 3.0 drives: USB 3.0 offers significantly faster transfer speeds than USB 2.0. Your ISO file will copy to the drive in a fraction of the time.
- Close unnecessary programs: Freeing up system resources helps the copying tool work more efficiently.
- Keep your computer plugged in: A sudden power loss during the writing process can corrupt the USB drive.
- Label your USB drives: Use a label or marker to identify which ISO is on which drive. This prevents confusion later.
- Store ISO files safely: Keep your original ISO files in a dedicated folder on your computer. This makes it easy to create new bootable USB drives whenever you need them.
These simple habits may seem minor, but they add up to a much better experience every time you work with ISO files and USB drives. Think of it as building a routine that keeps your data backup and portable media organized and reliable.
Frequently Asked Questions About Copying ISO Files to USB
Here are some of the most common questions people ask about this process. If you have a specific concern, check to see if it is addressed below.
Can I copy an ISO file to USB without losing data?
No, copying an ISO file as a bootable image will erase all existing data on the USB drive. However, if you manually extract the ISO contents to the USB drive using the “Mount and Copy” method, you can keep other files on the drive as well. Just make sure there is enough free space.
What size USB drive do I need?
The USB drive should be at least as large as the ISO file you are copying. For most Windows installation ISOs, an 8 GB drive is sufficient. For larger ISOs like some Linux distributions or game discs, a 16 GB or 32 GB drive may be needed.
Can I use the same USB drive for multiple ISO files?
Yes, but only if you are using the manual extraction method. Bootable USB drives are typically formatted for a single operating system. If you want to carry multiple ISOs, consider using a tool that supports multi-boot USB creation.
Is it safe to download ISO files from the internet?
It is safe as long as you download from official or trusted sources. Always verify the file using checksums or hashes provided by the official website. Avoid downloading ISO files from unknown or suspicious websites to prevent malware infections.
Can I copy an ISO to USB on a Chromebook?
Chromebooks have limited support for creating bootable USB drives directly. However, you can use Linux tools on Chromebooks or connect to a Windows or Linux machine remotely to complete the process. The BalenaEtcher method also works on Chromebooks that support Linux apps.
Why is my USB drive not booting after copying the ISO?
This usually happens because of incorrect partition scheme settings or a corrupted ISO file. Try using Rufus with the correct settings for your computer’s firmware (UEFI or BIOS). Also make sure your computer’s boot order is set to prioritize USB drives.
Final Thoughts on Copying ISO Files to USB
Copying files from an ISO to a USB drive is a practical skill that everyone can learn. Whether you are setting up a new computer, troubleshooting an old one, or just need portable access to important software, the methods in this guide will get the job done right.
The key is to choose the right method for your needs. Rufus is the go-to choice for most Windows users who want a reliable bootable USB. BalenaEtcher is perfect for Mac and Linux users. And the manual extraction method works well when you just need to access ISO contents without making the drive bootable.
Remember to always back up your data, verify your ISO file before starting, and follow each step carefully. With these precautions in place, you will have a working bootable USB drive in no time. Now that you know how to copy files from ISO to USB, you can tackle any installation or recovery task with confidence.
Start with the method that feels most comfortable to you, and do not be afraid to experiment. Once you have created your first bootable USB, you will wonder why you did not learn this sooner. Happy creating!