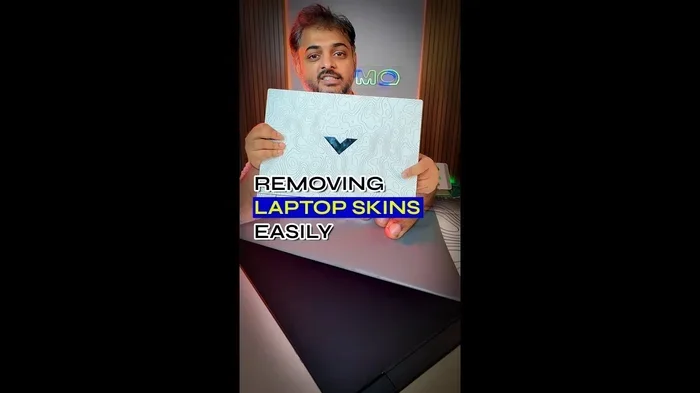
Can Laptop Skins Be Removed Easily Your Complete Guide
Yes, you can remove laptop skins easily if you use the right techniques. Whether your laptop skin has lost its stickiness or you simply want a fresh look, this guide shows you how to remove laptop skins safely without harming your device’s surface.
Key Takeaways
- Heat and patience are key: Using gentle heat helps loosen the adhesive when removing laptop skins.
- Avoid sharp tools: Razor blades and metal scrapers can scratch your laptop surface.
- Residue is normal: Most laptop skins leave some sticky residue that can be cleaned with simple household items.
- Check your warranty: Removing skins from certain laptops may affect your device warranty.
- Repositionable skins exist: Some laptop decals allow you to remove and reapply them multiple times.
- Surface protection matters: Always check your laptop finish before applying or removing any adhesive laptop cover.
- Take your time: Rushing the removal process is the most common cause of skin damage on laptops.
📑 Table of Contents
- What Are Laptop Skins and Why Are They So Popular?
- Can You Remove Laptop Skins Easily? The Big Question
- How to Remove Laptop Skins Safely: Step-by-Step
- Common Mistakes When Removing Laptop Skins
- How to Clean Up Residue After Removing a Laptop Skin
- Tips for Applying a New Laptop Skin After Removal
- Expert Insights on Laptop Skin Removal
- Key Differences: Removing Skins from Different Laptop Brands
- Conclusion
What Are Laptop Skins and Why Are They So Popular?
A laptop skin is a thin, decorative cover that you stick onto the outer surface of your laptop. Most skins are made from vinyl or a similar adhesive material. They come in countless designs, colors, and textures. Some people use them for style. Others want laptop surface protection from scratches and everyday wear.
The trend has grown fast. Laptop customization is now a huge market. You can find everything from minimalist matte finishes to bold artistic wraps. A protective laptop cover made from a skin is an affordable way to refresh your device. It costs far less than a new laptop or a full wrap job at a shop.
But here is the big question that every skin owner eventually faces: can laptop skins be removed easily? Let us dig into that right now.
Types of Laptop Skins
- Vinyl laptop wrap: A full or partial cover made from thin vinyl. It wraps around the lid and sometimes the base.
- Laptop decals: Smaller stickers or designs placed on specific areas of the laptop.
- Adhesive laptop cover: A full-surface skin that covers the entire back panel.
- Repositionable laptop skin: A special type that lets you lift and reapply it without losing stickiness.
Each type has a different removal process. Knowing which one you have makes a big difference.
Can You Remove Laptop Skins Easily? The Big Question
The short answer is yes. Removing laptop skins is generally straightforward. But “easy” depends on a few things. The type of skin matters. The adhesive quality matters. And how long the skin has been on your laptop plays a role too.
A fresh laptop skin applied a few weeks ago usually comes off without much fuss. An older skin that has been on for years? That can be trickier. The adhesive bonds stronger over time. Heat and patience become your best friends.
Factors That Affect Removal
Several things determine how smoothly the process goes:
- Age of the skin: Older skins bond more tightly. Removing laptop skins from a device that had them for two years is harder than removing one that is one month old.
- Skin material: Premium vinyl skins often use better adhesives. Cheap decals may leave more residue behind.
- Temperature: Warm environments soften adhesive. Cold conditions make it stiffer and harder to peel.
- Surface type: Matte laptop finishes tend to hold skins differently than glossy ones. Some laptop finishes are more delicate and can be affected by aggressive removal.
- Full coverage vs. partial: A full vinyl laptop wrap covers more area. This means more adhesive to deal with during removal.
So when someone asks, “Can laptop skins be removed easily?” the honest answer is: it usually can, but you need the right approach.
How to Remove Laptop Skins Safely: Step-by-Step
This is the section you have been waiting for. Here is a proven method for remove skin from laptop without causing damage. Follow these steps carefully.
Step 1: Gather Your Supplies
Before you start, get everything ready:
- A hair dryer or heat gun (on low setting)
- A plastic scraper or old credit card
- Microfiber cloths
- Rubbing alcohol or isopropyl alcohol (70% or higher)
- A soft towel
- Patience (this is the most important supply!)
Do not grab a razor blade or metal scraper. These can scratch your laptop. We will talk more about this in the mistakes section.
Step 2: Heat the Edges
Use a hair dryer on a medium or low setting. Focus the warm air on one corner of the laptop skin. Hold it about three to four inches away. Heat the area for 20 to 30 seconds. The goal is to soften the skin adhesive without overheating the laptop surface.
Do not use excessive heat. Laptop screens and batteries can be sensitive. Keep the temperature gentle and steady.
Step 3: Peel Slowly at a Low Angle
Once the corner feels warm, gently lift it with your fingernail or the plastic scraper. Pull the skin back slowly. Keep the angle low, almost flat against the laptop surface. Pulling at a steep angle increases the risk of the skin tearing or leaving residue.
Continue peeling slowly. Apply more heat as you go, especially on any areas that feel sticky or resistant. This is where laptop skin bubbles often form if you rush. Take your time and everything will come away cleanly.
Step 4: Handle Stubborn Areas
If a section refuses to peel, do not force it. Apply more heat. Wait a few seconds. Then try again. If the skin tears, use the hair dryer on the remaining piece and keep working at it gradually.
For smaller laptop decals, you may need to hold the hair dryer on one spot longer. Small areas heat up faster. Be careful not to overheat.
Step 5: Clean the Surface
After the skin is fully off, you likely have some sticky residue left behind. Do not worry. This is completely normal. We will cover cleaning in the next section.
Common Mistakes When Removing Laptop Skins
Many people make avoidable mistakes during the removal process. These errors can lead to skin damage laptop owners regret. Let us look at the biggest ones.
Using Metal Tools
This is the number one mistake. Razor blades, box cutters, and metal scrapers feel effective. They cut through adhesive quickly. But they also scratch and gouge your laptop surface. A single slip can ruin the finish permanently. Always use a plastic scraper or a soft card.
Peeling Too Fast
Quick pulling tears the skin and leaves adhesive behind. It also risks pulling off parts of the laptop finish. Slow and steady wins this race. If you feel resistance, apply more heat instead of pulling harder.
Ignoring Heat
Some people try to peel the skin off cold. This almost always leads to a messy result. The adhesive was designed to bond strongly. Heat softens it and makes removal smooth. Skipping this step makes laptop decal removal ten times harder.
Using Harsh Chemicals
Acetone, nail polish remover, and bleach can damage laptop finishes. They strip paint and discolor surfaces. Stick to rubbing alcohol or dedicated adhesive removers that are safe for electronics. Always test on a small hidden area first.
Not Checking the Warranty
Some manufacturers consider skins as modifications. Removing them or having them applied may affect your laptop finish protection warranty. Check your product terms before you begin. This is especially important for high-end brands.
How to Clean Up Residue After Removing a Laptop Skin
Residue is the most common complaint about removing laptop skins. It is also the easiest problem to fix. Here is how to handle it.
Method 1: Rubbing Alcohol
Dampen a microfiber cloth with isopropyl alcohol. Gently rub the sticky areas. The alcohol dissolves most adhesives quickly. Work in small circles. Wipe clean with a dry cloth when done.
Method 2: Warm Soapy Water
Mix warm water with a few drops of dish soap. Dampen a soft cloth and rub the residue. This works well on less stubborn adhesive. Dry the surface immediately after cleaning.
Method 3: Cooking Oil or Baby Oil
For really stubborn glue, apply a tiny amount of cooking oil. Let it sit for a minute. Then wipe it away with a cloth. Oil breaks down adhesive bonds effectively. Just make sure to clean the area thoroughly afterward so it does not feel greasy.
Method 4: Commercial Adhesive Removers
Products like Goo Gone or similar brands work great. Spray a small amount on the residue. Wait 30 seconds. Wipe clean. Always test on an inconspicuous spot first. These products are powerful and can be harsh on certain finishes.
After cleaning, use a dry microfiber cloth to buff the surface. Your laptop should look and feel like new. If you plan to apply a fresh vinyl laptop wrap, make sure the surface is completely dry and free of any oil before reapplying.
Quick Tips for Residue Cleanup
- Never use paper towels on sticky areas. They can leave tiny fibers behind.
- Always test cleaning solutions on a small, hidden section first.
- Be gentle around logos and printed text on the laptop surface.
- Clean in one direction rather than circular motions for a streak-free finish.
Tips for Applying a New Laptop Skin After Removal
Once your laptop is clean and dry, you might want to apply a fresh laptop skin. Here is how to get a perfect result every time.
Measure and Cut Carefully
Measure your laptop dimensions. Cut the skin slightly larger than needed. This gives you room to adjust during application. Precision trimming comes after you position it correctly.
Apply on a Flat, Clean Surface
Work on a clean table. Make sure no dust or debris is on the laptop surface. Even a tiny particle under the skin creates an unsightly laptop skin bubble.
Start from One Corner
Peel a small portion of the backing. Align that corner with the edge of your laptop. Press it down firmly. Then slowly peel more backing while smoothing the skin outward. This prevents air pockets and alignment issues.
Use a Squeegee or Card
A squeegee or a soft plastic card helps press out air bubbles. Start from the center and push outward toward the edges. This technique works for any laptop customization project.
Smooth Out Wrinkles
If you see a wrinkle, do not panic. Gently lift the area nearest the wrinkle. Smooth it down again. Avoid pulling from the opposite side. This stretches the material and can cause tearing.
Expert Insights on Laptop Skin Removal
Tech professionals generally agree on a few things when it comes to laptop skins:
- Quality matters. Premium skins use better adhesives and materials. They are easier to remove and leave less residue. Cheap skins often tear and leave stubborn glue behind.
- Heat is non-negotiable. Every expert recommends using gentle heat. Cold removal almost always leads to problems.
- Know your laptop finish. Matte and glossy finishes react differently. Some premium finishes can be sensitive to adhesive products. Always check compatibility.
- Repositionable skins are a smart choice. If you like to change your look often, invest in a repositionable laptop skin. It saves you from adhesive headaches entirely.
Key Differences: Removing Skins from Different Laptop Brands
Different laptops require slightly different approaches. Here is a quick comparison.
| Laptop Brand | Surface Type | Removal Difficulty | Residue Level |
|---|---|---|---|
| MacBook Pro | Anodized aluminum | Moderate | Low to moderate |
| Dell XPS | Matte carbon fiber or glass | Easy | Low |
| HP Spectre | Glossy or matte metal | Moderate | Moderate |
| Lenovo ThinkPad | Matte plastic or carbon fiber | Easy | Low |
| ASUS ROG | Glossy plastic or metal | Easy | Moderate |
MacBook Pro skins require extra care. The aluminum surface can show scratches more easily. Use only plastic tools and gentle heat. Dell XPS and Lenovo ThinkPad models tend to be more forgiving during removal.
When to Seek Professional Help
Consider professional help if:
- The skin has been on your laptop for more than three years.
- You notice paint chipping or finish damage during removal.
- The adhesive residue will not come off with household methods.
- Your laptop has a fragile or unusual finish.
Professional technicians have specialized tools for laptop skin adhesive removal. They can protect your device even in tough situations.
Conclusion
So, can laptop skins be removed easily? Absolutely. With the right tools, gentle heat, and a patient approach, you can remove any laptop skin without harming your device. Clean up any residue with simple household items. Then decide whether to go skin-free or apply a fresh protective laptop cover.
Remember the essentials: never use metal tools, always apply heat, and take your time. Avoid common mistakes and follow the step-by-step methods in this guide. Your laptop deserves the best care. Whether you are removing a vinyl laptop wrap for a fresh start or just cleaning up an old decal, you now have everything you need to do it right.
Share this guide with anyone who loves their laptop customization but wants to change things up. A fresh look should never come at the cost of a damaged device. Happy peeling!
Frequently Asked Questions
Can I remove a laptop skin without using heat?
You can try peeling it slowly at room temperature, but results are often messy. Heat softens the adhesive and makes removing laptop skins much smoother. A hair dryer on a low setting is the safest and most effective method. Without heat, the skin is more likely to tear or leave sticky residue behind.
Will removing a laptop skin void my warranty?
It depends on the manufacturer. Some brands consider skins a modification and may void your warranty if damage is found underneath. Others do not check at all. To stay safe, check your warranty terms before removing or applying any laptop skin. If in doubt, contact the manufacturer directly.
How do I remove stubborn adhesive residue from my laptop?
Start with rubbing alcohol on a microfiber cloth. Gently rub the sticky areas in small circles. For tougher residue, try a dab of cooking oil left for one minute before wiping. Commercial adhesive removers like Goo Gone also work well. Always test on a small hidden area first to protect your laptop surface protection finish.
Are repositionable laptop skins worth buying?
Yes, if you like to change your laptop look frequently. Repositionable laptop skins use a special adhesive that allows you to lift, reposition, and reapply them multiple times. They reduce residue buildup and make future laptop decal removal much easier. They cost slightly more than standard skins but offer great value.
Can laptop skins damage the surface underneath?
If applied or removed improperly, yes. Using metal tools, pulling too fast, or skipping heat can scratch or peel the laptop finish. Cheap adhesive laptop covers may also leave permanent residue. To prevent skin damage laptop surfaces, always use plastic tools, gentle heat, and quality products designed for electronics.
How often should I replace my laptop skin?
There is no set schedule. Most people replace their vinyl laptop wrap every one to two years, or when it starts peeling, bubbling, or looking worn. Cleaning and proper application can extend the life of any skin. If you use a repositionable laptop skin, you can simply refresh its position instead of replacing it entirely.