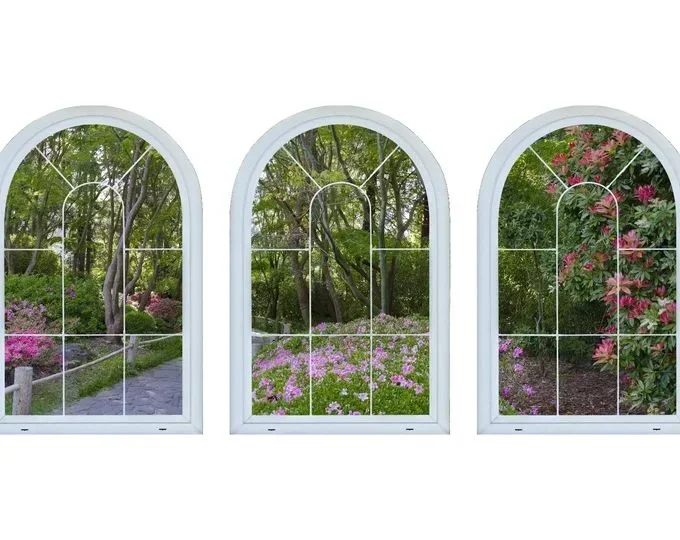
Can You Make A Fake Window Here Is Everything You Need
Yes, you can absolutely make a fake window, and it is easier than you think. Whether you want to add natural light to a dark room, boost your home curb appeal, or create a decorative accent, a fake window can transform any space. This guide covers everything from materials and types to a full step-by-step process, so you can build your own decorative window panel with confidence.
Key Takeaways
- Fake windows work for any room: They add light, depth, and style without needing a real opening.
- Multiple types exist: From painted windows to LED-lit panels, you have many creative options.
- Basic materials are affordable: Plywood, window film, paint, and LED strips keep costs low.
- Planning matters: Accurate measurements and the right design make your fake window look authentic.
- Avoid common mistakes: Skipping primer, using low-quality film, or ignoring lighting are top errors to dodge.
- Expert tips elevate the result: Layered glass effects and proper framing make your faux window nearly indistinguishable from the real thing.
📑 Table of Contents
What Is a Fake Window and Why Would You Want One?
A fake window is a decorative panel or structure designed to look like a real window. It does not open. It does not let in actual light from outside. But it creates the visual impression of a window very convincingly. People use them in basements, bathrooms, hallways, and closets where real windows are not possible.
The idea of a faux window has grown in popularity over the past few years. Homeowners and renters alike want to brighten up dark spaces without major construction. A decorative window panel can make a tiny room feel bigger. It can add charm to a boring wall. And it can even increase the perceived value of a home.
There are many reasons someone might want a simulated window. Maybe you live in an apartment where you cannot install a real window. Maybe you have a windowless bathroom that feels claustrophobic. Or maybe you just love the aesthetic of a window illusion and want to try a DIY window project at home.
Whatever your reason, making a fake window is a fun and rewarding project. You do not need advanced woodworking skills. You do not need a big budget. With the right materials and a little patience, you can create something that looks amazing. Let us explore the different types you can try.
Types of Fake Windows You Can Create
Painted Fake Windows
A painted fake window is one of the simplest approaches. You paint a window frame and scene directly onto a wall or a flat panel. This works great for children’s rooms, hallways, or accent walls. You can paint a sunny sky, trees, and even birds to make the illusion pop.
The key to a great painted faux window is detail. Use painter’s tape to create clean lines for the frame. Choose colors that match your room’s lighting. A warm golden tone can mimic afternoon sunlight. A cool blue tone can suggest a cloudy day.
Window Film Fake Windows
Window film is a thin, adhesive material you stick onto glass or a panel. You can find film that looks like frosted glass, stained glass, or even scenic views. This is a popular choice for people who want a quick and clean window decoration idea.
Window film is affordable and easy to apply. You can cut it to any size. It works well on existing glass doors or on a fake window panel you build yourself. Many people combine window film with a painted or wooden frame for a more finished look.
LED-Lit Fake Windows
An LED-lit fake window uses light-emitting diodes to simulate the glow of natural light. You can build a frame, attach a translucent panel, and install LED strips behind it. The result is a glowing window backdrop that looks stunning, especially in evening settings.
This type of optical illusion window is perfect for home theaters, gaming rooms, or bedrooms. You can even change the LED colors to match your mood. Warm white light mimics daylight. Cool blue light creates a cozy nighttime feel.
3D Wall-Mounted Fake Windows
A 3D fake window panel adds real depth to a wall. You build a frame that sticks out from the wall, creating a shadow box effect. Inside, you place a scene or a translucent panel with a printed or painted view. The 3D effect makes the interior window design look incredibly realistic.
This option takes more effort but delivers the best results. It is ideal for a living room accent wall or a front hallway. Guests will genuinely think it is a real window.
Materials You Need to Make a Fake Window
Gathering the right materials before you start is essential. Having everything ready keeps the project smooth and enjoyable. Here is a list of common supplies you will need.
- Plywood or MDF board for the frame and backing panel
- Window film or translucent acrylic sheet for the glass surface
- Wood trim or molding for the window frame
- Paint and primer for the frame and any painted details
- LED light strips if you want a backlit effect
- Screws, nails, or adhesive for assembly
- Measuring tape and level for accuracy
- Sandpaper and wood filler for smoothing the frame
When choosing your materials, think about the room where the fake window will go. For a bathroom, moisture-resistant materials like sealed plywood or acrylic work best. For a living room, you can use nicer wood trim and high-quality film. Budget is also a factor. A basic DIY window project can cost as little as 20 to 50 dollars. A more elaborate version with LED lighting and 3D framing might run 100 to 200 dollars.
One tool you will spend a lot of time on during planning is your computer. If you are designing your layout or tracking measurements digitally, the advantages and disadvantages of a computer mouse matter more than you might think. A mouse with a smooth scroll wheel and precise tracking makes spreadsheet work and design planning much easier than a trackpad. That small ergonomic choice can save you frustration during the planning phase.
Step-by-Step Guide to Making a Fake Window
Now let us walk through the actual build process. Follow these steps carefully and your fake window will look professional.
Step 1: Measure and Plan
Start by measuring the wall space where the fake window will go. Write down the height and width. Decide how big you want the frame to be. A standard window size is about 36 inches wide and 48 inches tall, but you can adjust to fit your space.
Before you cut any wood, plan your design on paper or in a digital tool. If you are using a spreadsheet to organize your materials list and measurements, and a line won’t delete in Microsoft Excel, do not panic. Simply right-click the row number, select delete, or use the clear all function. Keeping your measurements organized in a spreadsheet helps you avoid mistakes during the build.
Step 2: Build the Frame
Cut your plywood or MDF board to size for the backing panel. Then cut the wood trim to form the frame. The frame should surround the backing panel, leaving a gap in the center for the window glass or film.
Attach the trim to the backing panel using screws or wood glue. Use a level to make sure everything is straight. Sand any rough edges and fill gaps with wood filler. Let it dry completely before moving to the next step.
Step 3: Add the Glass or Film
Cut your window film or translucent acrylic to fit the center opening. If you are using film, peel off the backing and carefully apply it to the panel. Smooth out any bubbles with a credit card or a squeegee.
If you want a more realistic look, consider using two layers. A frosted film on the back layer and a clearer film on the front creates depth. This mimics how real glass reflects and transmits light.
Step 4: Paint and Detail
Prime the frame and let it dry. Then paint it in your chosen color. White or natural wood tones work well for most rooms. You can also add detail lines to simulate window panes. Use painter’s tape to create clean, even lines.
If you are creating a painted scene, now is the time to add it. Paint a sky, landscape, or garden view on the translucent panel or on a separate backing piece placed behind the film. This adds a beautiful touch to your home decor window project.
Step 5: Install Lighting (Optional)
If you chose an LED-lit design, now is the time to install the lights. Attach LED strips around the inside edges of the frame, behind the translucent panel. Connect them to a power source or a remote control adapter.
Test the lights before you mount the fake window on the wall. Make sure the glow is even and there are no dark spots. The lighting is what makes a faux window look truly magical, especially in dim rooms.
Step 6: Mount and Finish
Position the fake window panel on the wall. Use a level to make sure it is straight. Secure it with screws into wall studs or with heavy-duty adhesive. Add any finishing touches like curtains, window blind accessories, or decorative trim.
Stand back and admire your work. A well-made fake window can completely change the feel of a room. It brings in the illusion of natural light and adds a focal point that draws the eye.
Common Mistakes to Avoid When Making Fake Windows
Even with a great plan, mistakes can happen. Here are the most common ones and how to avoid them.
- Skipping the primer: Paint adheres poorly to bare wood. Always use a coat of primer before painting your frame. This ensures a smooth, even finish that lasts.
- Using low-quality window film: Cheap film wrinkles, bubbles, and fades quickly. Invest in a good-quality film designed for interior use. It makes a huge difference in how realistic your fake window looks.
- Ignoring room lighting: Your decorative window panel needs to match the room’s existing light. If the room has warm lighting, use warm-toned film and paint. If the room has cool lighting, go with cooler tones.
- Measuring only once: Always measure twice and cut once. A crooked or incorrectly sized panel is frustrating to fix after installation.
- Forgetting about depth: A flat panel looks less realistic than one with some depth. Use 3D framing or add a shadow box effect to give your window illusion more authenticity.
Another mistake people make is rushing the drying time. Whether it is primer, paint, or wood filler, each layer needs adequate time to dry. Patience pays off with a cleaner, more professional result.
Expert Tips for Making Your Fake Window Look Real
Layer Your Materials
Professional window art and set designers use layering to create depth. Place a printed landscape behind a frosted film. Add a second layer of clear film on top. This mimics how real glass works and makes your simulated window far more convincing.
Use Realistic Window Details
Add small details that real windows have. Put a thin strip of reflective tape or foil along the edges of the frame to simulate glass reflections. You can also add a curtain rod and lightweight curtains. These small touches make a big difference in how authentic your faux window appears.
Match Your Home’s Style
Your fake window should complement your existing decor. If your home has a modern style, use clean lines and a minimalist frame. If your home has a rustic style, use distressed wood and warm tones. Matching the style ensures your decorative window panel blends in seamlessly.
Consider the View
What you place inside the fake window matters. A serene landscape, a garden scene, or even a simple blue sky with clouds can set the mood. For a bathroom, a soft floral or beach scene adds a calming touch. For a living room, a countryside view creates warmth and charm.
Check Out Helpful Home Tools
If you are looking for more tools and gadgets to help with your home projects, check out these 10 gadgets to make moms life easier that can also assist with DIY home decor tasks. Many of these tools are versatile and useful beyond just window projects.
Conclusion
Making a fake window is a creative, affordable, and rewarding project that anyone can do. Whether you choose a simple painted design, a window film panel, or an elaborate LED-lit creation, the results can truly transform a room. A well-crafted faux window adds light, depth, and character to spaces that would otherwise feel dark and closed off.
Start with a clear plan. Gather your materials. Follow the steps carefully. And do not be afraid to add your own personal touches. The beauty of a DIY window project is that it reflects your style and creativity.
Now that you have all the information you need, it is time to start your own fake window project. Pick a room, choose a style, and gather your supplies. You will be amazed at how much difference a single decorative window panel can make in your home.
Frequently Asked Questions
Can you make a fake window without woodworking skills?
Absolutely. You can create a simple fake window using foam board, window film, and adhesive. No saws or screws are needed. This approach is perfect for beginners and renters who want a window decoration idea without any permanent changes to their space.
How long does it take to make a fake window?
A basic faux window can be completed in one to two hours. A more detailed 3D panel with lighting might take half a day. The time depends on the complexity of your design and the materials you choose. Planning ahead helps you stay efficient.
Can a fake window look really realistic?
Yes, especially when you use layered materials and proper lighting. A simulated window with frosted film, a painted scene, and LED backlighting can be nearly indistinguishable from a real window. The key is attention to detail and matching your room’s existing light.
What is the best material for a fake window panel?
Plywood or MDF board makes a sturdy backing. For the glass surface, window film is affordable and easy to work with. Translucent acrylic gives a more premium feel. Choose based on your budget and the room where the fake window will be installed.
Are fake windows safe for bathrooms?
Yes, as long as you use moisture-resistant materials. Sealed plywood, acrylic panels, and waterproof window film all work well in humid environments. A decorative window panel in a bathroom can make the space feel much brighter and more open without the need for a real window.
Can kids help make a fake window?
Definitely. Painting a fake window scene is a fun family activity. Kids can help with painting, applying film, and choosing colors. It is a great way to encourage creativity and give children a sense of accomplishment with a DIY window project they helped build.