Can Rufus Burn Iso To Usb Everything You Need To Know
Yes, Rufus can burn ISO files to USB drives quickly and efficiently. This free, open-source tool is one of the most popular choices for creating bootable USB drives from ISO images. Whether you need to install Windows, Linux, or another operating system, Rufus makes the process simple and fast with just a few clicks.
Have you ever needed to install an operating system or run a portable program from a USB drive? If so, you have probably heard of Rufus. Can Rufus burn ISO to USB? The short answer is yes. Rufus is a lightweight, free tool that helps you turn a regular USB flash drive into a bootable device. It works with ISO files for Windows, Linux, and many other systems. In this guide, we will walk you through everything you need to know about using Rufus to burn ISO files to USB drives.
Many people ask, can Rufus burn ISO to USB because the process seems complicated. But it is not. Rufus was designed to be simple. You do not need to be a tech expert. Whether you are a student, a professional, or someone who just wants to fix a computer, Rufus gets the job done. Let us dive into the details.
Key Takeaways
- Rufus is a reliable, free tool that burns ISO files to USB drives in minutes.
- You need a USB drive with at least 4GB of storage to hold most ISO files.
- The process is straightforward and does not require advanced technical skills.
- Choosing the right file system (FAT32 or NTFS) matters for compatibility.
- Common errors can be fixed with simple troubleshooting steps.
- Rufus works on Windows and supports a wide range of ISO images.
- Always back up your USB drive before burning, as the process erases all data.
📑 Table of Contents
What Is Rufus and Why Do People Use It?
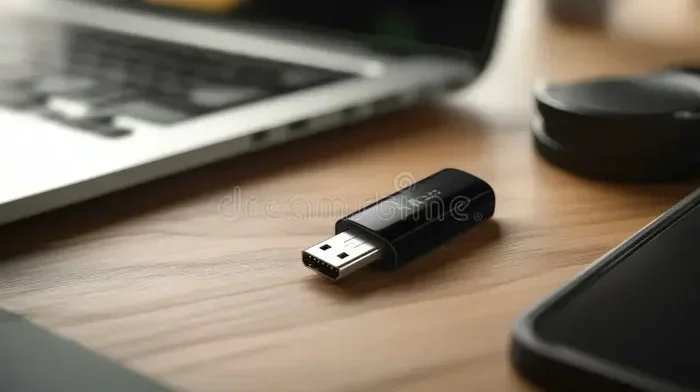
Rufus is a small, free application for Windows. Its main job is to format USB drives and make them bootable. A bootable USB drive can start a computer and run an operating system or installation program. People use Rufus for many reasons:
- Installing Windows or Linux from a USB stick instead of a DVD.
- Running portable tools like antivirus scanners or system repair utilities.
- Creating backup installation media for future use.
- Testing operating systems without installing them on a hard drive.
- Recovering failed systems using bootable rescue disks.
Rufus has been around for many years. It is trusted by millions of users worldwide. The tool is regularly updated and maintained by a dedicated developer. It is one of the most well-known names in the world of bootable USB creation. When people search for how to burn ISO to USB, Rufus is almost always at the top of the list.
The beauty of Rufus lies in its simplicity. You do not need special hardware or expensive software. A standard USB flash drive and the Rufus application are all you need. This makes it accessible to everyone.
How to Burn ISO to USB Using Rufus
Now let us get into the step-by-step process. If you have been wondering can Rufus burn ISO to USB, this section will show you exactly how. The process takes only a few minutes once you have your files ready.
Step 1: Download and Install Rufus
First, go to the official Rufus website and download the latest version. Rufus is a portable application, which means you do not need to install it. You can run it directly from the downloaded file. This is one of the reasons people love Rufus. There is no messy installation process. Just download, open, and go.
Make sure you download Rufus from the official source. Third-party websites sometimes bundle unwanted software with downloads. Always verify the URL to keep your computer safe.
Step 2: Prepare Your USB Drive
Plug your USB flash drive into your computer. The drive should have at least 4GB of space, though larger ISO files may need 8GB or more. Important: burning an ISO to a USB drive will erase all existing data on the drive. Make sure you back up any important files first.
Use a reliable USB drive. Old or damaged drives may cause problems during the burning process. A new or well-maintained flash drive works best for creating bootable media.
Step 3: Select Your ISO File
Open Rufus. You will see a simple, clean interface. Under the “Boot selection” section, click the “SELECT” button. Navigate to the ISO file you want to burn. Rufus supports many ISO formats, including Windows installation images, Linux distributions, and utility discs.
Once you select the ISO file, Rufus will display some details about it. You can see the file size, the detected file system, and other useful information. This helps you confirm that Rufus has recognized your ISO correctly.
Step 4: Configure the Settings
Rufus offers several settings you can adjust. Here is what you need to know:
- Partition scheme: Choose MBR for older computers or GPT for newer ones with UEFI firmware.
- File system: FAT32 works on most systems. NTFS is better for files larger than 4GB.
- Cluster size: The default setting works fine in most cases.
- Volume label: You can name your USB drive or leave it blank.
Most users can stick with the default settings. Rufus chooses good defaults automatically. But if you are working with a specific system or older hardware, you may want to adjust these options.
Step 5: Start the Burning Process
Click the “START” button. Rufus will begin writing the ISO file to your USB drive. You will see a progress bar and a status window. The process usually takes between 5 and 15 minutes, depending on the size of the ISO and the speed of your USB drive.
Do not remove the USB drive during this process. Wait for Rufus to display a “READY” message. This confirms that the burning process is complete and your USB drive is now bootable.
Step 6: Test Your Bootable USB
To test the USB drive, restart your computer and enter the BIOS or boot menu. The key to access this menu varies by computer brand. Common keys include F12, F2, ESC, or DEL. Once in the boot menu, select your USB drive as the primary boot device.
If everything worked correctly, your computer will start from the USB drive. You should see the installation or recovery screen for the operating system or tool you burned to the drive.
Understanding ISO Files and USB Formats
To get the best results with Rufus, it helps to understand what ISO files are and how USB formats work. Let us break this down in simple terms.
What Is an ISO File?
An ISO file is an exact copy of a disc. It contains all the data, files, and structure of a CD, DVD, or Blu-ray disc in a single file. Think of it like a digital snapshot of a physical disc. When you burn an ISO to a USB drive, you are essentially recreating that disc on the USB stick.
ISO files are commonly used for operating systems. When you download Windows or Linux, you usually get an ISO file. This file needs to be written to a USB drive or disc before you can use it. Rufus handles this writing process quickly and reliably.
FAT32 vs NTFS: Which File System Should You Choose?
The file system determines how data is stored on your USB drive. Rufus gives you two main options:
- FAT32: This is the most compatible file system. It works with almost all computers and devices. However, it has a limitation: individual files cannot be larger than 4GB.
- NTFS: This file system supports larger files. It is the default for Windows. However, some older computers may not boot from NTFS-formatted USB drives.
For most users, FAT32 is the safest choice. If your ISO file is larger than 4GB, you will need to use NTFS or a different approach like splitting the file.
MBR vs GPT: Understanding Partition Schemes
The partition scheme determines how your USB drive is organized. Here is a simple comparison:
| Feature | MBR | GPT |
|---|---|---|
| Best for | Older computers with BIOS | Newer computers with UEFI |
| Max partition size | 2TB | 9.4 ZB (virtually unlimited) |
| Number of partitions | Up to 4 primary | Up to 128 |
| Compatibility | Widely supported | Modern systems only |
If you are not sure which to choose, MBR is the safer option for older hardware. GPT is better for modern computers. Rufus makes it easy to switch between the two.
Common Problems and How to Fix Them
Even though Rufus is a reliable tool, you may run into occasional issues. Here are some common problems and their solutions.
Rufus Does Not Detect the USB Drive
If Rufus does not show your USB drive, try these steps:
- Unplug the USB drive and plug it into a different port.
- Try a different USB cable or adapter.
- Restart your computer and open Rufus again.
- Check if the USB drive works on another computer.
Sometimes Windows does not release a USB drive properly. A quick restart usually fixes this.
The USB Drive Will Not Boot
If your computer does not boot from the USB drive, check the following:
- Make sure you selected the correct partition scheme (MBR or GPT) for your computer.
- Enter the BIOS and verify that USB booting is enabled.
- Try a different USB port, preferably a USB 2.0 port for better compatibility.
- Re-burn the ISO using Rufus with updated settings.
Error Messages During Burning
Error messages can appear for several reasons. The most common cause is a corrupted ISO file. Download the ISO again from the official source. Also, make sure your USB drive is not write-protected. Some USB drives have a physical switch that locks them.
Slow Burning Speed
If the burning process is taking too long, try using a faster USB drive. USB 3.0 drives are significantly faster than USB 2.0 drives. Also, closing other programs on your computer can free up resources and speed up the process.
If you are looking for other tech tools and gadgets that simplify everyday tasks, you might enjoy our guide on 10 Gadgets To Make Moms Life Easier for some creative ideas on helpful tech accessories.
Tips for a Smooth Burning Process
Follow these practical tips to ensure success every time you use Rufus to burn an ISO file:
- Always download ISO files from official sources. This ensures the file is not corrupted or infected with malware.
- Use a high-quality USB drive. Name-brand flash drives are more reliable and less likely to fail during the burning process.
- Close all other programs before starting. This gives Rufus full access to your system resources.
- Verify the ISO file hash if available. Many ISO downloads include a checksum you can use to confirm file integrity.
- Label your USB drive. After burning, label the drive so you know what it contains. This saves confusion later.
- Keep Rufus updated. New versions often include bug fixes and support for the latest ISO formats.
- Eject the USB drive safely. Always use the “Safely Remove Hardware” option before pulling out the drive.
These simple steps can save you a lot of frustration. They help ensure that your bootable USB drive works perfectly when you need it most.
When You Might Need Alternative Tools
Rufus is an excellent tool, but it is not the only option. Here are a few situations where you might consider alternatives:
- Mac users: Rufus is a Windows-only application. Mac users can use tools like BalenaEtcher or the built-in Disk Utility to burn ISO files to USB.
- Linux users: The dd command or Etcher are popular choices for Linux systems.
- Large-scale deployments: If you need to create many bootable USB drives at once, tools like Win32 Disk Imager or multi-burn solutions may be more efficient.
- Non-USB media: If you need to burn an ISO to a DVD or Blu-ray disc instead, tools like ImgBurn or CDBurnerXP are better suited for that task.
Each tool has its strengths. Rufus remains the top choice for Windows users who want a fast, simple, and free solution for creating bootable USB drives. If you are working with phones or other devices and need help with related tasks, such as adding prefixes to numbers on iPhone, there are dedicated resources available for those specific needs as well.
Why Rufus Stands Out from Other Tools
There are many tools available for burning ISO files to USB drives. So why do so many people choose Rufus? Here are the key reasons:
- It is completely free. No trials, no hidden fees, no premium versions.
- It is lightweight. Rufus does not require installation and uses minimal system resources.
- It is fast. Rufus burns ISO files quickly, even on older computers.
- It supports many formats. You can use Rufus with Windows, Linux, and other ISO images.
- It is regularly updated. The developer actively maintains the tool and releases frequent updates.
- It works offline. You do not need an internet connection to use Rufus after downloading it.
These advantages make Rufus the go-to choice for anyone who needs to create bootable USB drives. The tool has earned a strong reputation in the tech community for being dependable and easy to use.
Final Thoughts
Can Rufus burn ISO to USB? Absolutely. Rufus is one of the best free tools available for creating bootable USB drives from ISO files. The process is simple, fast, and reliable. Whether you need to install a new operating system, run a portable tool, or recover a failing system, Rufus gets the job done.
Remember to always back up your USB drive before burning. Choose the right settings for your computer. And download your ISO files from trusted sources. With these precautions in mind, you will have a working bootable USB drive in no time.
Rufus has been a trusted tool for years, and it continues to be the preferred choice for millions of users. If you are new to creating bootable USB drives, Rufus is the perfect place to start. Give it a try, and you will see how easy it really is.
Frequently Asked Questions
Is Rufus safe to use?
Yes, Rufus is completely safe. It is a free, open-source tool that has been used by millions of people worldwide. It does not contain malware or adware. Always download it from the official Rufus website to ensure you get the genuine version.
Can Rufus burn any ISO file to USB?
Rufus supports most ISO files, including Windows, Linux, and many utility discs. However, some specialized or encrypted ISO files may not work. In general, standard ISO images from official sources work perfectly with Rufus.
Do I need admin rights to use Rufus?
Yes, you need administrator privileges to run Rufus. This is because the tool needs to format and write directly to your USB drive. On most Windows systems, you will be prompted to allow administrative access when you open Rufus.
Can I use Rufus on a Mac or Linux computer?
No, Rufus is designed for Windows only. Mac and Linux users should use alternative tools like BalenaEtcher, dd, or UNetbootin to burn ISO files to USB drives.
How long does it take Rufus to burn an ISO to USB?
The burning process typically takes between 5 and 15 minutes. The exact time depends on the size of the ISO file, the speed of your USB drive, and your computer’s performance. USB 3.0 drives are noticeably faster than USB 2.0 drives.
Will Rufus erase all data on my USB drive?
Yes, Rufus will erase all existing data on the USB drive during the burning process. Always back up important files before using Rufus. The tool formats the drive as part of the process, which removes all previous content.