Can I Print My Own Shipping Label Heres Everything You Need
Yes, you can absolutely print your own shipping label from home using a regular printer or a dedicated label printer. Whether you ship packages occasionally or run a small business, printing your own shipping label saves time, money, and trips to the post office. This guide walks you through everything from choosing the right printer and software to calculating shipping rates and avoiding common errors. You will also learn how to add tracking numbers, handle customs forms, and print return labels with ease.
Key Takeaways
- You can print shipping labels at home: All you need is a printer, label paper, and shipping software or an online carrier platform.
- Label printers save time and effort: Thermal printers produce crisp, professional labels without ink and are ideal for frequent shippers.
- Shipping costs vary by carrier and weight: Comparing rates across USPS, UPS, FedEx, and DHL helps you find the best deal.
- Common mistakes cause delays: Incorrect barcode placement, missing customs info, and wrong label sizes can delay your package delivery.
- Return labels are easy to print: Most shipping platforms let you generate return labels in seconds for a better customer experience.
- Small businesses benefit the most: Automated label printing streamlines fulfillment and frees up hours each week.
📑 Table of Contents
- Can I Print My Own Shipping Label? Yes, and Here Is How
- What You Need to Print Your Own Shipping Label at Home
- Step-by-Step Guide to Printing Your Own Shipping Label
- Pros and Cons of Printing Your Own Shipping Labels
- Common Mistakes to Avoid When Printing Shipping Labels
- Expert Tips for Saving Money on Shipping Labels
- How Tracking and Barcodes Work with Printed Labels
- Frequently Asked Questions
- Final Thoughts
Can I Print My Own Shipping Label? Yes, and Here Is How
Have you ever stared at a package, wondering how to get a shipping label without driving to the post office? The good news is that printing your own shipping label is something anyone can do today. You do not need a fancy setup or a business license. Whether you are sending a birthday gift to a friend or shipping products to customers, a home printer handles the job just fine.
The process is simpler than most people think. You choose a carrier, weigh your package, pay for postage online, and print the label. That is it. Print your own shipping label in less than five minutes and skip the long lines. This guide covers every detail you need to know, from equipment options to step-by-step instructions.
Many small business owners and online sellers have already made the switch. They save money on postage, reduce errors, and deliver packages faster. If you are curious about how this works, you are in the right place. Let us break it all down for you.
Why More People Are Choosing DIY Shipping Labels
The rise of e-commerce has changed how we ship things. Instead of handwriting addresses on brown boxes, people now use printed shipping labels with barcodes and tracking numbers. Carriers like USPS, UPS, FedEx, and DHL all accept home-printed labels. This shift makes sense because it is faster, cleaner, and more professional.
When you print your own shipping label, you control the entire process. You pick the carrier, select the service level, and pay the exact postage amount. No guesswork involved. Plus, most platforms automatically generate a tracking number, so you and your customer can monitor the package in real time.
What You Need to Print Your Own Shipping Label at Home
Getting started with DIY shipping labels is easier than you might expect. You need a few basic tools, and you can have everything up and running in under an hour. Here is what you will need.
A Computer or Mobile Device
You need a device to access shipping software or carrier websites. Most people use a laptop or desktop computer, but you can also use a tablet or smartphone. The key is a stable internet connection. All major carriers offer online platforms where you can create and pay for labels directly.
A Printer
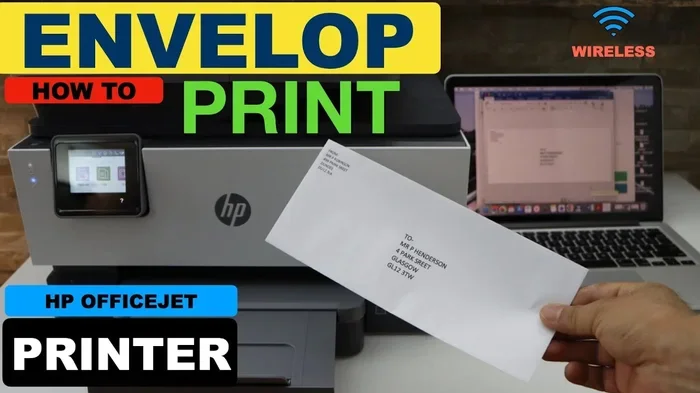
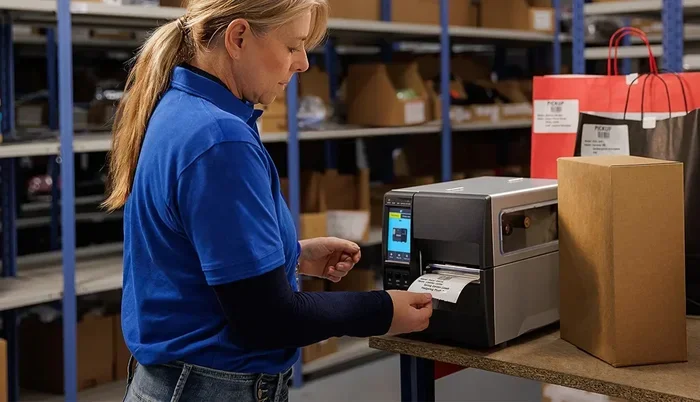
You have two main options here. A standard inkjet or laser printer works great for occasional use. You simply print the label on regular paper or adhesive label sheets. For frequent shippers, a dedicated thermal label printer is a game changer. These printers use heat to print on special label rolls, so you never run out of ink.
Thermal printers like the Zebra GC420t or Rollo Shipmate are popular choices. They print crisp barcodes and text every single time. The upfront cost is higher than a regular printer, but the savings on supplies add up fast.
Label Paper or Adhesive Sheets
If you use a standard printer, you need adhesive label paper. Brands like Avery offer sheets specifically designed for shipping labels. These sheets come in standard sizes like 4×6 inches, which fit most carrier requirements. Make sure you buy the right size for your printer, whether it is letter-size or A4.
Shipping Software or an Online Platform
You need a way to generate the label. Several options exist:
- Carrier websites: USPS Click-N-Ship, UPS WorldShip, and FedEx Ship Manager let you create labels for free.
- Third-party platforms: Services like Shippo, Pirate Ship, and Stamps.com compare rates across carriers and let you print labels at home.
- E-commerce integrations: If you sell on Shopify, Etsy, or Amazon, built-in shipping tools generate labels directly from your dashboard.
A Scale to Weigh Your Package
Accurate weight determines your shipping cost. A basic digital scale costs under 30 dollars and pays for itself quickly. Simply place your sealed package on the scale and enter the weight into the shipping platform. The system calculates the exact rate.
Step-by-Step Guide to Printing Your Own Shipping Label
Now that you have your tools ready, let us walk through the actual process. Follow these steps and you will have a printed label in minutes.
Step 1: Weigh and Measure Your Package
Place your packed box on the scale. Write down the weight in ounces or pounds. Also measure the length, width, and height. Some carriers charge based on dimensional weight, so accurate measurements matter. This step ensures you get the right shipping rate and avoid surprises.
Step 2: Choose a Carrier and Service
Log into your preferred shipping platform. Select the carrier and service type. For example, USPS offers First Class, Priority Mail, and Media Mail. UPS and FedEx provide Ground, 2-Day, and Next-Day options. Compare rates and delivery speeds to find the best fit for your needs.
Step 3: Enter Shipping Details
Type in the sender address and the recipient address. Double-check every detail. A single typo in the zip code or apartment number can cause delivery delays. Most platforms save your address book, so returning customers get fast label creation.
Step 4: Pay for Postage
After entering the addresses, the platform displays the total postage cost. Pay using a credit card, debit card, or PayPal. The cost depends on the carrier, service level, weight, and destination. Domestic shipments within the United States are generally cheaper than international packages.
Step 5: Print the Label
Click the print button. Use quality paper or adhesive label stock for the best results. Make sure the printer settings match the label size. A 4×6 inch label is the standard for most carriers. Print a test page first if you are unsure about the alignment.
Step 6: Attach the Label to Your Package
Peel off the adhesive backing and place the label on the largest, flattest surface of the box. Avoid placing it over seams, tape edges, or barcodes. The label needs to stay flat and visible for scanning. If the label gets damaged during transit, the carrier may not be able to track your package.
Pros and Cons of Printing Your Own Shipping Labels
Like any approach, DIY shipping labels come with advantages and a few drawbacks. Let us look at both sides honestly.
The Advantages
- Convenience: Print labels anytime, day or night, without leaving your home.
- Cost savings: Online platforms often offer discounted rates compared to counter pricing at the post office.
- Professional appearance: Clean, printed labels look more professional than handwritten ones.
- Tracking built in: Every label includes a tracking number automatically.
- Time efficiency: Batch printing lets you label multiple packages in minutes.
- Flexibility: You can compare rates across carriers and choose the best option each time.
The Drawbacks
- Upfront costs: A thermal printer and label paper require an initial investment.
- Learning curve: Setting up shipping software takes a little time and patience.
- Printer issues: Inkjet printers can smudge if the label gets wet during transit.
- Mistakes happen: Wrong addresses or incorrect weights lead to wasted labels and extra costs.
Overall, the pros far outweigh the cons for most people. Even occasional shippers benefit from the convenience and savings that come with printing your own shipping label.
Common Mistakes to Avoid When Printing Shipping Labels
Even experienced shippers make mistakes. Knowing what to watch out for saves you time, money, and frustration.
Using the Wrong Label Size
Each carrier has preferred label dimensions. USPS and UPS typically use 4×6 inch labels. If you print a label at the wrong size, the barcode may not scan properly. Always check the carrier guidelines before printing. Most shipping platforms let you select the correct size in the settings.
Skipping the Test Print
Always do a test print on plain paper first. Hold the test label up to a window and compare it with the carrier guidelines. This simple step catches alignment issues before you waste an adhesive label. It only takes a few seconds but saves frustration later.
Forgetting to Remove Old Labels
If you reuse a box, always remove the old shipping label completely. Leftover barcodes and addresses confuse sorting machines and can send your package to the wrong destination. Use a label remover or soak the box in warm water to clean off the adhesive.
Not Including a Return Label
For e-commerce sellers, always include a return shipping label inside the package. This improves customer satisfaction and reduces the hassle of return requests. Many platforms let you print return labels alongside the original label in a single batch.
Ignoring Customs Forms for International Shipments
If you ship internationally, you must include a customs form. This document declares the contents and value of your package. Forgetting it can result in delays or returned parcels. Most shipping platforms generate customs forms automatically when you select international delivery.
Expert Tips for Saving Money on Shipping Labels
Printing your own labels opens the door to significant savings. Here are some proven strategies that experienced shippers use every day.
Compare Rates Across Carriers
Do not just stick with one carrier. USPS might be cheapest for a small package going across town, while UPS could be better for a heavier box. Use comparison tools like Pirate Ship or Shippo to see rates side by side. Even a small difference per label adds up to hundreds of dollars over time.
Use Cubic Pricing for Small Packages
USPS offers Cubic pricing for small, heavy packages under one pound. This rate is based on volume rather than weight, which can save you a lot if you ship compact items. Make sure your package fits within the size requirements before selecting this option.
Buy Shipping Supplies in Bulk
Label paper, tape, and boxes cost less when you buy in bulk. Amazon and office supply stores often offer discounts on multi-packs. Stock up during sales and you will always have supplies on hand without paying full price.
Take Advantage of Free Pickup Services
UPS and FedEx offer free package pickup from your home or office. USPS also provides free pickup for Priority Mail shipments. This means you never have to drive to a shipping center just to drop off a package. Schedule a pickup online and have the driver come to you.
Set Up Automated Label Printing
If you run an online store, connect your e-commerce platform to shipping software. This automates label generation for every order. You save hours each week and reduce the chance of human error. Many platforms offer integrations with Shopify, WooCommerce, and Square.
How Tracking and Barcodes Work with Printed Labels
Every printed shipping label contains a barcode that carriers scan at each checkpoint. This barcode links your package to a tracking number in the carrier system. When you print the label, the tracking number is generated automatically.
The barcode holds all the information needed for delivery: destination address, service type, and weight class. Scanners at warehouses, trucks, and delivery vehicles read this barcode to route your package correctly. Without a scannable barcode, your package could get lost or delayed.
This is why label quality matters. Use a good printer and fresh label paper. If the barcode smears or fades, it will not scan. Thermal printers excel here because the heat-based printing creates durable, smudge-proof barcodes that last the entire journey.
For customers, the tracking number provides peace of mind. They can check the status online and know exactly when their package arrives. This transparency builds trust and reduces customer service inquiries. It is one of the biggest benefits of printing your own shipping label over traditional methods.
Frequently Asked Questions
Do I need a special printer to print my own shipping label?
No, you do not need a special printer for occasional use. Any standard inkjet or laser printer works fine with adhesive label sheets. However, if you ship frequently, a thermal label printer produces cleaner barcodes and saves you from buying ink constantly.
Can I print a shipping label on regular paper?
You can print on regular paper, but you must tape it securely to the box. This method is not recommended because the label can peel off or get damaged during transit. Adhesive label sheets or thermal label rolls are much more reliable and professional.
How much does it cost to print a shipping label at home?
The cost depends on the carrier, package weight, and destination. Domestic labels typically range from 5 to 25 dollars. You can find even lower rates through third-party platforms like Pirate Ship, which offer discounted USPS and UPS rates with no monthly fee.
Is it cheaper to print my own shipping label?
Yes, in most cases. Online shipping platforms offer discounted rates that are lower than counter pricing at the post office or retail shipping stores. You also save on gas and time by not having to visit a physical location.
Can I print a return label for my customers?
Absolutely. Most shipping platforms let you generate return labels easily. You can include a pre-printed return label inside every package. This improves the customer experience and encourages repeat purchases for online sellers.
What happens if I print a label with the wrong address?
If the package has not been scanned yet, you may be able to intercept and redirect it. Contact the carrier immediately with your tracking number. Some carriers offer address correction services for an additional fee. To avoid this, always double-check the address before printing.
Final Thoughts
Can I print my own shipping label? The answer is a resounding yes. Whether you are a casual shipper or a growing business owner, printing your own shipping label puts you in control of the entire process. You save money, save time, and deliver a more professional experience to your customers.
The tools you need are simple and affordable. A printer, label paper, a digital scale, and a shipping platform are all it takes. Follow the steps outlined in this guide, avoid the common mistakes, and apply the expert tips for saving money. Before long, printing labels will feel like second nature.
Start small if you are new to this. Print your first label for a personal package and get comfortable with the process. Once you see how easy and efficient it is, you will wonder why you ever waited. Print your own shipping label today and experience the difference for yourself.
With the right setup and a little practice, you will handle shipping like a pro. Your packages will arrive on time, look professional, and include tracking from start to finish. That is the power of DIY shipping labels, and it is available to anyone willing to try.