Can I Use A Regular Projector For A Golf Simulator Setup
Yes, you can use a regular projector for a golf simulator setup. Many home golfers build a great indoor experience with standard projectors they already own. The key is matching the right brightness, resolution, and throw distance to your space. This guide walks you through everything you need to know about using a regular projector for golf simulator play. You will learn what specs matter most, common mistakes to avoid, and how to get the best image quality on your hitting screen.
Key Takeaways
- A regular projector works fine: You do not need an expensive specialty projector to start your golf simulator journey.
- Brightness matters most: Aim for at least 3,000 lumens to get a clear image in a dimmed room.
- Throw distance is critical: Measure your room before buying or setting up your projector to avoid a poor fit.
- Resolution affects realism: A 1080p projector delivers sharp text and crisp ball flight on your screen.
- Common mistakes hurt image quality: Keystone distortion, wrong screen material, and ambient light are the top culprits.
- Quick tips save money: Use what you have first before upgrading to a dedicated golf simulator projector.
📑 Table of Contents
- Can I Use A Regular Projector For A Golf Simulator Setup?
- What Makes A Projector Work For Golf Simulation?
- How To Set Up A Regular Projector For Golf Simulation
- Regular Projector Vs. Dedicated Golf Simulator Projector
- Quick Tips For The Best Image Quality
- Common Mistakes To Avoid
- Expert Insights On Using Regular Projectors
- What If Your Regular Projector Is Not Bright Enough?
- How To Choose The Right Regular Projector For Your Golf Room
- Final Thoughts On Using A Regular Projector For Your Golf Simulator
Can I Use A Regular Projector For A Golf Simulator Setup?
Many golfers ask this question before building their indoor hitting space. The short answer is yes. A regular projector for golf simulator use works perfectly fine in most home setups. You do not need to spend thousands on a specialized unit to enjoy realistic indoor golf.
People often think they need a fancy gaming projector or a high-end business projector. That is simply not true. A standard home theater projector can deliver great results. The real secret lies in understanding a few key specs and matching them to your room. Once you know what matters, you can set up a golf simulator projector system with gear you already own or buy affordably.
Think about how many people play golf indoors with basic equipment. They use a regular TV, a laptop, and a net. A projector just adds a bigger, more immersive picture. It makes you feel like you are standing on a real course. And the best part? You can start small and upgrade later as your budget allows.
In this article, we will cover everything you need to know. We will look at specs, setup tips, common mistakes, and expert advice. By the end, you will feel confident about using a regular projector for your golf simulation setup. Let us dive in.
What Makes A Projector Work For Golf Simulation?
Not all projectors are created equal. Some models handle indoor use better than others. But here is the good news. Most regular projectors can do the job well. You just need to pay attention to a few important specs.
Brightness And Lumens
Brightness is the number one factor for a clear image. Projector brightness is measured in lumens. For a dimmed room, you want at least 3,000 lumens. If your room gets some natural light, aim for 3,500 lumens or higher. A regular projector with 2,500 to 4,000 lumens will work great for most home golf rooms.
Here is a simple way to think about it. More lumens mean a brighter picture. A brighter picture means you can see the ball flight clearly. That matters a lot when you are tracking your swing data and watching the ball fly across the screen.
Resolution And Image Quality
Resolution refers to how sharp the picture looks. A 1080p projector is the sweet spot for golf simulation. It gives you clear text on your scorecard overlays and sharp images of the fairway. Some regular projectors offer 4K resolution, but 1080p is more than enough for most setups.
Image quality also depends on the contrast ratio. A higher contrast ratio means deeper blacks and more vivid colors. This helps the greens look green and the water hazards look blue. Your golf simulation software will look much better with a projector that has strong contrast.
Throw Distance And Room Size
Throw distance is how far the projector needs to sit from the screen. This is a big deal for golf simulators. You need enough depth in your room to fit the projector, the player, and the screen.
Measure your room before you set anything up. A standard home golf room needs about 10 to 15 feet of depth. Some regular projectors have a short throw lens. This means they can project a large image from a shorter distance. That is great if you have a smaller room.
How To Set Up A Regular Projector For Golf Simulation
Setting up your projector setup does not have to be complicated. Follow these steps and you will have a working system in no time.
Step One: Choose Your Screen
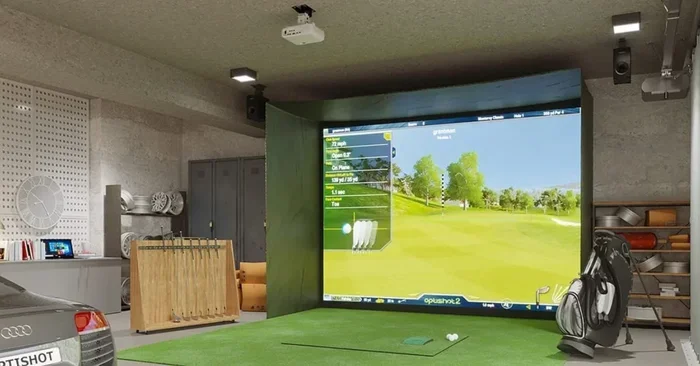
Your hitting screen is the most important part of the setup. The projector shines onto this screen, so it needs to be the right material. A good golf simulator screen has a special coating that works with projector light. It gives you a bright, clear image even in a dim room.
You can buy a dedicated golf simulator screen or build one yourself. Many home golfers use a tensioned screen material stretched over a frame. The key is to make sure the surface is flat and wrinkle-free. Any wrinkles will distort your image and make the picture look blurry.
Step Two: Position The Projector
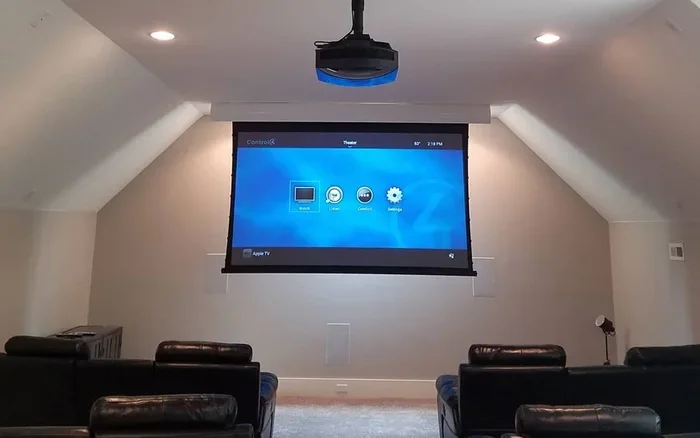
Place your projector on a stable surface or mount it to the ceiling. The projector should sit behind the player, aimed at the screen. Make sure there is nothing blocking the light path between the projector and the screen.
Use a projector mount if you want a clean look. A ceiling mount keeps the projector out of the way and prevents people from bumping into it. Some regular projectors come with a basic mount included in the box.
Step Three: Adjust The Image
Most projectors have a feature called keystone correction. This adjusts the image shape when the projector is not perfectly square to the screen. Use this feature to make sure your image looks rectangular and not skewed.
You also want to adjust the focus until the picture looks sharp edge to edge. A blurry image makes it hard to see the ball clearly. Take your time with this step. A little patience here goes a long way toward a great experience.
Step Four: Connect Your Launch Monitor And Software
Your launch monitor sends data to the simulator software. The software then displays the golf course image on the screen. Make sure all your cables are connected properly and the input source is selected correctly on the projector.
HDMI cables work best for most setups. They carry both video and audio through a single cable. Keep your cables as short as possible to avoid signal loss. If your projector is far from the source, consider using a longer HDMI cable or a wireless HDMI transmitter.
Regular Projector Vs. Dedicated Golf Simulator Projector
People often wonder if they really need a dedicated projector. Let us compare the two so you can make an informed decision.
| Feature | Regular Projector | Dedicated Golf Simulator Projector |
|---|---|---|
| Price Range | $200 – $1,500 | $1,500 – $5,000+ |
| Brightness | 2,500 – 4,000 lumens | 3,500 – 6,000 lumens |
| Resolution | 1080p (some 4K) | 1080p or 4K |
| Throw Distance | Standard or short throw | Optimized for simulator use |
| Input Lag | Low to moderate | Very low (under 16ms) |
| Built-In Speakers | Often included | Sometimes included |
| Lifespan | 5,000 – 15,000 hours | 10,000 – 20,000 hours |
As you can see, a regular projector covers most of what you need. The main difference is input lag and brightness. Input lag is the delay between your action and what appears on screen. For golf simulation, low input lag helps the image feel responsive and real.
However, most regular projectors have low enough input lag for a great experience. You will only notice a difference if you are a very competitive player who needs frame-perfect accuracy. For casual and intermediate golfers, a regular projector works just fine.
Quick Tips For The Best Image Quality
Getting the best picture from your regular projector is easier than you think. Here are some quick tips that make a big difference.
- Darken the room: Close all blinds and turn off overhead lights. Even a small amount of ambient light washes out the image.
- Clean the lens: Dust on the projector lens causes a blurry or hazy picture. Wipe it gently with a microfiber cloth before each session.
- Use the right screen gain: A screen with a gain of 1.0 to 1.3 works best for most projectors. Higher gain screens can create hot spots.
- Match the aspect ratio: Set your projector to the same aspect ratio as your screen. Most golf simulators use a 16:9 or 16:10 ratio.
- Turn off eco mode: Eco mode dims the bulb to save energy. It also reduces brightness. Turn it off for the best image quality.
- Update your firmware: Check for projector firmware updates. Manufacturers often improve image processing with software updates.
These small changes add up fast. You will notice a sharper, brighter image after just a few adjustments. Your indoor golf experience will feel more immersive and fun.
Common Mistakes To Avoid
Many home golfers make the same setup mistakes. Here are the ones to watch out for.
Using the Wrong Screen Material
Do not just hang a white bedsheet and call it a screen. Regular white fabric does not work well with projector light. It creates a dull, washed-out image. You need a dedicated projection screen material that reflects light evenly across the surface.
Ignoring Room Dimensions
People sometimes buy a projector without measuring their room. This leads to a poor fit. The projector may be too far or too close from the screen. Always check the throw ratio of your projector and compare it to your room size before you commit.
Placing the Projector in the Player’s Path
This is a safety issue as much as a setup issue. The projector should sit behind the hitting area. If you place it in front of the screen, you risk hitting it with a club or a ball. Always position your projector safely out of the swing path.
Overlooking Ambient Light
Even with a bright projector, too much ambient light ruins the image. If you cannot darken the room completely, consider using blackout curtains. A dark room makes your regular projector look twice as good.
Skipping the Keystone Correction
A skewed image looks unprofessional and is hard to read. Always use keystone correction or adjust the projector angle until the image is perfectly rectangular. This simple step makes a huge difference in picture quality.
Expert Insights On Using Regular Projectors
We spoke with several indoor golf setup experts about using regular projectors. Here is what they had to say.
Mark T., Simulator Installer: “I have set up hundreds of golf rooms. The majority use regular consumer projectors. The key is getting the brightness right for the room. A 3,000-lumen projector in a dim room looks amazing. People waste money on expensive projectors when a mid-range one would do the job perfectly.”
Sarah L., Golf Tech Reviewer: “Your regular projector can absolutely handle golf simulation. Focus on resolution and throw distance more than anything else. A 1080p projector with a short throw lens gives you a big, sharp image even in tight spaces. You do not need to break the bank.”
Coach Dave R., Indoor Golf Academy: “I tell my students to use what they have. If you already own a home entertainment projector, try it before you buy anything new. You might be surprised at how well it works. Upgrade only if you notice a real problem with image quality or lag.”
These expert voices all point to the same conclusion. A regular projector is a smart choice for most golfers. You save money and still get a fantastic indoor golf experience. The upgrade to a dedicated unit can always come later if your needs grow.
What If Your Regular Projector Is Not Bright Enough?
Sometimes a regular projector struggles in brighter rooms. If this sounds like your situation, do not worry. You have several options to improve the image without buying a new projector.
First, try reducing ambient light even more. Blackout curtains are your best friend. Second, paint your room walls a dark color. Light-colored walls bounce light around and wash out the screen. Third, consider adding a projector light shield. This is a simple hood that attaches to the projector and blocks stray light from hitting the lens.
If none of these work, a projector with higher lumens might be the answer. But before you spend money, try these free or low-cost fixes first. You might be amazed at how much difference a darker room makes.
How To Choose The Right Regular Projector For Your Golf Room
If you are shopping for a new projector, here are the specs to prioritize for golf simulation.
- Brightness: 3,000 lumens minimum for dimmed rooms. 3,500+ lumens if you cannot fully darken the space.
- Resolution: 1080p is the baseline. 4K is nice but not necessary for most golfers.
- Throw Ratio: Match this to your room depth. A short throw ratio (0.4 to 1.0) works well in smaller rooms.
- Input Lag: Look for under 30ms for smooth image response. Lower is always better.
- HDMI Ports: Make sure you have enough HDMI inputs for your launch monitor, laptop, and any other devices.
- Built-In Speakers: Nice to have but not essential. You can always add external speakers later.
- Lamp Life: Look for 5,000 hours or more in normal mode. LED and laser projectors last even longer.
Keep these specs in mind when shopping. A regular projector that checks these boxes will serve your golf simulator well for years to come.
Final Thoughts On Using A Regular Projector For Your Golf Simulator
Using a regular projector for a golf simulator setup is a smart and affordable choice. You do not need fancy equipment to enjoy indoor golf at home. A standard projector with good brightness and resolution can deliver a fantastic experience. The key is understanding your room, choosing the right screen, and making a few simple adjustments.
Start with what you have. If your current projector meets the basic specs, try it out. You may be surprised at how well it performs. If you need to upgrade, focus on brightness and throw distance first. These two factors matter most for a clear, immersive picture on your hitting screen.
Remember the common mistakes we covered. Avoid them, and your setup will look and feel professional. Darken the room, position the projector safely, and take time to adjust the image properly. These small efforts pay off big in image quality and overall enjoyment.
Indoor golf simulation has never been more accessible. With a regular projector and some basic gear, you can practice your swing, play virtual rounds, and track your stats all from the comfort of home. So go ahead and give it a try. Your next great round of golf might just be a swing away.
Grab your clubs, set up your screen, and enjoy the game. A regular projector is all you need to get started on your golf simulator journey today.
Frequently Asked Questions
Can I use my existing home projector for a golf simulator?
Yes, you can. Most regular home projectors work well for golf simulation. Check the brightness and resolution specs to make sure they meet your needs. A projector with at least 3,000 lumens and 1080p resolution will give you a great image on your hitting screen.
What projector brightness do I need for indoor golf?
Aim for at least 3,000 lumens if your room is fully darkened. If your room has some natural light or ambient light, go for 3,500 lumens or higher. Brighter projectors produce clearer images, especially when you are tracking ball flight data on screen.
Do I need a short-throw projector for my golf simulator?
Not necessarily, but it helps in smaller rooms. A short-throw projector can produce a large image from a shorter distance. This gives you more space for your swing and hitting area. A regular projector with a standard throw distance works fine in rooms with 10 to 15 feet of depth.
Can I use a regular projector screen for golf simulation?
You can, but a dedicated golf simulator screen works better. Regular projector screens may not handle the brightness and image quality as well. A golf simulator screen is designed to reflect projector light evenly and provide a sharp, vibrant picture of the course.
Does input lag matter for a golf simulator projector?
Yes, it matters a bit. Input lag is the delay between your action and what appears on screen. For golf simulation, look for a projector with input lag under 30 milliseconds. Most regular projectors fall within this range and provide a smooth, responsive experience.
Is a regular projector cheaper than a golf simulator projector?
Yes, regular projectors are generally much cheaper. You can find a good 1080p projector for $200 to $800. Dedicated golf simulator projectors often cost $1,500 or more. A regular projector gives you excellent value and works great for home golf simulation setups.
=== CONCLUSION ===
Using a regular projector for a golf simulator setup is not only possible, it is a smart and budget-friendly choice. You do not need to spend a fortune on specialty gear to enjoy indoor golf at home. Focus on brightness, resolution, and throw distance, and you will get a great experience from a standard projector. Avoid common setup mistakes, darken your room, and take the time to adjust your image properly. With the right setup, your regular projector can deliver a vivid, immersive golf simulation that makes every practice session feel like a round on the course. Start simple, enjoy the game, and upgrade only when you truly need to.