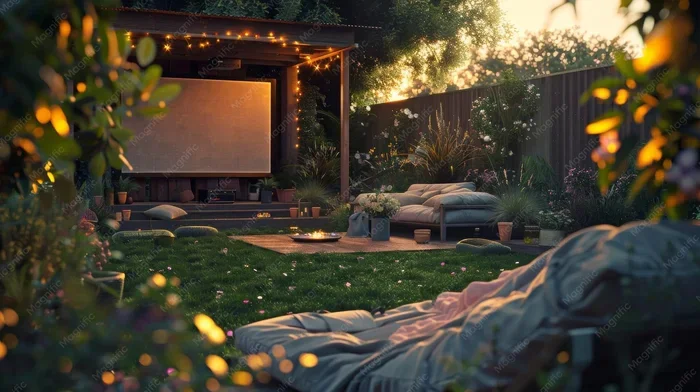
Do You Need A Screen For An Outdoor Projector Setup
You don’t always need a dedicated projector screen for outdoor use. A white wall, a bedsheet, or even a portable inflatable screen can work great depending on your setup. The right choice depends on your budget, space, and how much ambient light you deal with at night.
Key Takeaways
- You can skip a screen: A flat white wall or a bedsheet can serve as a decent projection surface for casual outdoor movie nights.
- Inflatable screens are popular: They are easy to set up, affordable, and deliver a smooth, wrinkle-free picture every time.
- DIY screens save money: Building your own screen with PVC pipes and a projector fabric is a budget-friendly option that works surprisingly well.
- Ambient light matters: The brighter your environment, the more important screen gain and projector brightness become for a clear image.
- Screen size affects experience: A bigger screen creates a more immersive feel, but you need enough throw distance and darkness to make it work.
- Permanent setups are an option: If you host outdoor movies often, a wall-mounted or frame-mounted screen saves setup time every time.
📑 Table of Contents
- Do You Really Need A Screen For An Outdoor Projector?
- Your Outdoor Screen Options Compared
- Projector Placement And Screen Positioning Tips
- How To Build A Simple DIY Outdoor Projector Screen
- Common Mistakes People Make With Outdoor Projector Screens
- Expert Tips For The Best Outdoor Projector Experience
- Final Thoughts: Do You Need A Screen?
Do You Really Need A Screen For An Outdoor Projector?
Here is the short answer. No, you do not always need a screen for an outdoor projector. You can project onto a white wall, a bedsheet, or even a flat piece of plywood. But here is the longer answer. A proper screen makes a huge difference in picture quality, color accuracy, and overall viewing experience. If you have ever tried watching a movie on a wrinkled bedsheet, you know exactly what we mean.
Outdoor movie nights are becoming more popular every year. People set up projectors in backyards, on patios, and even at camping trips. The question most beginners ask is whether a screen is essential or just a nice-to-have. The truth is, it depends on your situation. Your budget, your space, and how serious you are about picture quality all play a role. This guide breaks down every option so you can make the best choice for your setup.
Let us start with the basics. A projector sends light onto a surface. That surface can be anything. But not every surface gives you the same result. A dedicated screen is designed to reflect light evenly. This creates a bright, clear, and colorful image. A random wall might have bumps, paint texture, or shadows that distort the picture. So while you can technically skip a screen, you probably should not if you want the best experience.
Why Screen Quality Matters For Outdoor Viewing
Think of it like this. You would not cook a gourmet meal on a dirty pan. The ingredients might be great, but the result suffers. The same goes for projecting an image. Even the most expensive projector will look mediocre on a poor surface. A good outdoor projector screen enhances every detail. Colors pop. Blacks look deeper. The image feels sharp and alive.
Outdoor environments add extra challenges. Moonlight, streetlights, and even neighbor’s porch lights create ambient light. A high-quality screen with good gain helps fight this. It reflects more light back to the viewer. This means your image stays visible even when some outside light is present. Without a proper screen, you might squint through a washed-out picture the entire movie.
Your Outdoor Screen Options Compared
Not all screens are created equal. There are several types to choose from, and each one fits a different kind of setup. Let us walk through the most popular options so you can find what works best for you.
Inflatable Projector Screens
Inflatable screens are the go-to choice for most families. They are easy to set up. You plug them in, and a fan blows them up in minutes. They come in sizes ranging from 80 inches to over 120 inches diagonal. The surface is smooth and wrinkle-free, which means a clean picture every time.
Most inflatable screens are lightweight and portable. You can pack one in a carrying bag and bring it to a tailgate or a camping trip. They are also affordable. You can find a solid 100-inch inflatable screen for under 100 dollars. If you host outdoor movie nights once in a while, this is probably your best bet.
One thing to watch out for is wind. An inflatable screen can flop around on a breezy night. Some models come with stakes or sandbags to keep them stable. Always check the weather before you set up. A gusty evening can turn your movie night into a frustrating experience fast.
DIY Outdoor Projector Screens
If you like building things or saving money, a DIY screen is a fantastic option. You can build a frame from PVC pipes or wooden boards. Then stretch a white projector screen fabric over it. The result is a rigid, wrinkle-free surface that looks almost like a store-bought screen.
DIY screens are highly customizable. You can make them any size you want. Want a massive 150-inch screen for your big backyard? Go for it. The material cost is usually very low. A roll of projector screen fabric costs around 30 to 50 dollars. Add some PVC pipe and connectors, and you have a full screen for under 50 dollars total.
The downside is setup time. Unlike an inflatable screen that takes five minutes, a DIY screen requires assembly every time. You also need a flat wall or frame to attach it to. But if you are willing to put in a little effort, the picture quality can rival screens that cost three times as much.
Portable Tripod Screens
Tripod screens are the middle ground between inflatable and DIY options. They come with a foldable tripod stand and a pull-up screen material. Setup is fast, usually under two minutes. They are stable and do not need inflation. Most tripod screens range from 60 to 100 inches in size.
These screens are great for people who move their setup around often. You can set one up on a patio, take it down, and store it in a closet. They are more durable than inflatable screens because there is no fabric to puncture. The trade-off is that they can be heavier to carry, and the screen material sometimes has slight wrinkles.
Walls And Flat Surfaces As Screens
Can you just use a wall? Absolutely. A flat exterior wall with smooth paint works surprisingly well for casual viewing. The key is to make sure the surface is as smooth and white as possible. Dark or textured paint will absorb light and dull your image. If your wall is not white, you can always hang a white bedsheet over it.
This is the most budget-friendly option by far. You already own the wall. You might already own a bedsheet. All you need is your projector and a clear line of sight. Many people who host backyard movie nights for the first time start with this method. It works fine for a casual evening with friends. But if you want a cinematic experience, a dedicated screen is a better choice.
| Screen Type | Avg. Cost | Setup Time | Picture Quality | Portability |
|---|---|---|---|---|
| Inflatable Screen | $40 – $150 | 5 minutes | Good to Great | Excellent |
| DIY Screen | $30 – $80 | 15 – 30 minutes | Great to Excellent | Moderate |
| Tripod Screen | $50 – $200 | 2 minutes | Good to Very Good | Good |
| Wall / Bedsheet | Free – $20 | 1 – 2 minutes | Fair to Good | N/A |
| Permanent Wall-Mounted | $100 – $500 | One-time install | Excellent | Poor |
Projector Placement And Screen Positioning Tips
Where you place your projector matters just as much as the screen itself. A poorly positioned projector can ruin even the best screen. Let us cover some simple rules that make a big difference.
Distance matters. Every projector has a specific throw ratio. This tells you how far the projector needs to be from the screen to produce a given image size. Check your projector manual or look up the throw ratio online. A short-throw projector can create a large image from just a few feet away. A standard-throw projector needs more space. Measure your setup before you buy anything.
Height placement is key. Your projector should be level with the center of the screen or slightly below. If you place it too low, the image gets distorted at the top. Too high, and the bottom of the image gets cut off. Most people place their projector on a table or a sturdy chair. Some mount it on a wall or ceiling for a more permanent setup.
Avoid obstacles in the light path. Make sure no trees, poles, or people walk between the projector and the screen during the movie. Even a brief shadow across the image can be distracting. Choose a clear line of sight and keep the area free of clutter.
One thing many people overlook is the projector itself. If you are looking to upgrade or buy a new one, check out this guide on using a projector as a TV. It covers important factors like resolution, brightness, and connectivity that apply to outdoor setups as well.
Dealing With Ambient Light Outdoors
Outdoor projection happens in the open air, which means you cannot control the light. This is the biggest difference between indoor and outdoor setups. Here is how to handle it.
First, choose the darkest part of your yard. Trees, fences, and even your house can block stray light. Position your screen where the least amount of ambient light hits it. A shaded area is always better than a spot hit by porch lights or streetlamps.
Second, start your movie as soon as it gets dark enough. Do not wait until it is fully black outside. The earlier you start, the less ambient light you deal with. A good rule of thumb is to begin when you can barely see the projection surface without the projector on.
Third, consider screen gain. Screen gain measures how much light a screen reflects back to the viewer. A higher gain screen reflects more light and looks brighter in ambient conditions. However, high-gain screens can have a narrower viewing angle. This means people sitting off to the side might not see the image as clearly. For most backyard setups, a gain between 1.0 and 1.3 works well.
How To Build A Simple DIY Outdoor Projector Screen
Building your own outdoor projector screen is easier than you think. Here is a step-by-step guide that anyone can follow over a weekend.
What You Will Need
- A PVC pipe cutter or hacksaw
- 1-inch PVC pipes and elbow connectors
- Projector screen fabric (white, matte finish)
- A staple gun or zip ties
- A level and measuring tape
- Ground stakes or sandbags for stability
Step By Step Instructions
- Measure and cut your frame. Decide on your screen size. A 100-inch diagonal screen is a great starting point for most backyards. Cut your PVC pipes to the right lengths for the top, bottom, and two sides of the frame.
- Assemble the frame. Connect the pipes using elbow connectors. Make sure the frame is perfectly square and level. A crooked frame means a crooked image.
- Attach the screen fabric. Lay the fabric over the frame. Use a staple gun to secure it along the edges. Pull the fabric tight to avoid wrinkles. Zip ties work well too if you do not want to puncture the fabric.
- Set up the frame outside. Place the frame on a flat surface. Use ground stakes or sandbags to keep it from tipping over. Make sure the frame is stable and will not wobble during the movie.
- Position your projector. Set up your projector at the correct throw distance. Turn it on and adjust the focus and keystone settings until the image fills the frame evenly.
This basic setup works for casual movie nights and costs well under 50 dollars. If you want a more permanent solution, you can mount the frame to a wall or build a freestanding stand with a hinged base for easy storage.
Common Mistakes People Make With Outdoor Projector Screens
Even with the best intentions, outdoor projection can go wrong. Here are the most common mistakes and how to avoid them.
Choosing a screen that is too small. It is tempting to go with a compact screen to save space. But a small screen on a large lawn feels underwhelming. People in the back rows cannot see the details. When in doubt, go bigger. A 100-inch screen is a sweet spot for most backyard setups.
Ignoring the projector’s brightness. An outdoor screen needs a bright projector to combat ambient light. A low-lumen projector will produce a faint, washed-out image. For outdoor use, look for a projector with at least 2,000 lumens. More is better, especially if your yard gets any nearby light.
Forgetting about audio. A great picture means nothing if the sound is terrible. Most portable projectors have weak built-in speakers. Consider adding a portable Bluetooth speaker or connecting external speakers through your projector’s audio output. Good sound makes a huge difference in the overall experience.
Not testing before the big night. Set up your entire system at least a day or two before your movie event. This gives you time to fix any issues with placement, focus, or screen wrinkles. Nothing ruins a movie night faster than scrambling to fix problems while your guests wait.
If you are thinking about connecting your phone to the projector for streaming, check out this guide on connecting your phone to a projector with HDMI. It covers the cables and adapters you need for a seamless setup.
Expert Tips For The Best Outdoor Projector Experience
Here are some pro tips that take your outdoor setup from good to great.
- Use a white bedsheet as a test surface first. Before you invest in a screen, project onto a bedsheet hung on a wall. This helps you find the best position and spot any light issues.
- Paint a wall white if you have one. If you have an exterior wall that is not white, a coat of flat white outdoor paint transforms it into a projection surface instantly.
- Point the projector away from viewers. Nobody wants to sit in the projector beam. Position the projector behind the seating area so people can watch without squinting or blocking the light.
- Use a white sheet behind the screen for extra brightness. Hanging a white sheet behind your screen can bounce extra light back toward the viewing area. This is a simple trick that boosts brightness without extra cost.
- Keep the projector lens clean. Outdoor environments bring dust, pollen, and insects. A dirty lens creates a blurry or hazy image. Wipe the lens gently with a microfiber cloth before each use.
If you plan to store your projector on a shelf or elevated surface, this article about placing a projector on a shelf has helpful tips for safe and effective storage.
Final Thoughts: Do You Need A Screen?
So, do you need a screen for an outdoor projector setup? The honest answer is it depends on what kind of experience you want. For a quick backyard movie with friends, a white wall or bedsheet works fine. For a regular movie night or a special event, investing in a proper screen makes a noticeable difference.
Inflatable screens offer the best balance of convenience and quality for most people. They are affordable, easy to set up, and deliver a clean picture. DIY screens are the best option if you want maximum picture quality on a budget and do not mind a little assembly work.
Whatever you choose, the most important thing is to just get out there and start watching movies under the stars. Outdoor projection is one of the best ways to bring people together. A good movie, some popcorn, and a clear night sky create memories that last a lifetime. You do not need a perfect setup to enjoy it. You just need the willingness to try.
Start simple. Use what you already have. Upgrade as you go. The best outdoor projector setup is the one that actually gets used.
Frequently Asked Questions
Can I use a white bedsheet as an outdoor projector screen?
Yes, a white bedsheet works as a basic outdoor projector screen. Hang it on a wall or frame it with PVC pipes for a tighter surface. The picture will not be as crisp as a dedicated screen, but it is a great free option for casual movie nights.
What size outdoor projector screen should I get?
A 100-inch diagonal screen is ideal for most backyard setups. It is large enough to feel immersive but still fits in most yards. Consider your seating distance when choosing a size. The farther your seating area, the bigger the screen you can comfortably use.
Do I need a special projector for outdoor use?
You need a projector with at least 2,000 lumens for outdoor use. Higher lumens help fight ambient light and keep the image bright and clear. Most standard indoor projectors work outdoors at night as long as the area is dark enough.
Can I use an inflatable screen indoors too?
Yes, inflatable projector screens work both indoors and outdoors. They are lightweight and easy to move around. Just make sure you have enough ceiling height indoors and enough space for the screen to inflate fully without obstruction.
How do I keep my outdoor projector screen from blowing over in the wind?
Use ground stakes, sandbags, or heavy bases to anchor your screen frame. For inflatable screens, make sure the air valve is secure and the fabric is taut. Placing the screen behind a windbreak like a fence or hedge also helps stabilize it during breezy evenings.
Is it better to project onto a wall or a dedicated screen?
A dedicated screen gives you a smoother, brighter, and more color-accurate image compared to a wall. Walls often have texture, paint imperfections, or shadows that degrade the picture. However, for casual viewing, a smooth white wall works perfectly well and costs nothing extra.
=== END OF ARTICLE ===