Can You Dunk A Keyboard In Water Without Ruining It
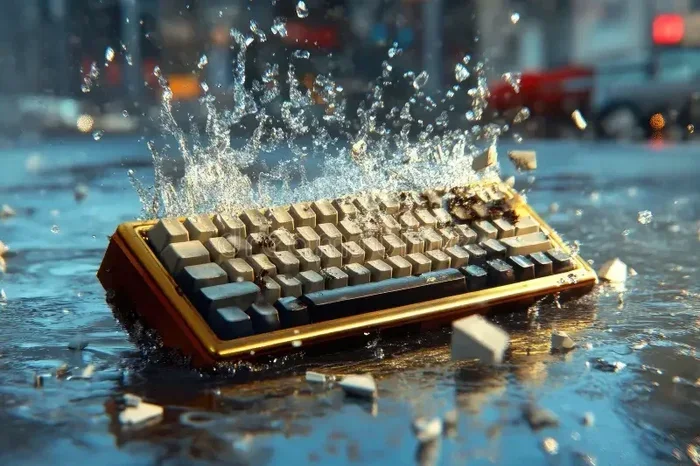
Many people wonder if you can dunk a keyboard in water and still use it afterward. The short answer is yes, but only if you act fast and follow the right steps. Water damage is one of the leading causes of keyboard failure, yet many devices survive complete submersion with proper care. This guide walks you through everything you need to know about dunking a keyboard in water, from immediate response to long-term recovery. You will learn proven drying techniques, common mistakes to avoid, and how different keyboard types handle liquid exposure.
This is a comprehensive guide about Can You Dunk A Keyboard In Water.
Key Takeaways
- Acting fast is critical: The sooner you dry a keyboard after water exposure, the better its chances of survival.
- Not all keyboards are equal: Mechanical and membrane keyboards react very differently to water submersion.
- Never use heat to dry: Hair dryers and ovens can melt internal components and cause more damage than water itself.
- Disassembly helps enormously: Removing keycaps and internal parts allows for thorough drying and cleaning.
- Patience pays off: Rushing to power on a wet keyboard is the number one mistake people make.
- Prevention is easy: Waterproof keyboard covers and smart placement can keep your keyboard safe from future spills.
[FEATURED_IMAGE_PLACEHOLDER]
You have probably seen someone drop their keyboard in a glass of water or spill a drink all over their desk and wonder, “Can you dunk a keyboard in water without ruining it?” It is a fair question. Keyboards are electronic devices filled with sensitive circuits, and water and electronics do not mix — or do they? The truth is more surprising than most people think.
Every year, thousands of keyboards survive water submersion thanks to quick thinking and the right approach. Whether it is a full-sized mechanical board, a compact tenkeyless layout, or a cheap membrane keyboard from the office, the principles of rescue remain the same. This article breaks down exactly what happens when water meets a keyboard, how to save one, and what you can do to prevent future accidents.
We will cover everything from the science behind liquid damage to step-by-step recovery instructions you can follow right now. By the end, you will feel confident about handling a waterlogged keyboard like a pro. Let us dive in — pun fully intended.
What Happens When You Dunk A Keyboard In Water
The Science Behind Keyboard Water Damage
When you dunk a keyboard in water, several things happen almost instantly. Water bridges the tiny gaps between electrical contacts on the circuit board. This creates what is called a short circuit. A short circuit means electricity flows where it should not, which can fry individual switches or the entire controller board.
But here is the good news. Pure distilled water is actually a poor conductor of electricity. It is the minerals, salts, and impurities found in tap water and drinks that cause the real damage. This is why spilling a sugary soda on a keyboard is often worse than dunking it in clean water.
The speed of damage depends on a few factors:
- Type of liquid: Clean water is less harmful than coffee, juice, or soda.
- Duration of submersion: A quick dunk is less damaging than leaving it underwater for hours.
- Keyboard type: Mechanical keyboards with exposed switches may short out faster than sealed membrane boards.
- Power state: A keyboard that is plugged in and powered on during submersion suffers far worse damage.
Immediate Effects Of Submersion
As soon as a keyboard goes under water, you may notice a few things. The keys might feel mushy or unresponsive. LEDs may flicker or stop working entirely. If the keyboard was plugged in, you might hear a faint pop or see a small spark. These are all signs that a short circuit has occurred.
However, many of these effects are temporary. Once the water drains and the board dries, electrical connections often return to normal. The real threat comes from corrosion. Water left inside a keyboard for days or weeks can begin to eat away at copper traces and solder joints. This is why speed matters so much when rescuing a wet keyboard.
Can You Dunk A Keyboard In Water And Still Use It
Why Some Keyboards Survive
Yes, you absolutely can dunk a keyboard in water and still use it afterward — but only under the right conditions. Many people have successfully rescued their keyboards from full submersion. The key is removing all moisture before powering the device back on.
Some keyboards are even designed to handle water exposure. Water resistant keyboards and waterproof keyboard models use sealed enclosures and protective coatings on their circuit boards. These boards often carry an IP rating, which measures resistance to dust and water. An IP67-rated keyboard, for example, can survive full submersion in water for up to 30 minutes.
Even standard office keyboards can survive a dunk if you follow proper recovery steps. The survival rate is surprisingly high when people resist the urge to plug the keyboard back in too soon.
When Dunking A Keyboard Is A Bad Idea
There are situations where dunking a keyboard in water is a terrible idea. If the keyboard is already damaged or old, water exposure can push it over the edge into complete failure. Keyboards with visible rust, cracked casings, or corroded contacts should probably be replaced instead of rescued.
Also, never dunk a keyboard that is currently powered on. Always unplug it first. Submerging a live keyboard dramatically increases the risk of permanent circuit board damage. The electrical current combined with water creates a much more destructive short circuit than water alone.
Another scenario to avoid is dunking wireless keyboards with built-in lithium batteries. Water can damage the battery cells, leading to swelling, leaks, or even fire hazards. If you have a wireless keyboard, extra caution is needed during the drying process.
Step-By-Step Guide To Saving A Waterlogged Keyboard
Step 1: Disconnect And Power Off Immediately
The very first thing you must do is unplug the keyboard from the computer. If it is wireless, turn it off and remove the batteries if possible. This prevents any electrical current from flowing through wet circuits, which is what causes the most severe damage.
Do not try to press any keys while the keyboard is wet. This can push water deeper into the internal layers and spread moisture to areas that were previously dry. Resist the urge to test it — trust the process and move to the next step.
Step 2: Remove Keycaps And External Parts
If your keyboard has removable keycaps, take them all off. Mechanical keyboards make this especially easy since each keycap pops off with a keycap puller or gentle tug. Removing keycaps exposes the switches and allows water to escape from hidden areas.
For laptops and built-in keyboards, this step is trickier. You may need to flip the laptop upside down and gently shake out excess liquid. Do not tilt the laptop at extreme angles, as this can cause water to flow deeper into the chassis toward the motherboard.
Step 3: Drain Excess Water
Hold the keyboard upside down and let gravity do the work. Tap the back of the case gently to encourage water droplets to escape. You can also use a soft cloth or paper towel to absorb moisture from the surface and crevices.
Do not shake the keyboard aggressively. Vigorous shaking can spread water to internal components that were not yet exposed. Gentle, controlled movements work best at this stage.
Step 4: Dry The Keyboard Thoroughly
This is the most important step, and it requires patience. There are several keyboard drying techniques you can use:
- Air drying: Place the keyboard in a well-ventilated area and let it sit for at least 24 to 48 hours. A fan on a low setting can speed up the process.
- Silica gel packets: These moisture-absorbing packets, often found in shoe boxes and electronics packaging, work wonders. Place them around and inside the keyboard.
- Rice method: Burying the keyboard in uncooked rice is a popular trick. Rice absorbs moisture from the air and surrounding surfaces. It is not the most effective method, but it is better than doing nothing.
- Isopropyl alcohol rinse: For keyboards contaminated with sugary or sticky liquids, rinsing with 99% isopropyl alcohol can remove residue and displace water. Alcohol evaporates faster than water and does not conduct electricity.
Never use a hair dryer on high heat. Excessive heat can warp plastic keycaps, melt switch housings, and damage delicate circuit traces. If you must use forced air, use a cool setting only.
Step 5: Inspect And Test
After waiting at least 24 hours, inspect the keyboard carefully. Look for any remaining moisture, corrosion, or debris. Use a soft brush to clean out any dust or residue from the key switches.
Reconnect the keyboard and power it on. Test every key individually. If some keys do not register, there may still be moisture trapped inside. In that case, repeat the drying process for another 12 to 24 hours before testing again.
If the keyboard still does not work after thorough drying, the issue may be permanent keyboard water damage to the internal controller. At that point, replacement is often the most practical solution.
Different Keyboard Types And How They Handle Water
Mechanical Keyboards
Mechanical keyboards are popular among gamers and typists for their tactile feedback and durability. However, they are not inherently water resistant. Each mechanical switch has exposed metal contacts that can corrode quickly when exposed to moisture.
That said, many mechanical keyboard enthusiasts have successfully dunked their boards and recovered them. The key is removing the switches entirely and cleaning the PCB (printed circuit board) with isopropyl alcohol. This level of disassembly is not for everyone, but it is the most thorough approach to keyboard repair after water exposure.
Membrane Keyboards
Membrane keyboards are the most common type found in offices and homes. They use a thin rubber dome or silicone layer beneath the keys to register presses. These keyboards tend to handle water better than mechanical ones because the membrane layer provides some natural insulation against short circuits.
However, membrane keyboards are not waterproof. Prolonged water exposure can still cause the membrane layers to warp, peel, or develop mold. If you spill water on a membrane keyboard, drying it quickly is essential to prevent long-term issues.
Rigid And Split Keyboards
Split ergonomic keyboards and rigid custom boards often have better build quality and tighter case seals. Some premium models use gaskets and O-rings to create a water-resistant barrier around the internal electronics. These keyboards have a higher chance of surviving a full dunk compared to budget membrane boards.
If you invest in a water resistant keyboard or waterproof keyboard, you get added peace of mind. These boards are specifically engineered to handle liquid exposure, making them ideal for messy work environments, kitchens, and outdoor use.
Comparison Table
| Keyboard Type | Water Resistance | Survival Rate After Dunk | Recovery Difficulty |
|---|---|---|---|
| Mechanical | Low | Moderate | High |
| Membrane | Low to Moderate | Moderate | Medium |
| Waterproof (IP67+) | High | Very High | Low |
| Split Ergonomic | Moderate | Moderate to High | Medium |
| Laptop Built-In | Very Low | Low | Very High |
Common Mistakes People Make After A Keyboard Gets Wet
Turning It On Too Soon
The single biggest mistake is powering on a wet keyboard before it is completely dry. Even if the surface looks dry, moisture can still be trapped inside the switches and under the circuit board. Plugging in a damp keyboard can cause a short circuit that permanently destroys the device.
Wait at least 24 hours, and preferably 48 hours, before reconnecting. Patience is your greatest ally in keyboard rescue operations.
Using A Hair Dryer Or Heat Gun
Many people reach for a hair dryer to speed up the drying process. While the intention is good, the results are often bad. High heat can melt plastic components, warp the PCB, and damage sensitive electronics. If you need forced air, use a fan or a hair dryer on its coolest setting from a distance of at least 12 inches.
Ignoring Sticky Residue
If the liquid that entered the keyboard was a drink — coffee, soda, juice, or milk — the sugar and acids left behind can cause corrosion over time. Simply drying the keyboard is not enough. You need to clean the residue with isopropyl alcohol and a soft cloth to prevent long-term damage.
Skipping The Disassembly
Trying to dry a keyboard with keycaps still attached is like trying to dry a soaked sponge while it is still in its wrapper. Removing keycaps and, if possible, opening the case allows air to reach all the wet surfaces. Skipping this step dramatically increases drying time and the risk of hidden moisture causing corrosion later.
Using The Wrong Cleaning Products
Avoid using harsh chemicals, household cleaners, or excessive water to clean a wet keyboard. These products can leave conductive residues or damage plastic components. Stick to isopropyl alcohol (90% or higher) and distilled water for cleaning. They are safe for electronics and evaporate cleanly without leaving behind any residue.
How To Prevent Water Damage To Your Keyboard
Use A Keyboard Cover
A simple keyboard cleaning accessory like a waterproof cover can protect your board from spills and splashes. These covers are especially useful in office environments, kitchens, and workshops where liquids are frequently present.
Look for covers made from food-grade silicone that are easy to clean and do not interfere with key presses. A good cover adds minimal bulk while providing significant protection against liquid accidents.
Keep Drinks Away From Your Desk
This sounds obvious, but it is the most overlooked tip. Keeping beverages at a safe distance from your keyboard dramatically reduces the risk of liquid damage to keyboard components. Use a spill-proof mug or water bottle for extra protection.
Consider A Waterproof Keyboard
If you work in an environment where spills are inevitable, investing in a waterproof keyboard is a smart move. These boards are designed with sealed enclosures, drainage channels, and protective coatings that can handle full submersion. They cost a bit more, but they save you from the hassle of emergency drying sessions.
Regular Maintenance
Keeping your keyboard clean reduces the risk of hidden moisture buildup. Regularly shake out crumbs, wipe down surfaces, and deep clean your board every few months. A well-maintained keyboard is more resilient to accidental water exposure because its internal components are in better condition.
Expert Insights On Keyboard Water Recovery
What Repair Technicians Recommend
Professional keyboard repair technicians agree on one thing: time is everything. The faster you disconnect a keyboard from power after it gets wet, the better the outcome. Technicians also recommend using isopropyl alcohol to displace water from internal components. Alcohol evaporates quickly and leaves no conductive residue behind.
Many technicians also suggest taking photos of your keyboard before disassembly. This makes reassembly much easier and helps you remember where each screw and cable goes. It is a small tip that saves a lot of frustration.
When To Replace Instead Of Repair
Not every water-damaged keyboard can be saved. If the circuit board shows visible corrosion, multiple keys remain dead after 48 hours of drying, or the USB controller is visibly burned, replacement is the safest choice. Trying to force a damaged keyboard back to life can sometimes cause further harm to your computer’s USB port or motherboard.
On the other hand, if the keyboard is relatively new and the damage was limited to a quick dunk in clean water, recovery is very likely. Trust your judgment and weigh the cost of repair against the cost of replacement.
Key Takeaways
- Speed matters: Disconnect the keyboard immediately after water exposure.
- Dry thoroughly: Wait at least 24 to 48 hours before reconnecting.
- Clean residue: Use isopropyl alcohol to remove sugary or sticky deposits.
- Disassemble when possible: Remove keycaps and open the case for better airflow.
- Avoid heat: Never use a hair dryer or oven to speed up drying.
- Know when to replace: Some damage is irreversible, and that is okay.
Conclusion
So, can you dunk a keyboard in water without ruining it? The answer is a qualified yes. With quick action, proper drying techniques, and a little patience, many keyboards survive complete submersion. The key is to never panic and never rush the process.
Remember to disconnect power immediately, remove keycaps, drain excess water, and let the keyboard dry fully for at least 24 hours. Avoid common mistakes like using heat, turning it on too soon, or ignoring sticky residue. These simple steps can mean the difference between a recovered keyboard and a permanent loss.
Prevention is always better than cure. Consider using a waterproof keyboard cover, keeping drinks away from your desk, or investing in a water resistant keyboard for long-term peace of mind. Whether you have a mechanical board, a membrane keyboard, or a premium waterproof model, understanding how to handle water exposure keeps your typing experience alive and thriving.
The next time you or someone nearby accidentally dunk a keyboard in water, you will know exactly what to do. Stay calm, follow the steps, and give your keyboard the best chance at a full recovery. Your typing fingers will thank you.
Frequently Asked Questions
Can a keyboard survive being fully submerged in water?
Yes, many keyboards can survive full submersion if you disconnect power immediately and dry them thoroughly. The survival rate depends on the keyboard type, the liquid involved, and how quickly you act. Mechanical and membrane keyboards both have documented cases of successful recovery after full dunking.
How long should I wait before using a keyboard after it gets wet?
Wait at least 24 to 48 hours before reconnecting a wet keyboard. Even if the surface feels dry, moisture can still be trapped inside switches and on the circuit board. Rushing this step is the most common reason keyboards fail after water exposure.
Is it safe to use rice to dry a wet keyboard?
The rice method is safe but not the most effective option. Rice absorbs some moisture but works slowly and can leave starch dust inside the keyboard. Silica gel packets or air drying with a fan are better alternatives. If you use rice, make sure the keyboard is completely cool and dry before removing it.
What should I do if I spill coffee on my keyboard?
Coffee spills are especially damaging because sugar and acids cause corrosion. First, disconnect the keyboard immediately. Remove keycaps and rinse the internal parts with 99% isopropyl alcohol to dissolve sticky residues. Dry thoroughly for 48 hours before testing. The sooner you clean coffee spills, the better the chances of full recovery.
Can water damage permanently destroy a keyboard?
Yes, prolonged water exposure can cause permanent damage through corrosion of circuit traces and solder joints. Keyboards left wet for days or weeks are at high risk of irreversible failure. However, quick response and proper drying techniques can prevent most permanent damage from short-term water exposure.
Are wireless keyboards more vulnerable to water damage than wired ones?
Wireless keyboards have an additional vulnerability because they contain lithium batteries. Water can damage battery cells, leading to swelling or leakage. Always remove batteries from wireless keyboards before attempting any drying process. Wired keyboards do not have this battery-related risk, making them slightly safer to rescue after water exposure.