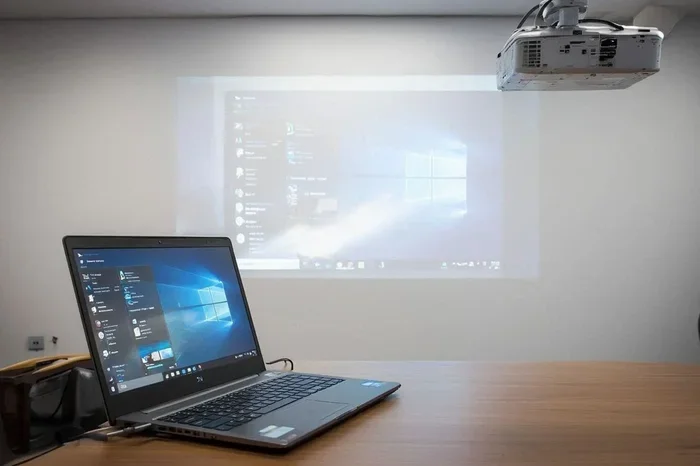
Can You Plug A Computer Into A Projector For Big Screen
Yes, you can absolutely plug a computer into a projector for big screen viewing. Whether you want a home theater setup or a presentation display, connecting your PC to a projector is simple and affordable. This guide covers every cable type, setup step, and troubleshooting tip you need.
Have you ever wanted to watch a movie, play a game, or give a presentation on a huge screen? Plugging your computer into a projector makes this possible. It opens up a whole new world of big screen viewing right in your living room or office. Whether you are a movie lover, a gamer, or someone who gives regular presentations, knowing how to connect your PC to a projector is a handy skill.
The good news is that it is easier than most people think. You do not need expensive equipment or technical expertise. With the right cable and a few simple steps, you can go from a small laptop screen to a wall-sized display in minutes. This guide walks you through everything you need to know about plugging a computer into a projector for big screen fun.
## Why Plug Your Computer Into a Projector?
There are many reasons to connect your computer to a projector. Some people want a cinematic experience at home. Others need a large display for work or school presentations. No matter your reason, the benefits are clear.
First, a projector gives you a much bigger screen than any monitor or laptop. You can watch movies, shows, and sports on a wall that is 100 inches or more. That is a viewing experience you simply cannot get from a small screen. Second, projectors are portable. You can set one up almost anywhere with a blank wall or a portable screen.
Third, plugging in your computer gives you full control. You can use your keyboard and mouse to navigate. You can switch between apps, browse the web, or play games. This flexibility makes a computer-projector combo incredibly versatile.
### Home Theater vs Presentation Setup
Your setup will look different depending on what you want to do. A home theater setup focuses on picture quality and sound. You want dark rooms, quality cables, and maybe a surround sound system. A presentation setup focuses on clarity and ease of use. You want bright images, simple connections, and reliable performance.
Both setups use the same basic connection method. The difference is in the cables you choose and the settings you adjust. We will cover both in detail below.
## Types of Cables You Can Use
Not all cables are the same. Your computer and projector will determine which cable works best. Here are the most common options.
### HDMI Cables
HDMI is the most popular and easiest option. Most modern computers and projectors come with HDMI ports. You just plug one end into your computer and the other into the projector. That is it. HDMI carries both video and audio through one cable. This makes it the go-to choice for most people.
If your laptop has an HDMI output, you are in luck. Simply connect it to any projector with an HDMI input. You will get high-quality video and sound in seconds.
### VGA Cables
VGA is an older connection type. It only carries video, not audio. You will need a separate cable or speaker setup for sound. However, many older projectors still use VGA. If you have an older computer or projector, this may be your option.
A VGA connection gives decent picture quality. It is not as sharp as HDMI, but it works well for presentations and basic viewing. If you need to convert VGA to a newer format, you can use an adapter.
### USB-C and DisplayPort
Some newer computers use USB-C or DisplayPort outputs. These carry high-quality video and audio. Many modern projectors also support these connections. If both your computer and projector have USB-C, you can use a direct USB-C cable.
If your computer has USB-C but your projector only has HDMI, you can use a USB-C to HDMI adapter. This is a simple and affordable solution. You can also find DisplayPort to HDMI adapters if needed.
### Wireless Options
Not all connections require cables. Many projectors now support wireless connectivity. You can mirror your computer screen using Wi-Fi or Bluetooth. Some projectors have built-in apps for streaming. Others work with devices like a fire stick for wireless content.
Wireless options are great for casual viewing. They are convenient and remove cable clutter. However, a wired connection usually gives better picture quality and less lag. For gaming or fast-action videos, a cable is the better choice.
## Step-by-Step Setup Guide
Setting up your computer with a projector is straightforward. Follow these steps for a smooth connection every time.
### Step 1: Check Your Ports
Look at the back of your computer and your projector. What ports do they have? Most computers have HDMI. Some have USB-C or VGA. Most projectors have at least one HDMI port.
Match the ports on both devices. If they both have HDMI, grab an HDMI cable. If they do not match, you will need an adapter. For example, if your computer has USB-C and your projector has HDMI, get a USB-C to HDMI adapter.
### Step 2: Connect the Cable
Plug one end of your cable into your computer. Plug the other end into the projector. Make sure both connections are secure. A loose cable will cause flickering or no signal at all.
If you are using an adapter, connect the adapter first. Then plug the cable into the adapter and the projector. Double-check every connection before moving to the next step.
### Step 3: Turn On the Projector
Power on your projector. Wait for it to warm up. Most projectors take a few seconds to display an image. You should see your computer screen appear on the projected surface.
If you see nothing, check your cable connections. Make sure the projector is set to the correct input source. Most projectors have a button or remote control to switch inputs. Select the HDMI or VGA port you plugged into.
### Step 4: Adjust Display Settings
Your computer may not automatically display on the projector. You might need to adjust your settings. On Windows, press the Windows key plus P. This opens the projection menu. Choose “Duplicate” to show the same image on both screens. Choose “Extend” to use the projector as a second screen.
On a Mac, go to System Settings and look for Displays. You can choose how your screen appears on the projector. Adjust the resolution for the best picture quality.
### Step 5: Set Up Audio
By default, your computer audio should play through the projector if you are using HDMI. If you do not hear sound, check your audio settings. On Windows, right-click the speaker icon in your taskbar. Select your projector as the audio output device.
If your projector has built-in speakers, they should work automatically. If the sound is not loud enough, you can connect external speakers. Some people prefer to keep audio on the computer and use Bluetooth speakers nearby.
## Best Practices for Big Screen Viewing
Once your computer is connected to the projector, you want the best possible experience. Here are some tips to get the most out of your setup.
### Choose the Right Projector Placement
Where you place your projector matters a lot. You want it positioned directly in front of your screen or wall. If the projector is tilted too much, the image will look distorted. Most projectors have keystone correction to fix this. But it is best to keep the projector level for the sharpest image.
Consider the distance between the projector and the wall. Check your projector manual for the recommended throw distance. This determines how large your image will be. A longer distance gives a bigger screen. A shorter distance works for smaller rooms.
### Match Your Resolution
Your projector has a native resolution. This is the number of pixels it displays. Common resolutions are 720p, 1080p, and 4K. Set your computer output to match the projector resolution. This gives you the clearest and sharpest picture.
If your computer outputs a higher resolution than the projector supports, the image may look blurry. Go into your display settings and lower the resolution to match. This simple step makes a big difference in picture quality.
### Control Room Lighting
Projectors work best in dim or dark rooms. Bright light washes out the image and reduces contrast. Close your curtains or blinds before watching. Turn off unnecessary lights. If you must have some light, use soft ambient lighting.
The brighter your projector, the better it handles light. Projector brightness is measured in lumens. For a dark room, 1,500 to 2,000 lumens is plenty. For a room with some light, look for 3,000 lumens or more.
### Use Quality Cables
Cheap cables can cause signal problems. They may produce a flickering image or no image at all. Invest in good quality HDMI or VGA cables. Look for cables that are well-shielded and have gold-plated connectors. These reduce interference and give a cleaner signal.
You do not need to buy the most expensive cables. But avoid the cheapest options. A mid-range cable from a reputable brand will serve you well.
## Common Problems and How to Fix Them
Even with a simple setup, you may run into issues. Here are the most common problems and their solutions.
### No Signal on the Projector
If your projector shows no signal, first check the cable connections. Unplug and replug both ends. Make sure the projector is on the correct input source. On your computer, press Windows P or check your display settings. Make sure the projector is detected.
Sometimes restarting both devices fixes the problem. Turn off the projector and your computer. Wait a few seconds. Turn them back on in order: projector first, then computer.
### Fuzzy or Blurry Image
A blurry image usually means the resolution does not match. Go to your display settings and adjust the resolution. Match it to the projector native resolution. Also check that the projector lens is clean. Dust on the lens can make images look fuzzy.
If you are using a VGA cable, the image may never be as sharp as HDMI. Consider upgrading to HDMI for better clarity.
### No Sound
If you have video but no sound, check your audio output settings. On Windows, click the speaker icon and select the projector as the output device. If you are using a VGA cable, you will need a separate audio cable. VGA does not carry sound.
Make sure your computer volume is not muted. Also check the projector volume settings. Some projectors have volume controls on the remote or side panel.
### Lag or Delay
If there is a delay between your computer and the projected image, this is called input lag. Wireless connections are more prone to lag than wired ones. If you are gaming or watching fast-action content, use a wired HDMI connection.
Lowering your computer resolution can also reduce lag. Close any unnecessary programs that might be using your graphics card. This frees up resources for smoother projection.
## Projector vs TV for Big Screen Viewing
Many people wonder whether a projector or a TV is better for big screen viewing. Both have pros and cons. Here is a quick comparison.
Feature | Projector | TV
—|—|—
Screen Size | 80 to 150+ inches | 55 to 85 inches
Portability | Very portable | Bulky and heavy
Setup | Needs blank wall or screen | Plug and play
Brightness | Works best in dark rooms | Works in any lighting
Cost | More affordable for big sizes | More expensive for large sizes
Lifespan | Bulb needs replacement | Lasts 50,000+ hours
A projector gives you a much bigger screen for less money. A TV is brighter and works in any room. If you want a true cinema experience, a projector wins. If you need a bright, all-purpose display, a TV might be better.
Many people also use a projector alongside a TV. You can have a projector for movie nights and a TV for everyday viewing. Both have their place in a well-rounded entertainment setup.
## Expert Tips for the Best Experience
Here are some expert tips to elevate your projector setup.
First, calibrate your projector colors. Most projectors come with default settings that look washed out. Go into the projector menu and adjust brightness, contrast, and color temperature. This makes a huge difference in image quality.
Second, use a dedicated screen if possible. A white wall works, but a projector screen gives better results. Screens have a special coating that reflects light evenly. This gives you a brighter, more uniform image.
Third, keep your projector ventilated. Projectors generate heat during use. Make sure the vents are not blocked. Give the projector space to breathe. This prevents overheating and extends the lifespan of the device.
Fourth, clean your projector filter regularly. Dust buildup can cause overheating and dim images. Check your manual for cleaning instructions. Most filters can be removed and gently washed.
## Wrapping Up
Plugging your computer into a projector for big screen viewing is one of the best upgrades you can make. Whether you are building a home theater or setting up a presentation, the process is simple and rewarding. You just need the right cable, a few minutes, and a blank wall.
Start with an HDMI connection if both your devices support it. It is the easiest and most reliable option. If you have older devices, use a VGA cable or an adapter. Adjust your settings for the best picture and sound. Follow the tips above and you will enjoy a fantastic big screen experience every time.
If you are exploring other ways to use your projector, check out our guide on whether you can use a projector as a TV for more ideas. You can also learn how to connect a phone to a projector with HDMI for even more versatility. With the right setup, your computer and projector can transform any room into an entertainment powerhouse.
Now that you know how to plug a computer into a projector, it is time to try it yourself. Grab the right cable, follow the steps, and enjoy the show. Your big screen experience is just a connection away.
Key Takeaways
- Easy Connection: You can plug a computer into a projector using HDMI, VGA, or USB-C cables depending on your devices.
- Multiple Options: Wireless streaming and wired adapters give you flexibility for any setup.
- Quick Setup: Most connections take under five minutes with the right cable.
- Audio Matters: You can route sound through the projector or keep it on your computer speakers.
- Resolution Matters: Match your projector resolution to your computer output for the clearest picture.
Frequently Asked Questions
Can I plug any computer into any projector?
Most computers and projectors can be connected as long as they share a common port type. HDMI is the most universal option on modern devices. If your ports do not match, you can use an adapter to bridge the gap between different connection types.
Do I need special software to connect my computer to a projector?
No special software is needed for a basic wired connection. Your operating system recognizes the projector as an external display automatically. You just need to adjust your display settings to duplicate or extend your screen.
Can I use a wireless connection instead of a cable?
Yes, many modern projectors support wireless screen mirroring. You can stream your computer screen over Wi-Fi. However, a wired connection usually provides better image quality and less lag. Wireless is great for casual viewing and presentations.
What is the best cable for connecting a computer to a projector?
HDMI is the best cable for most setups. It carries high-quality video and audio through a single cable. If your devices only have older ports, a VGA cable works for video, and you will need a separate audio cable for sound.
Can I use a projector outdoors with my computer?
Yes, you can connect your computer to a projector outdoors. You will need a power source for both devices. Choose a projector with high brightness for daytime use. A portable projector screen works well for outdoor movie nights or presentations.
How do I get sound from my computer through the projector?
If you use an HDMI cable, audio travels through the same cable automatically. For VGA connections, you need a separate 3.5mm audio cable from your computer to the projector. You can also use Bluetooth speakers or external speakers connected to your computer instead.