Can You Connect NES To HDMI Here Is Everything You Need
Yes, you can connect your NES to HDMI using a composite-to-HDMI converter or an AV adapter. This simple upgrade transforms your retro gaming experience, delivering sharper visuals and clearer sound on modern TVs. Whether you own the original NES or the NES Classic Edition, the right adapter makes all the difference.
Key Takeaways
- You can connect NES to HDMI: Using a composite-to-HDMI converter or AV adapter is the most reliable method.
- Multiple options exist: From budget adapters to premium upscaling boxes, there is a solution for every retro gamer.
- Modern TVs need the right input: Most new TVs lack RCA composite ports, making an HDMI bridge essential.
- Quality varies by adapter: Cheap converters may introduce lag or poor image quality, so choose wisely.
- The NES Classic Edition simplifies things: It outputs HDMI natively, but original NES units need extra hardware.
- Setup is straightforward: You can have your NES running on HDMI in under 10 minutes with the right gear.
📑 Table of Contents
- Can You Connect NES To HDMI
- Why Connect Your NES To HDMI
- Methods To Connect NES To HDMI
- What You Need To Connect NES To HDMI
- Step-by-Step Setup Guide
- Best Adapters and Converters for NES to HDMI
- Common Mistakes To Avoid
- Expert Tips for the Best NES HDMI Experience
- Can You Connect NES To HDMI: Final Thoughts
Can You Connect NES To HDMI
If you love retro gaming, you have probably wondered whether you can connect your old NES to a modern TV. The short answer is yes. But the full story is a bit more interesting. Your classic Nintendo Entertainment System was built in the 1980s. It uses old-school RCA cables with yellow, white, and red plugs. Modern televisions do not have those ports anymore. They use HDMI instead. So how do you bridge that gap?
The good news is that connecting NES to HDMI is easier than most people think. You just need the right adapter or converter. This guide walks you through every option available. We will cover different methods, recommend the best products, and help you avoid common mistakes. Whether you are setting up a retro gaming setup in your living room or adding your vintage console to a collection, this article has you covered.
Many people assume that plugging an old console into a new TV is impossible. That is not true at all. With a few simple tools, your NES can look and sound better than ever before. Let us dive into the details and show you exactly how to make it happen.
Why Connect Your NES To HDMI
You might be happy with your old CRT television. But there are real benefits to switching your NES to HDMI. Let us look at why so many retro gamers are making the switch.
Better Visual Quality
When you use the original NES cables on a modern TV, the picture looks terrible. The image is blurry and stretched. Colors wash out. Text becomes hard to read. An HDMI converter fixes all of these problems. It takes the old composite signal and converts it into a clean digital format. The result is a sharper, clearer picture that looks great on any screen.
Improved Sound Quality
The NES original sound chip produces decent audio for its era. But through RCA cables, the sound can feel flat and weak. HDMI delivers rich, clear audio through a single cable. You get better bass, clearer voices, and more defined sound effects. Your favorite 8-bit music sounds better than ever.
Modern TV Compatibility
Almost every new TV made today only has HDMI inputs. Very few models still include RCA composite ports. This means you cannot plug your NES directly into most modern displays. An HDMI adapter or converter solves this problem completely. It gives your old console a modern connection that any TV can handle.
Easy Setup and Use
Most HDMI converters for the NES are plug-and-play. You do not need technical skills. You do not need to open your console. You just connect the cables and go. It is one of the simplest retro gaming accessories you can buy. If you are also looking for other ways to simplify your tech life, check out 10 gadgets to make moms life easier for more ideas on streamlining your home setup.
Methods To Connect NES To HDMI
There are several ways to get your NES on an HDMI display. Each method has its pros and cons. Let us break them down so you can choose the best option for your situation.
Method 1: Composite to HDMI Converter
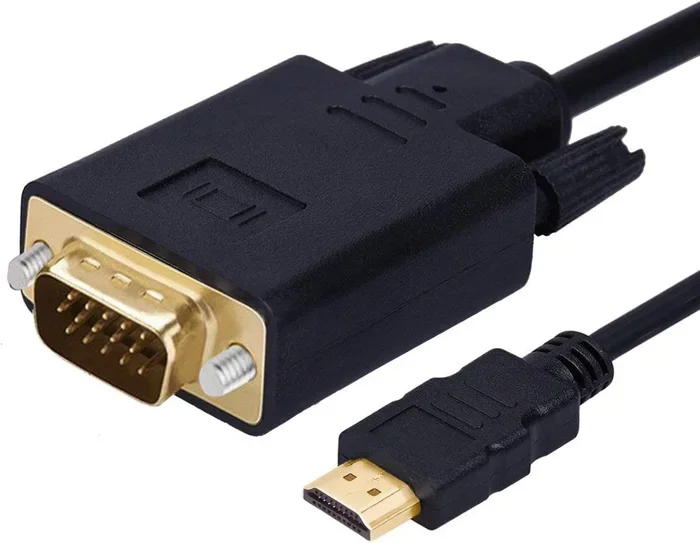
This is the most popular method. A composite-to-HDMI converter takes the old RCA cables from your NES and converts the signal to HDMI. You plug the yellow, white, and red cables into the converter box. Then you connect an HDMI cable from the converter to your TV. It is simple and effective.
Most converters also upscale the image. This means they improve the resolution of the original NES output. Some even add scanline filters that make the picture look more authentic, just like it did on a CRT screen. These filters are a big hit with collectors who want that retro feel.
Method 2: AV to HDMI Adapter
An AV to HDMI adapter works similarly to a converter but is usually smaller and more affordable. These adapters are compact boxes that sit right behind your TV. They accept composite input and output a clean HDMI signal. They are great for people who want a minimal setup without extra cables cluttering their space.
Some AV adapters also support other older consoles. You can use them with your SNES, Sega Genesis, or even a Game Boy Player. This makes them a versatile addition to any retro gaming area. They are a small investment that pays off across multiple systems.
Method 3: Use the NES Classic Edition Instead
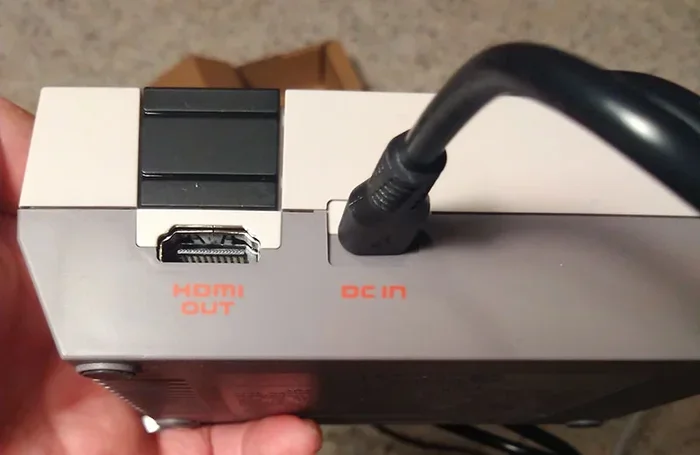
If you do not want to mess with cables and adapters, consider the NES Classic Edition. This miniature version of the original console was released by Nintendo in 2016. It outputs HDMI natively. You just plug it straight into your TV and play. No converter needed.
The NES Classic Edition comes pre-loaded with 30 classic games. It includes a replica controller that feels just like the original. However, it is a limited device. You cannot play your own cartridges on it. And Nintendo discontinued it, so finding one can be tricky and expensive. But if you just want a simple plug-and-play experience, it is the easiest path.
Method 4: Capture Card with HDMI Output
This method is a bit more advanced. You connect your NES to a capture card using the original composite cables. The capture card then outputs the signal through HDMI to your TV. This approach is popular among streamers and content creators who want to record or live-stream their retro gaming sessions.
Capture cards usually offer the best image processing. They can reduce input lag and improve color accuracy. However, they are more expensive than simple adapters. If you are not planning to stream or record, a basic converter will do the job just fine.
What You Need To Connect NES To HDMI
Setting up your NES with HDMI is simple. Here is a list of everything you need to get started.
- Nintendo Entertainment System console: The original NES unit or the NES Classic Edition.
- Composite RCA cables: These come with the original NES. Yellow for video, white and red for audio.
- Composite to HDMI converter: This is the key piece of hardware. You can find these online for under $20.
- HDMI cable: You need a standard HDMI cable to connect the converter to your TV.
- A modern TV or monitor with HDMI input: Any TV made in the last 15 years will work perfectly.
That is it. You do not need any special tools or technical knowledge. If you have ever struggled with phone settings, you will find this setup just as easy. For tips on managing other tech connections, you might also enjoy adding prefixes to numbers on iPhone for helpful mobile connectivity advice.
Step-by-Step Setup Guide
Follow these simple steps to get your NES running on HDMI in minutes.
- Connect the composite cables to your NES. Plug the yellow cable into the video port. Plug the white and red cables into the audio ports.
- Connect the other end of the composite cables to the converter box. Match the colors. Yellow goes to yellow input. White goes to white. Red goes to red.
- Plug an HDMI cable into the converter box. Use the HDMI output port on the converter.
- Connect the other end of the HDMI cable to your TV. Plug it into any available HDMI port on your television.
- Switch your TV to the correct HDMI input. Use your remote to select the HDMI port you plugged into.
- Power on your NES. The screen should light up with a clear, sharp image.
That is all there is to it. You are now playing your favorite NES games in better quality than you have ever seen. The whole process takes less than five minutes once you have all the parts ready.
Best Adapters and Converters for NES to HDMI
Not all converters are created equal. Some are cheap and produce poor results. Others deliver excellent quality at an affordable price. Here are some of the best options on the market.
| Product | Type | Price Range | Best For |
|---|---|---|---|
| RetroTINK 2X | Upscaling Converter | $50-$70 | Best image quality and scanline filters |
| RetroAVS | AV to HDMI Converter | $30-$45 | Budget-friendly and easy setup |
| HDMI AV Converter Adapter | Basic Converter | $10-$15 | Simple plug-and-play connection |
| Capture Card (Elgato HD60) | Capture and Convert | $100-$150 | Streaming and recording retro gameplay |
| NES Classic Edition | Native HDMI Console | $60-$80 | No extra hardware needed |
For most people, a basic composite-to-HDMI converter is all you need. It costs under $15 and gets the job done. If you are a purist who cares about image quality, invest in an upscaling converter like the RetroTINK. It will make your NES games look incredible on a large screen.
Common Mistakes To Avoid
Connecting your NES to HDMI is easy, but there are a few mistakes that can ruin the experience. Here are the most common ones and how to avoid them.
Buying a Cheap, Low-Quality Converter
Not all converters are worth the money. Some ultra-cheap adapters introduce lag, distort colors, or produce a weak signal. Always read reviews before buying. Stick with reputable brands and models that other retro gamers recommend. Spending a little extra upfront saves you from frustration later.
Using the Wrong Cable Connections
It sounds simple, but mixing up the RCA cable colors is a common mistake. Yellow is for video only. White and red are for audio. If you plug them in the wrong ports, you will get no sound or no picture. Always double-check your connections before powering on.
Ignoring Input Lag
Some HDMI converters add input lag. This is a slight delay between pressing a button and seeing the action on screen. For fast-paced NES games, this can be annoying. If you notice lag, try a different converter or adjust your TV settings. Many modern TVs have a “game mode” that reduces input lag significantly.
Forgetting to Enable Game Mode on Your TV
Most modern TVs have processing features that can slow down the image. These features are designed for movies and shows, not retro games. Switching your TV to game mode disables these processors and gives you the fastest, most responsive picture. This is a quick and easy step that many people overlook.
Expert Tips for the Best NES HDMI Experience
Want to get the most out of your retro setup? Here are some expert tips that make a real difference.
- Use a dedicated retro gaming monitor: A CRT monitor gives you the most authentic look. But if you prefer modern displays, a 1080p or 4K TV with game mode works great.
- Keep your cables short: Longer cables can degrade signal quality. Use the shortest cables that reach your setup comfortably.
- Clean your NES cartridge contacts: Dirty contacts cause games to freeze or not load. Use a cleaning kit to keep them in top shape.
- Store your converter in a ventilated space: Converters can get warm during long gaming sessions. Give them room to breathe to prevent overheating.
- Consider a power strip with surge protection: Your NES and converter both need power. A surge protector keeps your gear safe from electrical damage.
If you are building a complete retro gaming area, you might also want to explore other accessories that make the experience better. Retro gaming is about more than just the console. It is about the whole setup. From the right cables to comfortable seating, every detail matters.
Can You Connect NES To HDMI: Final Thoughts
So, can you connect NES to HDMI? Absolutely yes. It is one of the easiest and most rewarding upgrades you can make for your retro gaming collection. Whether you choose a simple composite-to-HDMI converter or invest in a premium upscaling box, the difference on a modern TV is night and day.
Your NES was built to last. The games are timeless. And with the right HDMI setup, they look better than they ever did on the original CRT television. You owe it to yourself to experience these classic titles the way they were meant to be seen.
Grab the right adapter, follow the steps in this guide, and start playing your favorite NES games on a big modern screen today. The setup takes minutes, and the results will last for years. Happy gaming!
Frequently Asked Questions
Can I connect my original NES directly to an HDMI TV?
No, you cannot connect the original NES directly to an HDMI TV. The NES uses composite RCA cables (yellow, white, and red), which modern TVs do not support. You need a composite-to-HDMI converter or adapter to bridge the connection between the old console and your modern display.
Do I need a special converter to play NES on HDMI?
Yes, you need a composite-to-HDMI converter to play your NES on an HDMI TV. These converters are affordable and widely available online. They take the analog signal from your NES and convert it into a digital HDMI signal that your TV can display clearly.
Does connecting NES to HDMI improve picture quality?
Yes, connecting NES to HDMI significantly improves picture quality compared to using RCA cables on a modern TV. The converter processes the analog signal and outputs a clean digital image. Many converters also upscale the resolution, making the picture sharper and more vibrant on larger screens.
Can I use the NES Classic Edition with HDMI?
Yes, the NES Classic Edition connects directly to HDMI with no extra hardware needed. It comes with a built-in HDMI output and includes an HDMI cable in the box. This makes it the simplest way to play classic NES games on a modern television without any adapters or converters.
Is there input lag when using an NES HDMI converter?
Some basic HDMI converters may introduce slight input lag, but most modern converters have minimal delay. To reduce lag further, enable game mode on your TV. Higher-quality upscaling converters like the RetroTINK are designed specifically to minimize input lag for a responsive gaming experience.
What is the best budget option for connecting NES to HDMI?
The best budget option is a basic composite-to-HDMI adapter, which costs between $10 and $15. These simple plug-and-play devices get the job done without breaking the bank. Just make sure to read reviews and choose a model with decent ratings to avoid poor-quality converters that cause image or sound issues.